|
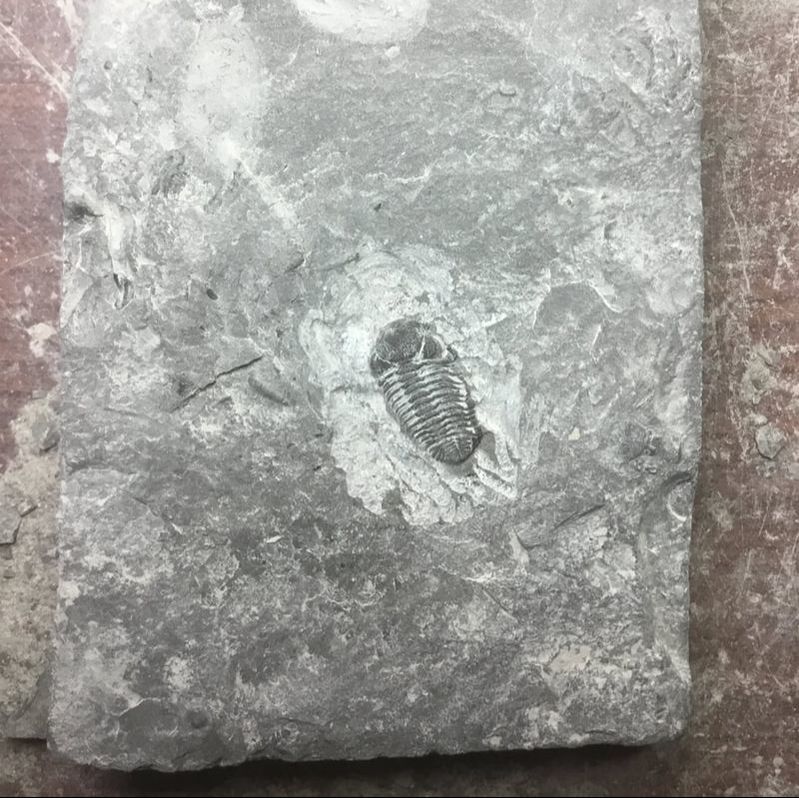
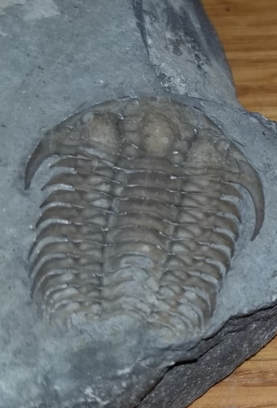
I managed to spend some time this week preparing a few of the finds from Penn Dixie. It looks like I had a few more full trilobites than I had thought, so there was a good deal of material to practice on. Preparing these Eldredgeops rana is a fairly straightforward job. The shell is thick and forgiving, and there are no big spines, flaky lappets, complicated horns, and the like to present much difficulty. I managed to prepare three, which I'll show in ascending order by size. Bug #1 - 1.7 cm
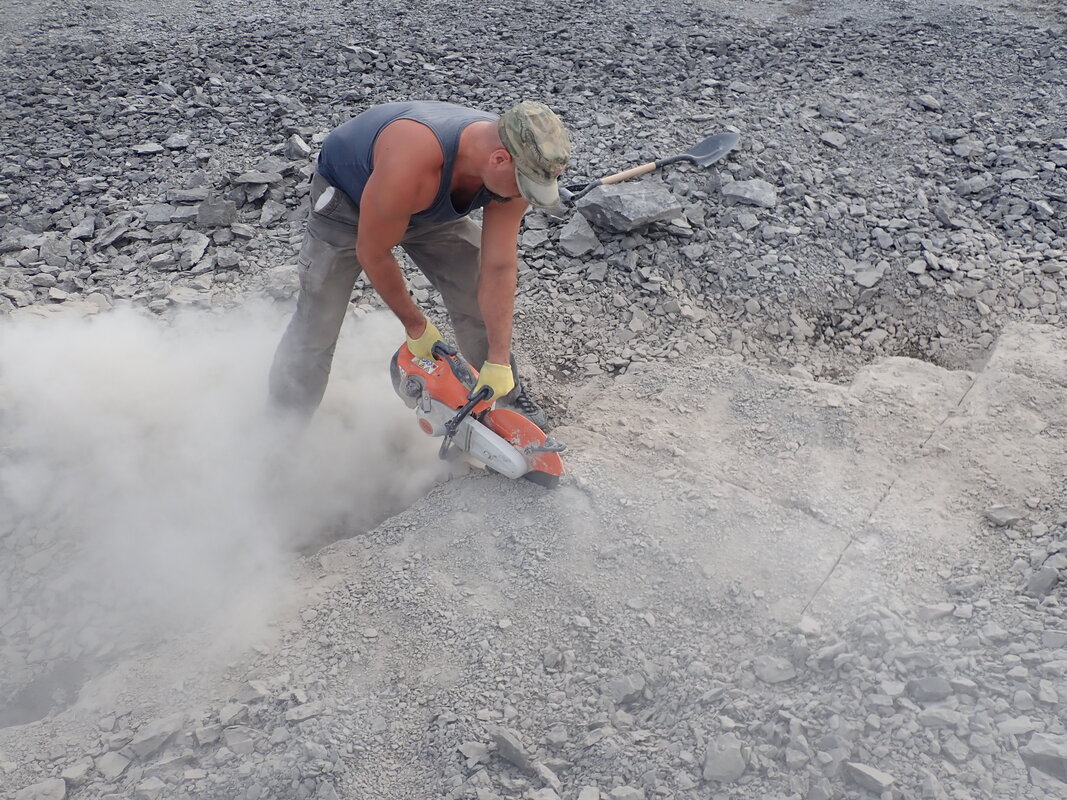
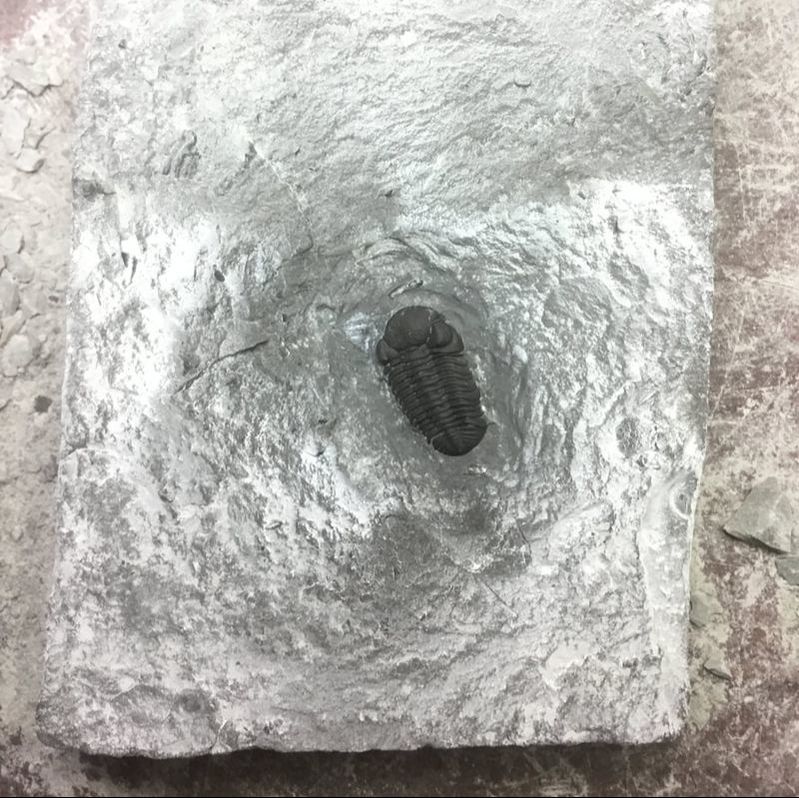
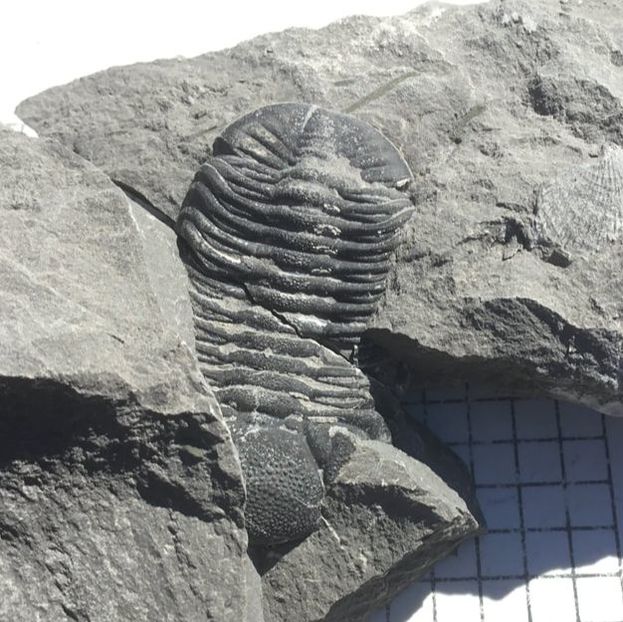
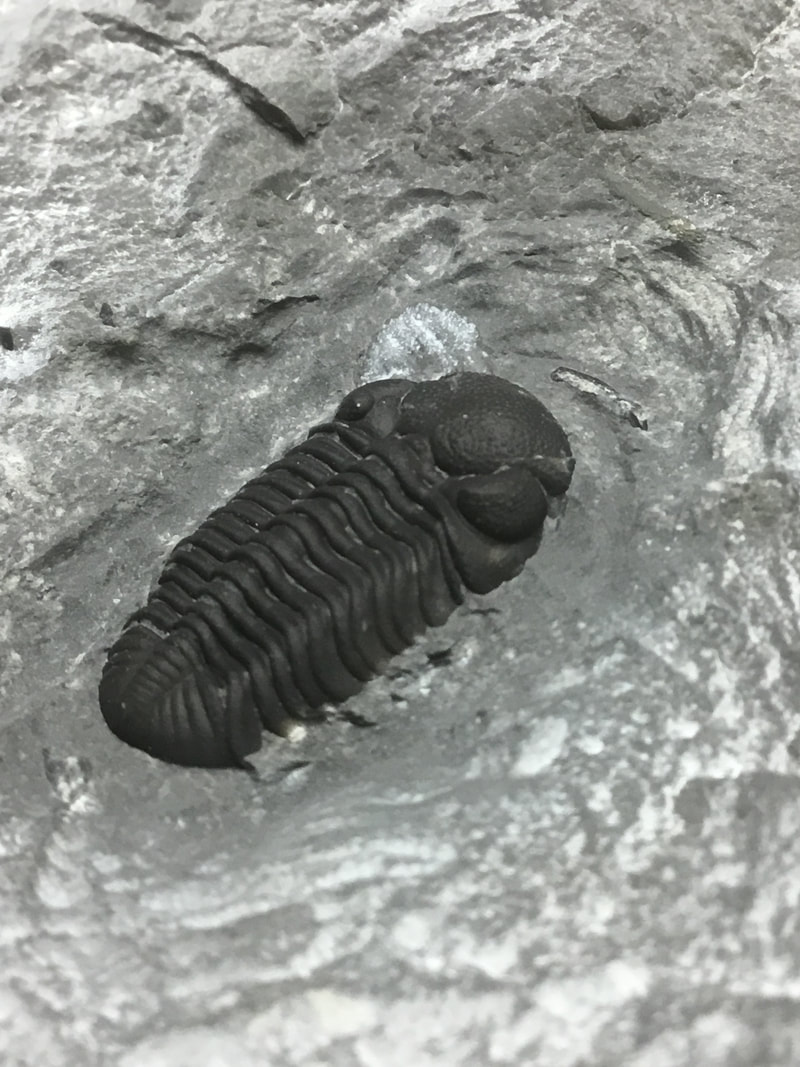 This one was fairly small, but I had recognized it as being complete in the field, and my friend Malcolm was able to chop it out of the block with his saw. There are areas on this where I could have bit in a bit deeper around the sides and the anterior of the glabella, but these smaller ones can be a bit tricky. I may take this one back to the bench for some detail work. Process: a quick trenching with the ARO clone air scribe, some spot work with the pin vise, and three rounds of blasting at 55 PSI using dolomite and the Paasche AECR. No finishing oil applied. Time: 25 minutes Bug #2 - 3.8 cm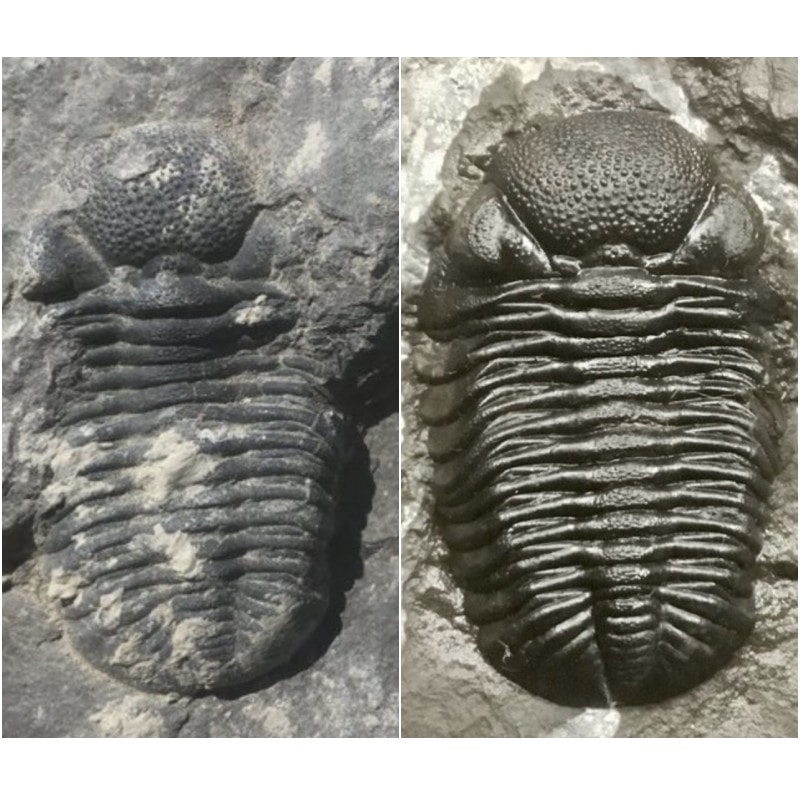 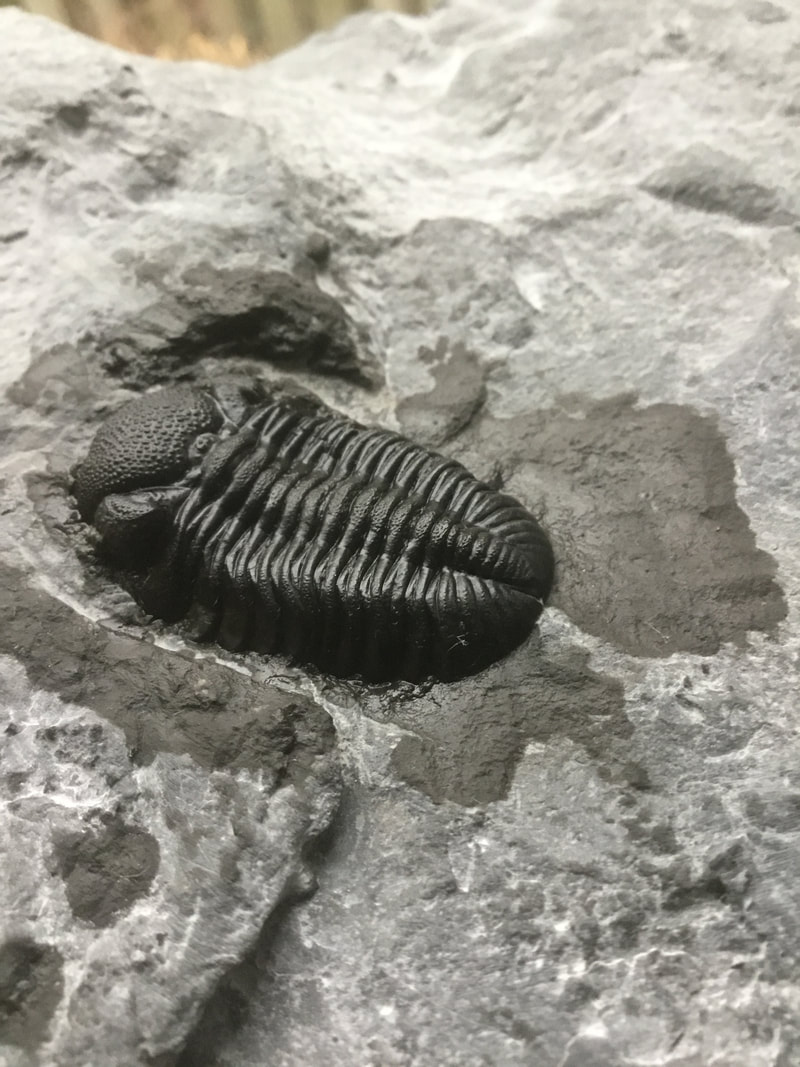 This shows a before and after picture (in the field, and after prep). This was one of Deb's finds, so I took care not to screw this one up! There is some slight damage to the left side pleura near the ridge of the cephalon, and some damage to the right side pleura as well, but in all not a bad prep. Process: Alternating between ARO clone scribe and Dremel, pin vise work, multiple rounds of dolomite blasting (20-60 PSI) using Paasche AECR. Finishing is just a light oil to bring out the detail, but it fades back to matte. Time: 90 minutes Bug #3 - 4.6 cm
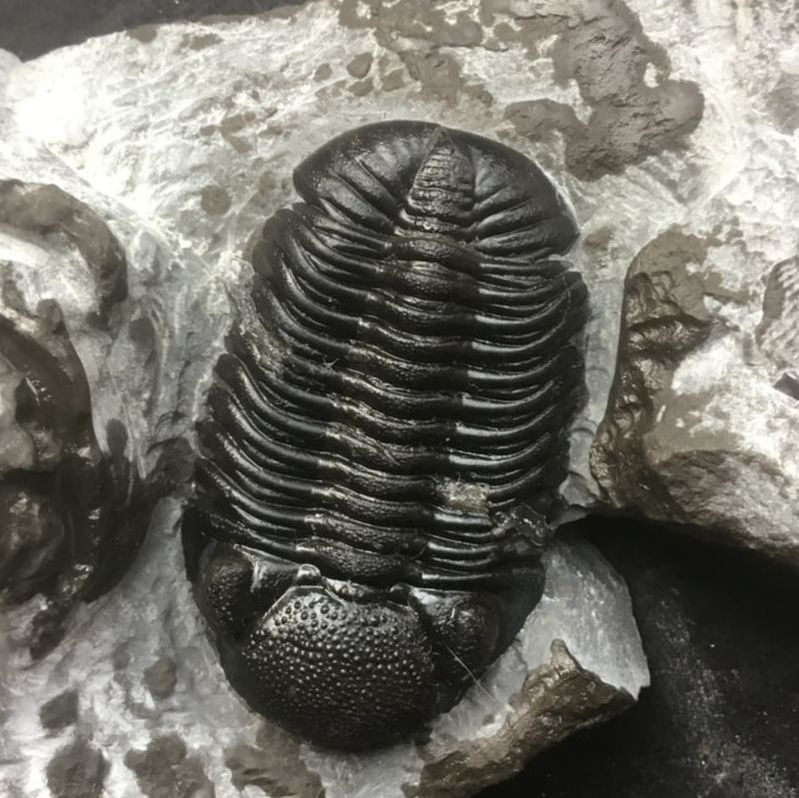
Before and after 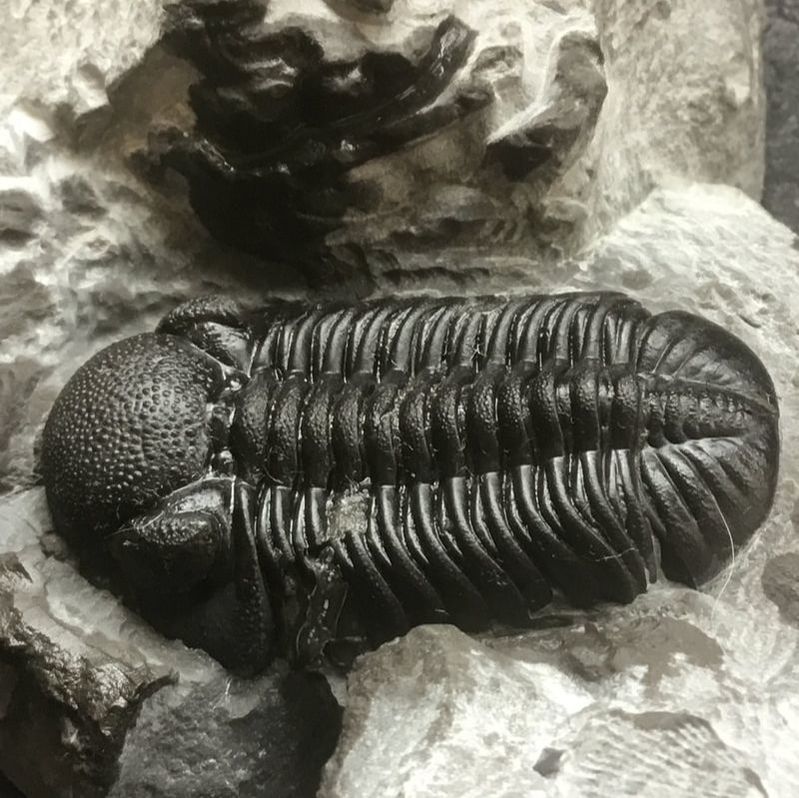 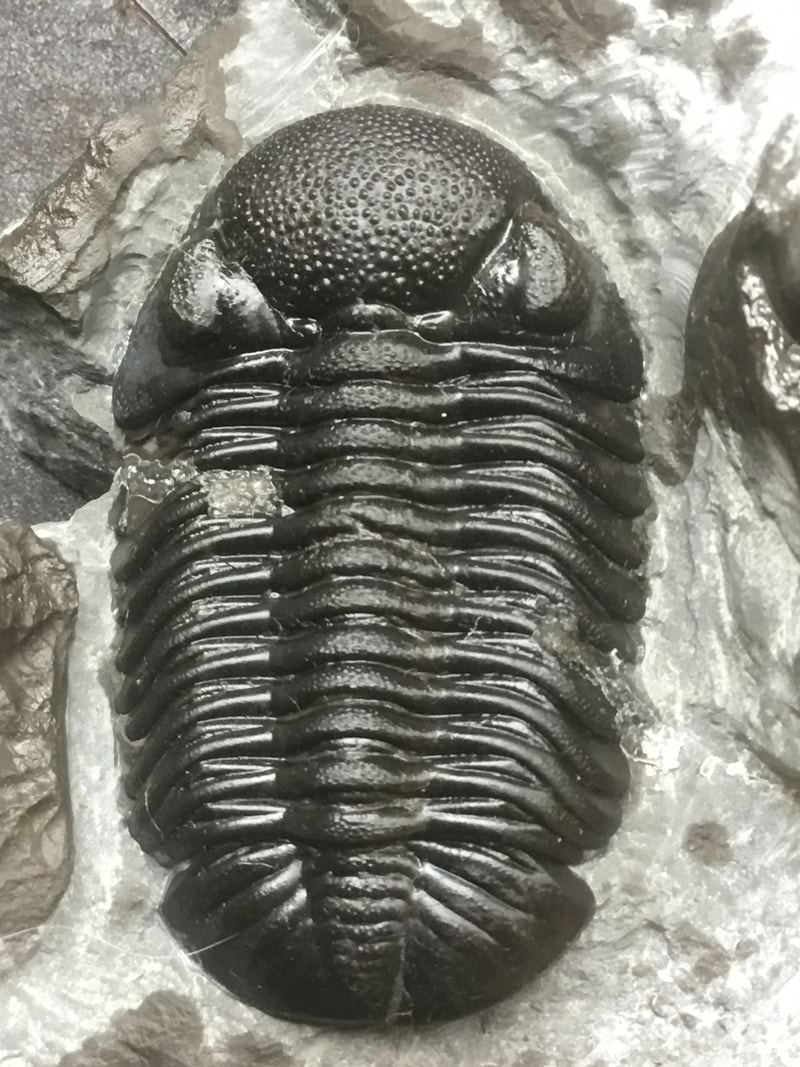 This big bug had some issues. When I found it in the field, it had been cleaved diagonally, so there is some missing pleurae bits on the upper left and lower right where the rock had split. I wrapped it up in a secure container, and when I got home I used cyanoacrylate to stick the pieces together with some clamps, and suitable time for curing. Despite the ugly fracture mark with some stubborn glue, it looks okay. I may take to trimming the excess matrix on either side to better centre this bug. Process: The right side had a lot of bulk matrix which took some time to scribe off. I trenched around to reveal the tips of the pleural segments and cephalon features, sculpted the surrounding matrix a bit to even out the jagged parts, sanded off the scribe marks, and blasted it with dolomite (25-55 PSI) with the Paasche AECR. Time: 75-90 minutes There are a handful of others that will need prep, including both prones and rollers. With time and practice, I am doing much better in terms of technique - but there is still a lot to learn. Fortunately, I'm in no hurry and will hopefully have decades to fine tune my preparation skills. Here are the others in the prep queue: four rollers and two prones: 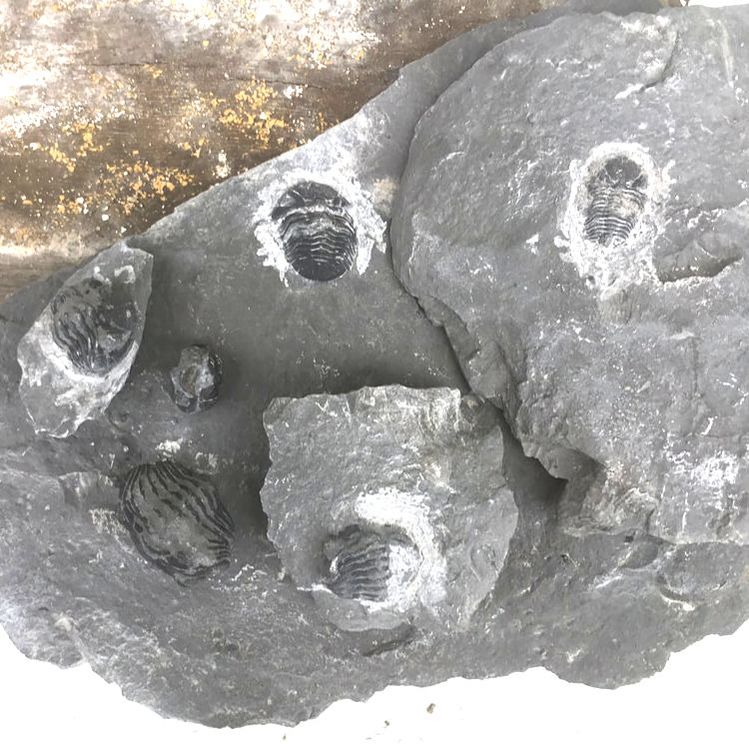 A four hour preparation session reveals a full Asaphus lepidurus. I knew this one had problems going into it, such as discolouration of the shell, some very sticky calcitic film, and possibly some damage. However, it turned out much better than I anticipated. I had thought it was likely missing a good chunk of the left side, but I was delightfully incorrect. It is a bit crushed/flattened out on that side, though, but worthy of being put in the display cabinet.  Time lapse GIF above, and a "before and after" picture side by side:
And finally just two pictures detailing how I got into the nooks and crannies. The entire prep involved a range of tools (air scribe, two Dremels, a lot of pin vise work, and Paasche AECR air eraser using dolomite at pressures 20-40 PSI). Believe it not, most of the work was painstakingly done by hand with the pin vise. As the matrix is far too thin on the left side, and the pleural segements stretched out / flattened which makes them a bit more fragile, I'm leaving that side alone.
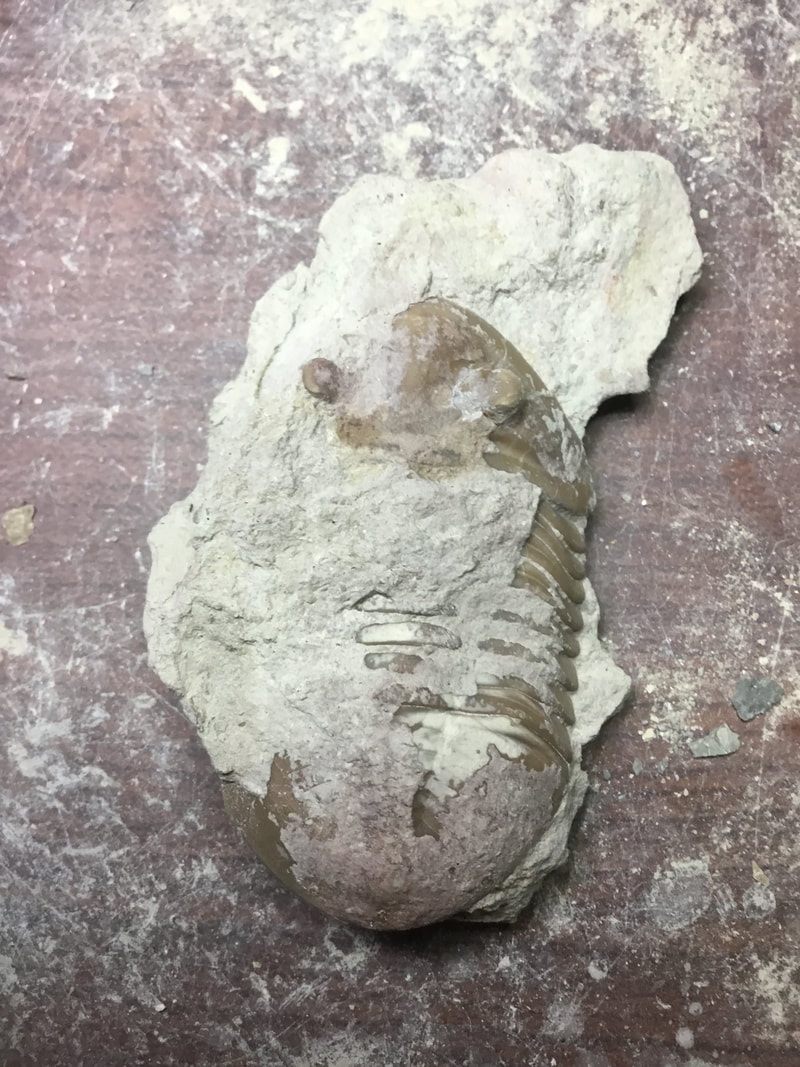
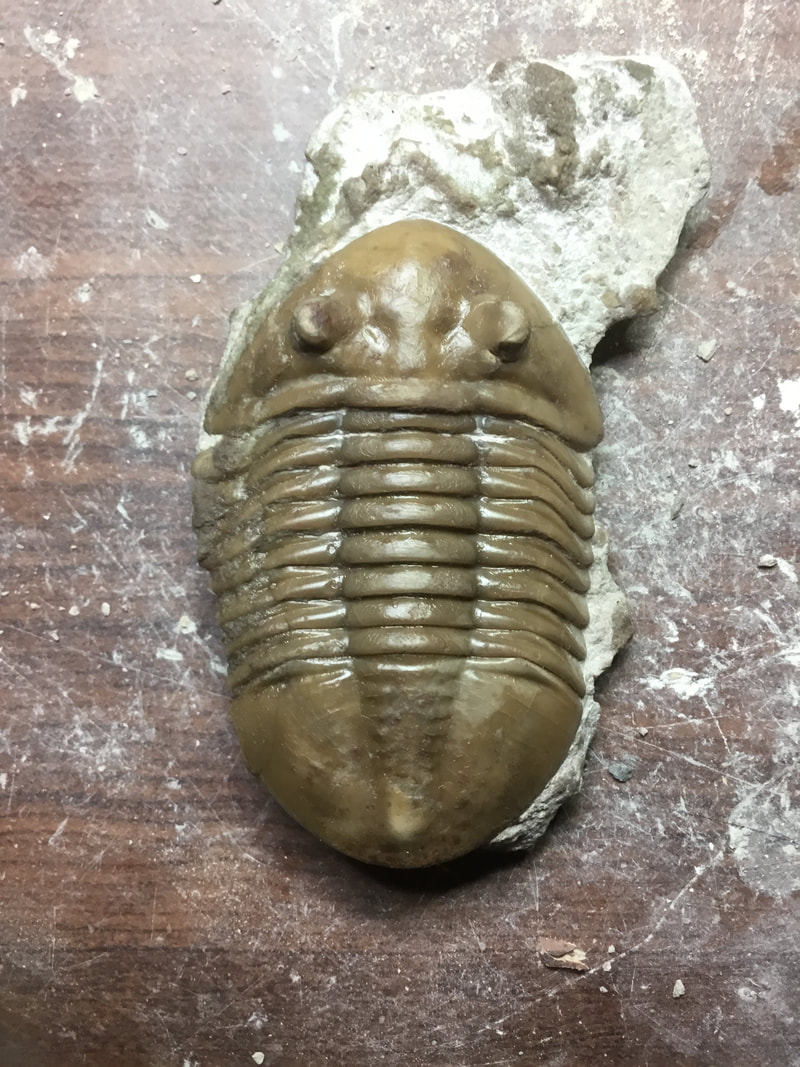
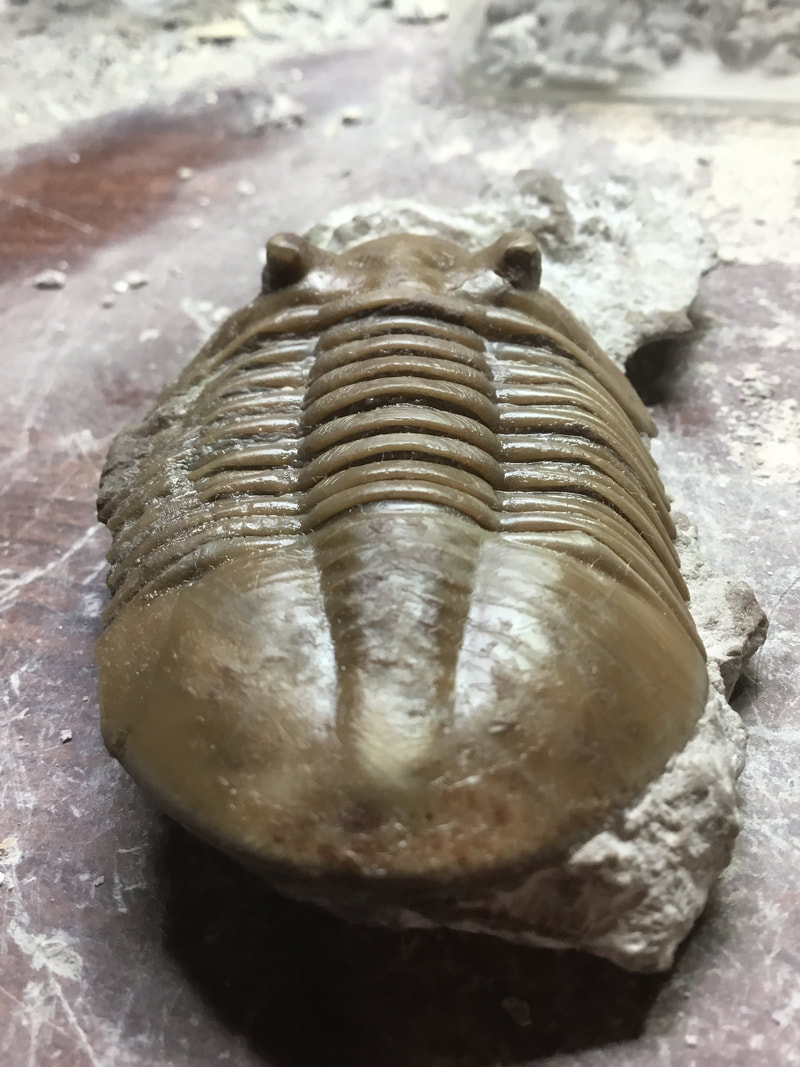
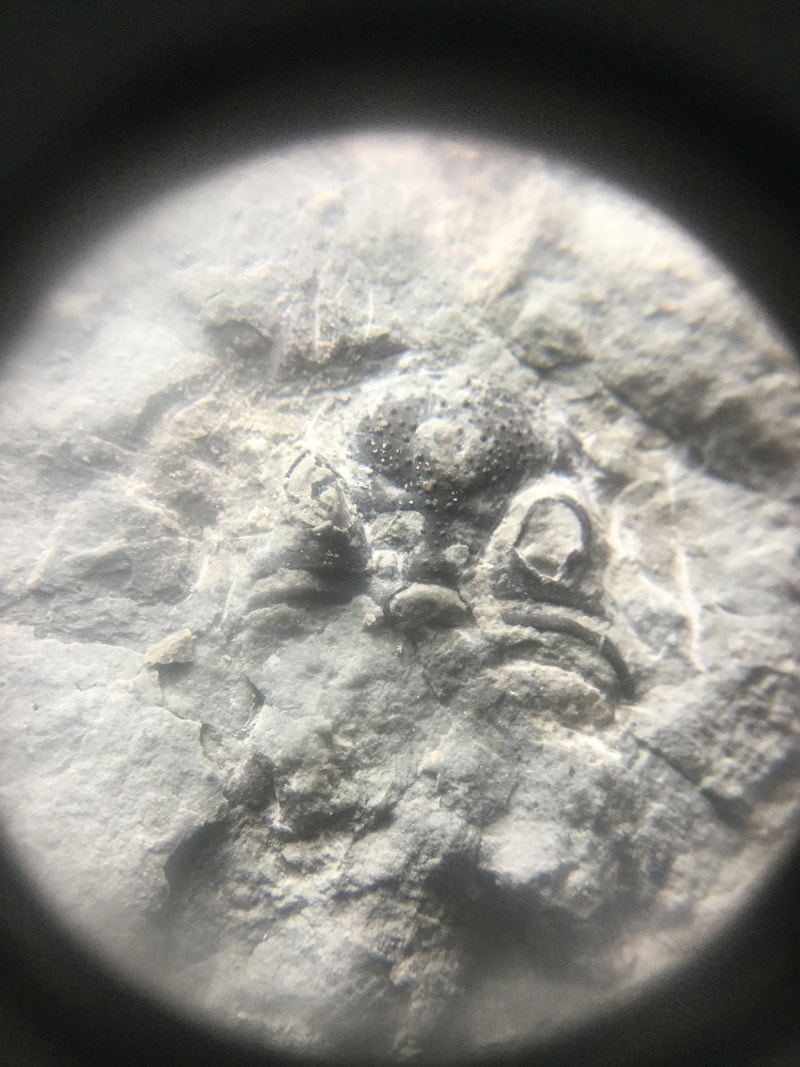
I received a piece of limestone matrix from a quarry near St Petersburg containing an asaphid trilobite. I'm giving it a go. Not complete, but pictures of the progress thus far. 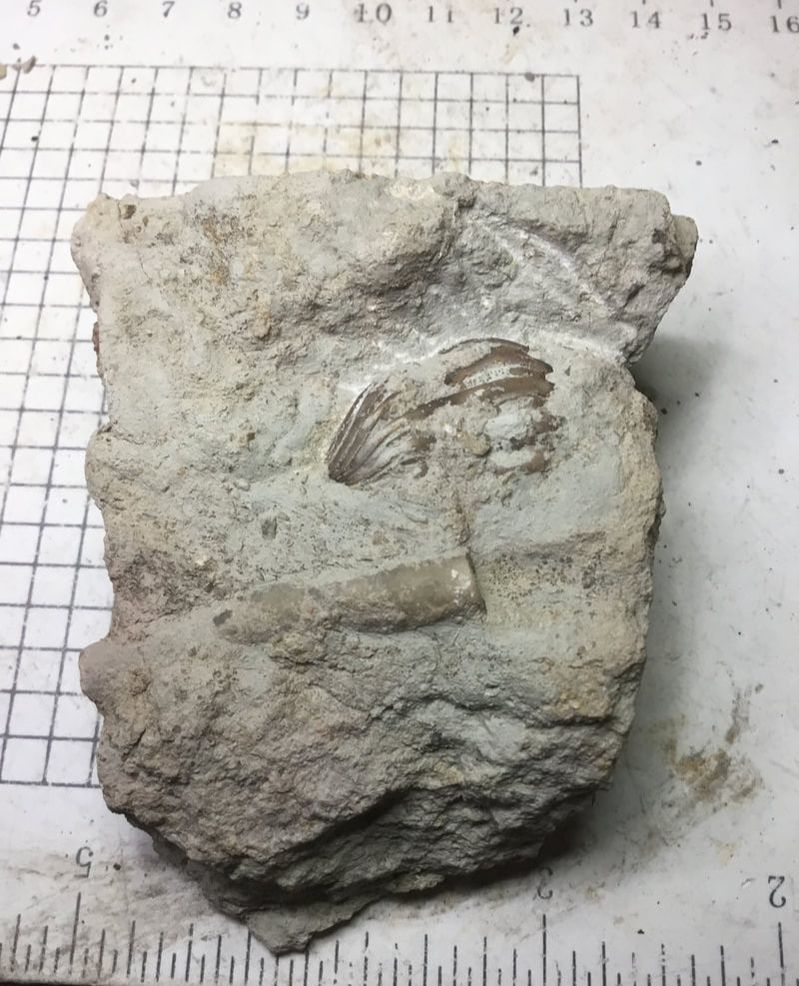 The initial state of the matrix above. 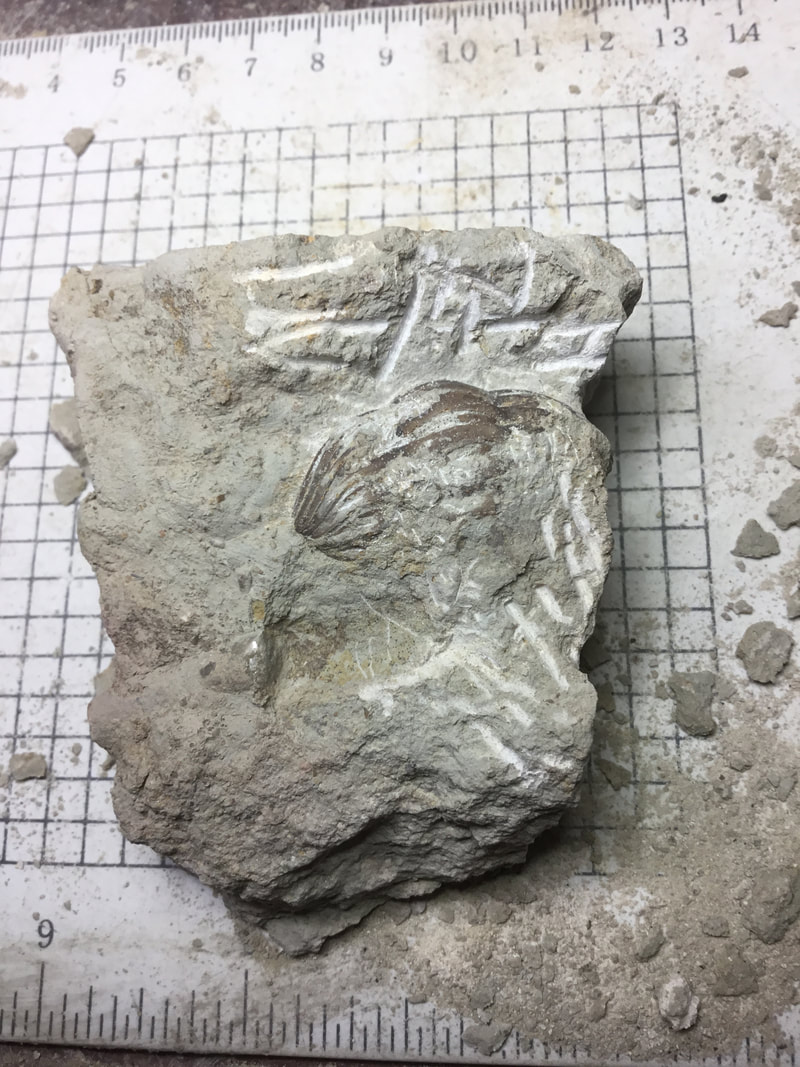 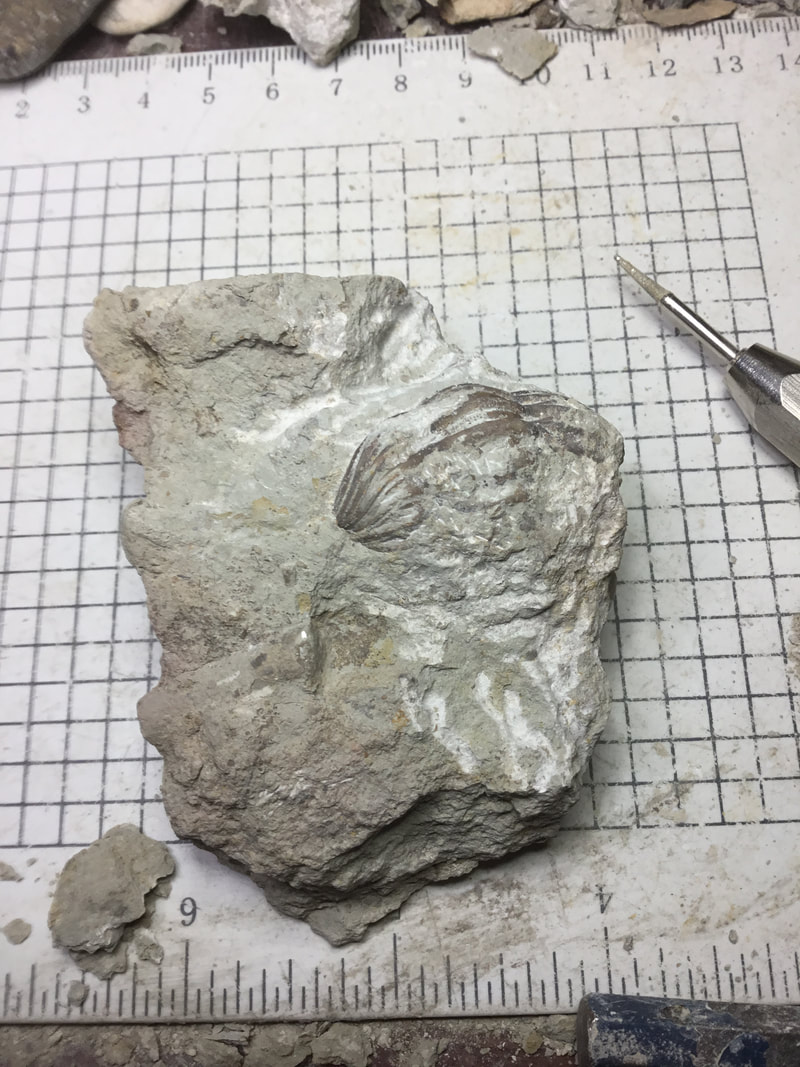 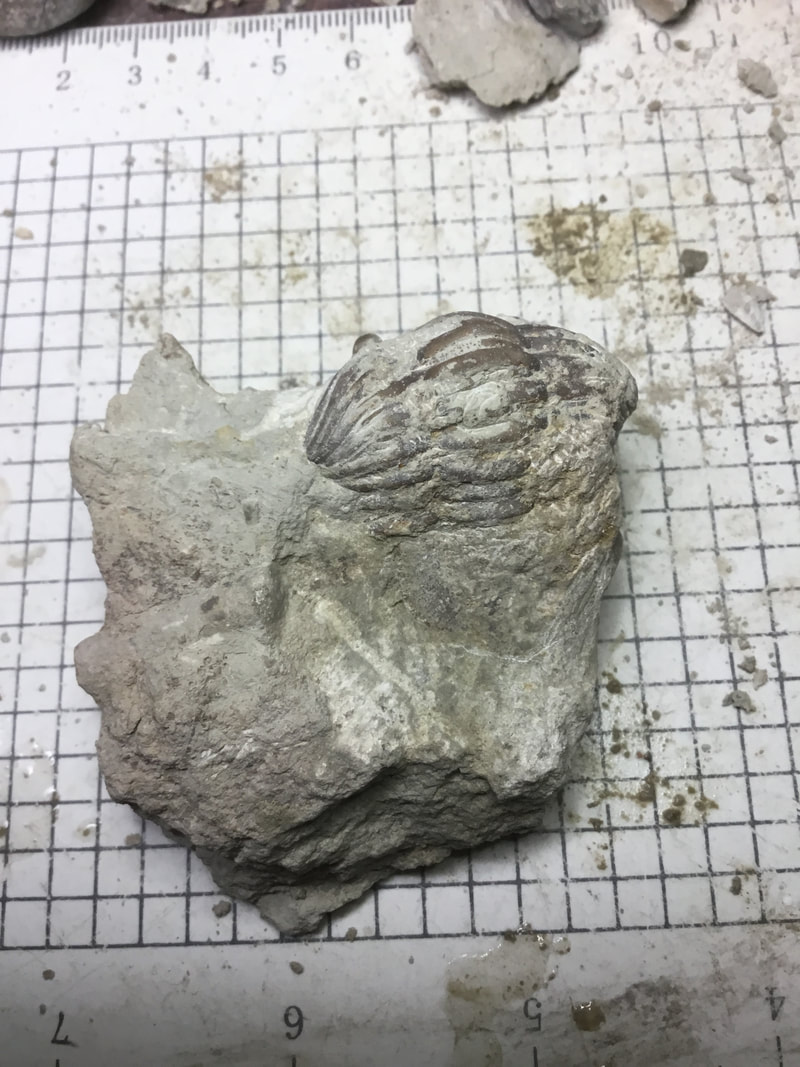 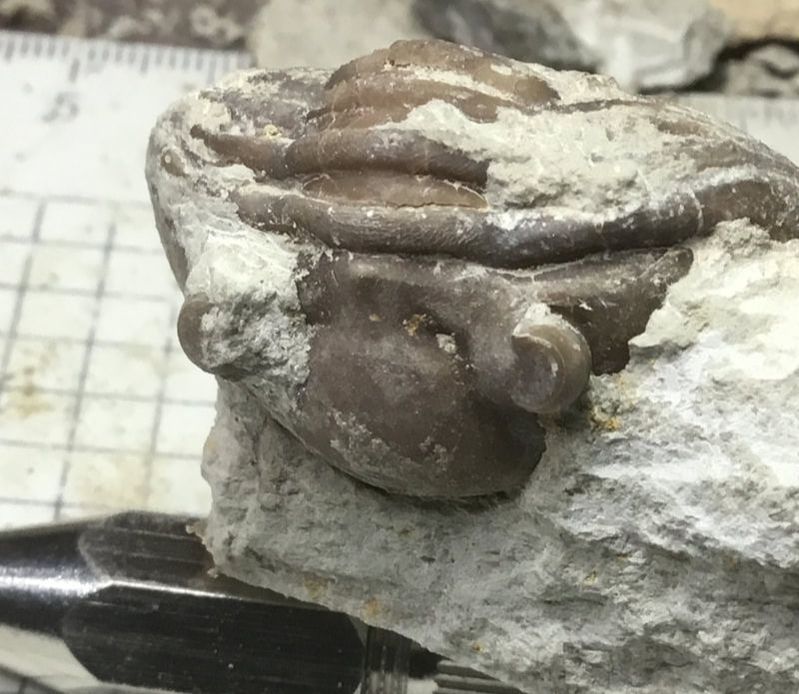 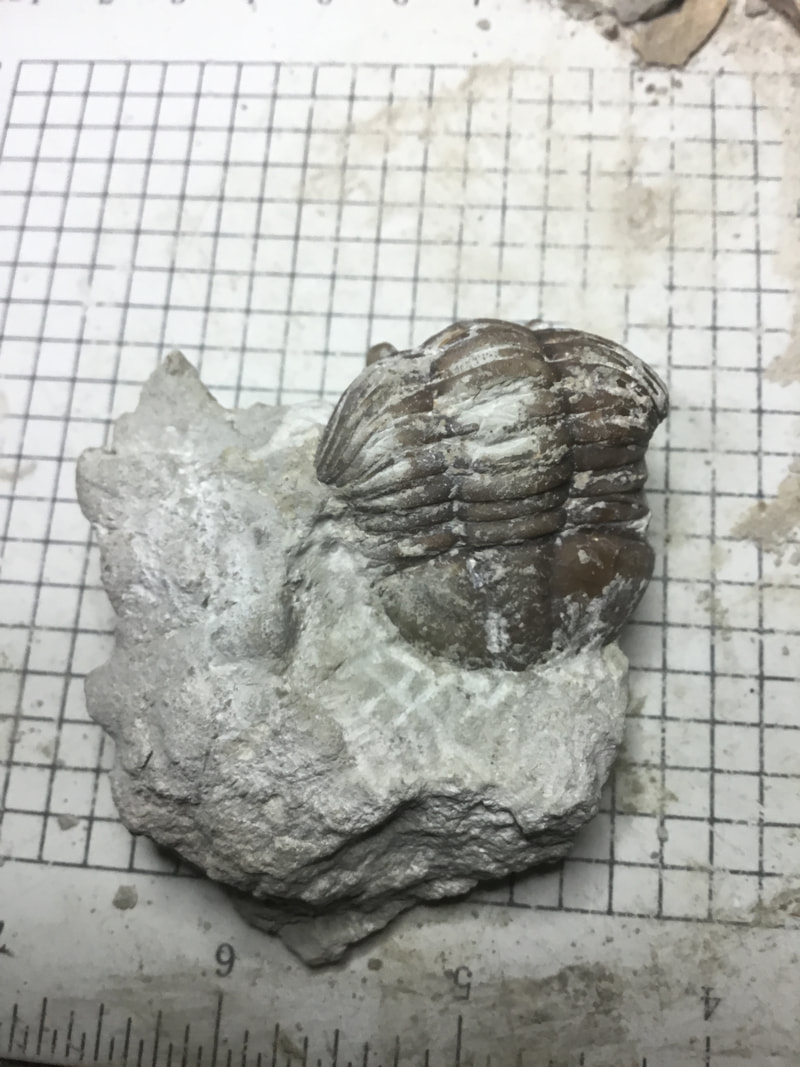  This one has been a bit of a challenge. A lot of the matrix is nice and soft, but there are "sticky" bits. I knew that the piece was not going to be museum quality, so I expected there to be a bit of damage. The thoracic area at the axis was already missing some shell, so I was not surprised when uncovering the rest that it would be missing. Unfortunately, I don't have any spare pieces of this to attempt a minor restoration. I did goof in one area, breaking off a bit of the shell. After uncovering the bulk matrix and performing some pin prep, I stabilized some areas with crazy glue, used the air abrader, and then brushed acetone on it to remove the gobs of glue. A few more pin prep attempts and I think this will have to be about it: 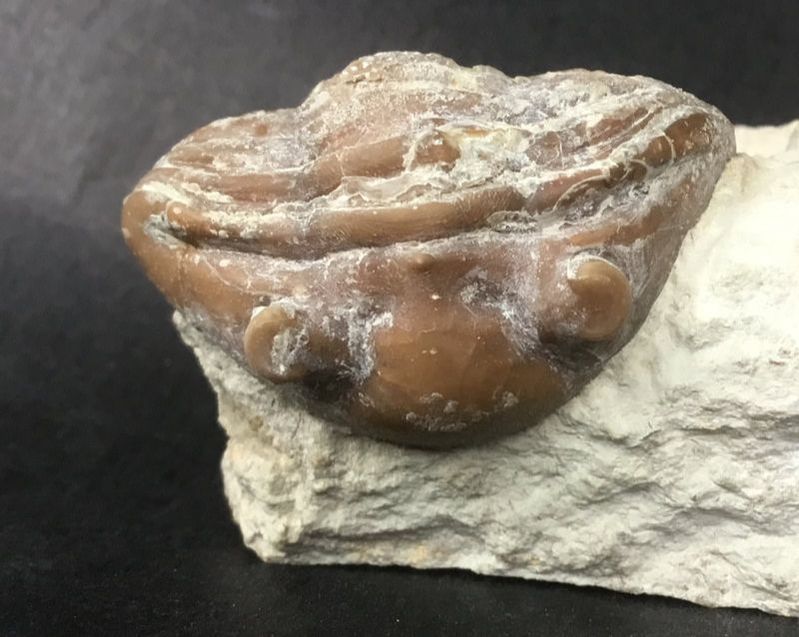 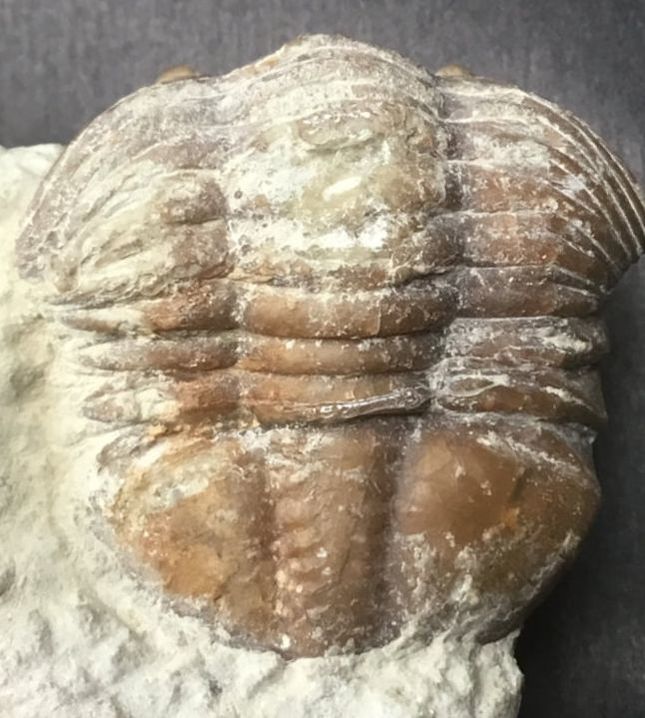 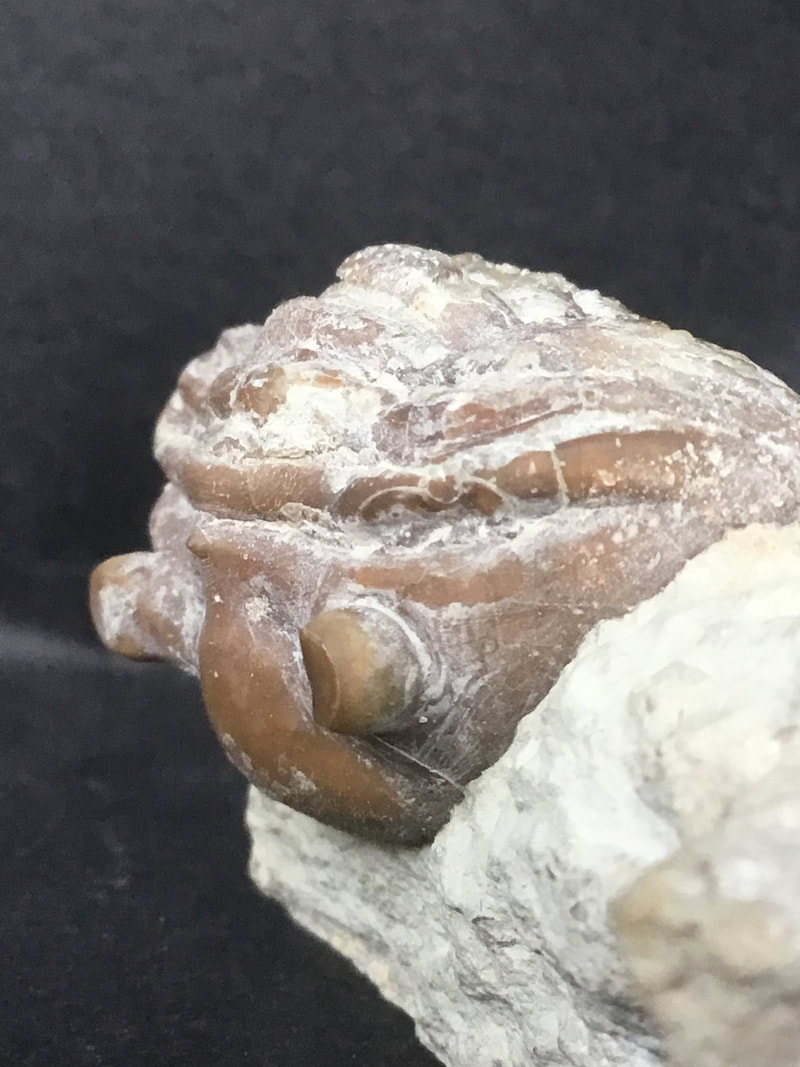 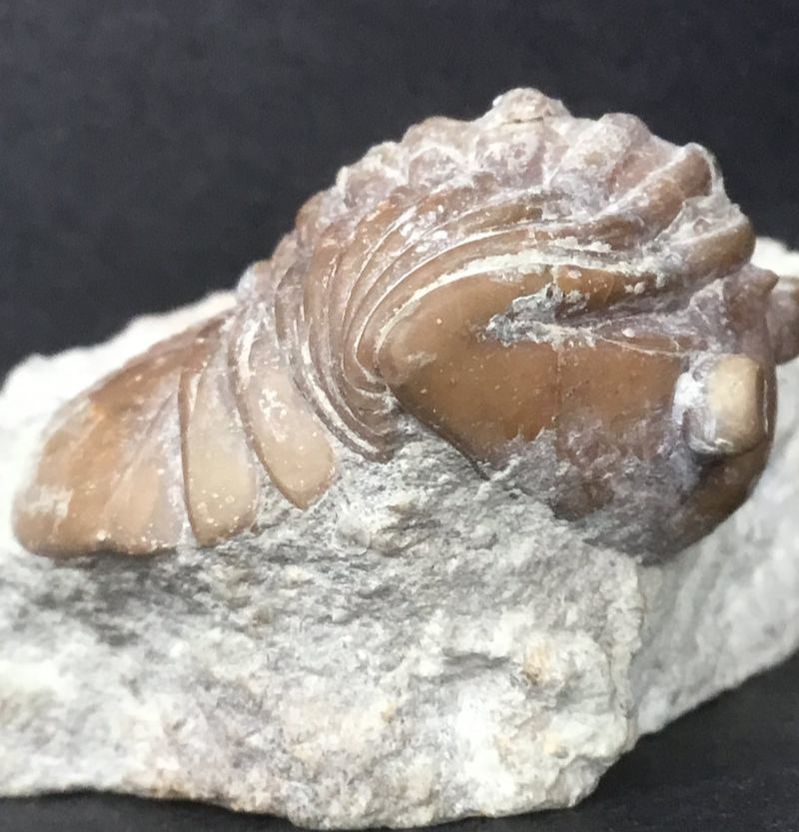 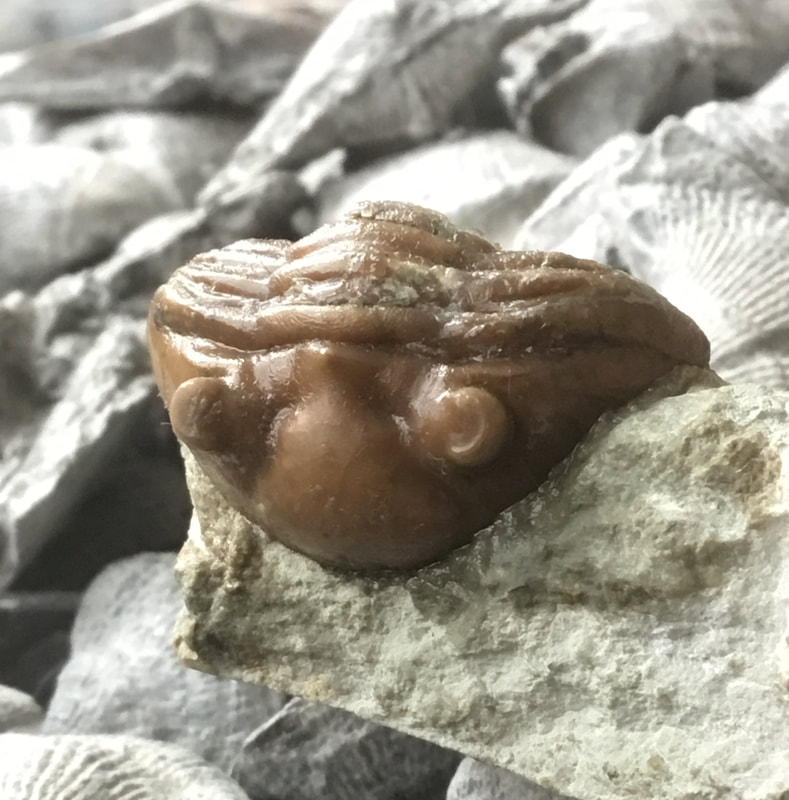 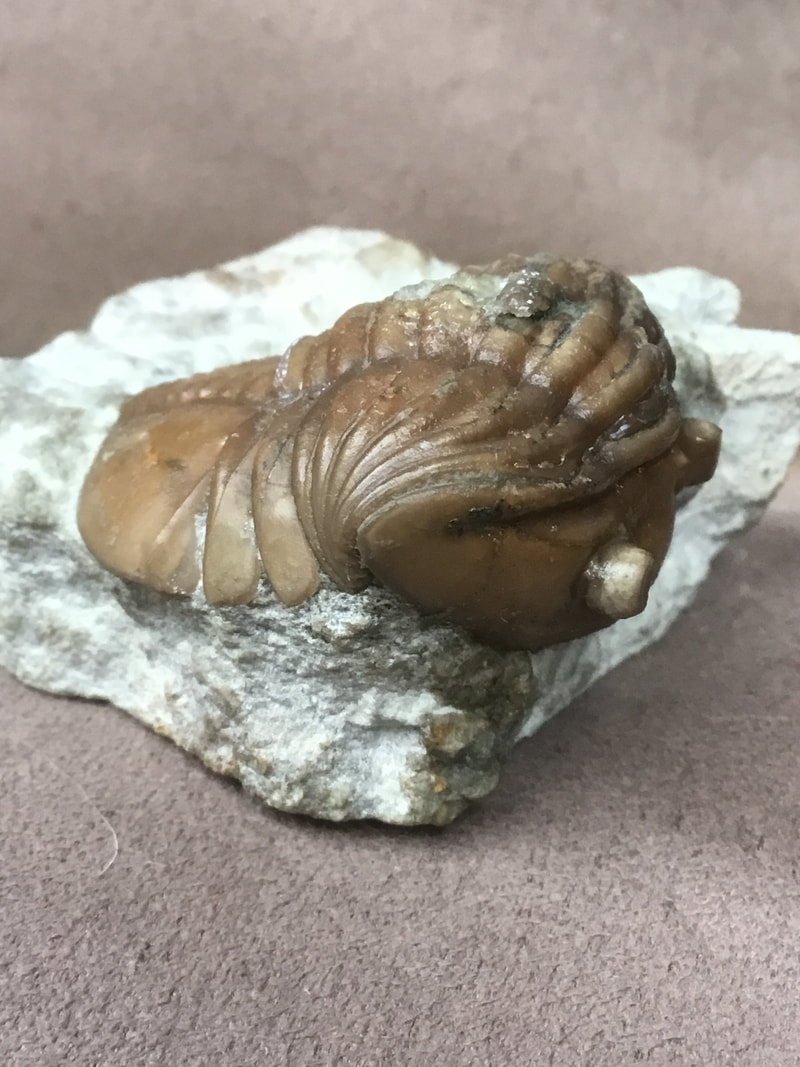 Today's post is another that beats the winter blahs. The first is just some tinkering with some of my finds from the previous year, and the second is a generous gift from a forum member. I am definitely running out of material to explore and prep, so I took a look at some of my one-of-a-kind specimens and noticed that maybe, just maybe, I could poke around my little Achatella achates from Brechin a bit more. I knew it was not complete, but finding even a cephalon of this Ordovician phacopid is quite uncommon.
This is a before and after sequence. Using a pin vice and my fancy microscope, I was able to remove some of the matrix to uncover more of the cephalon, but also the characteristic long genal spines of this species. Finding a whole one would be a trip-maker, for sure, but having an intact cephalon of this species is not too shabby. The next item is the result of a very lovely gift by one of our very great forum members, Dave A. from NY state. I've been wanting one of these for some time. The fragments my friend Tim gave me last April managed to make me pine in finding a fuller one of these very interesting holmonotid bugs. So here is Dipleura dekayi in its semi-prone, semi-enrolled glory: 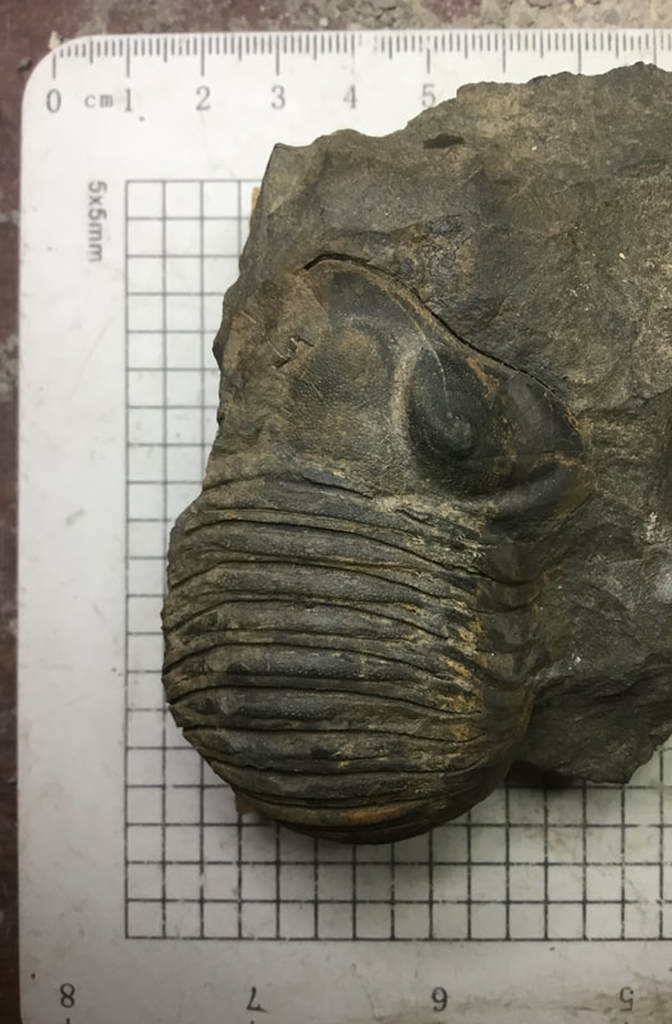 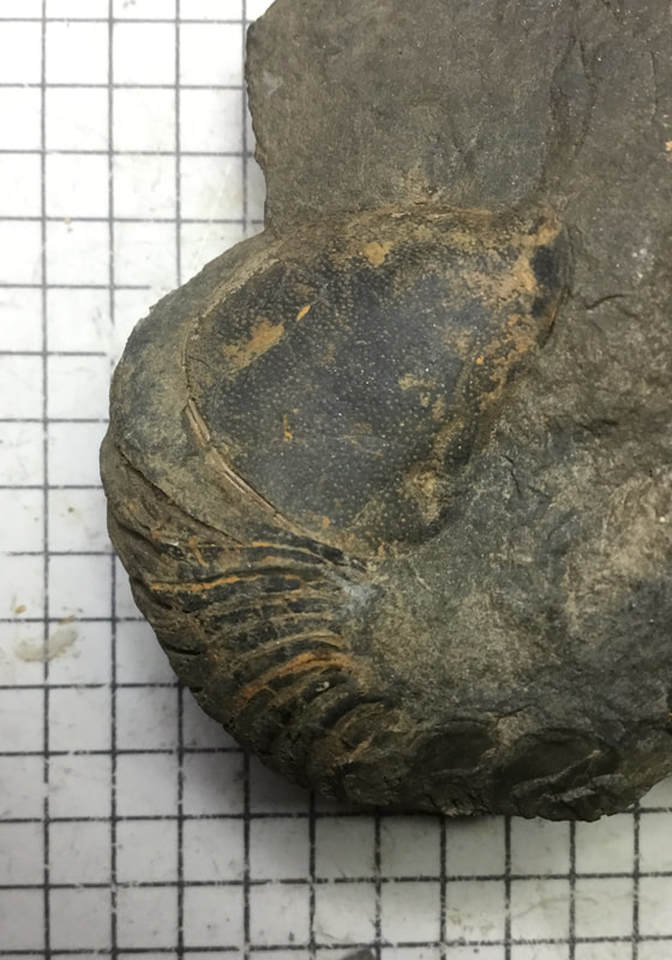 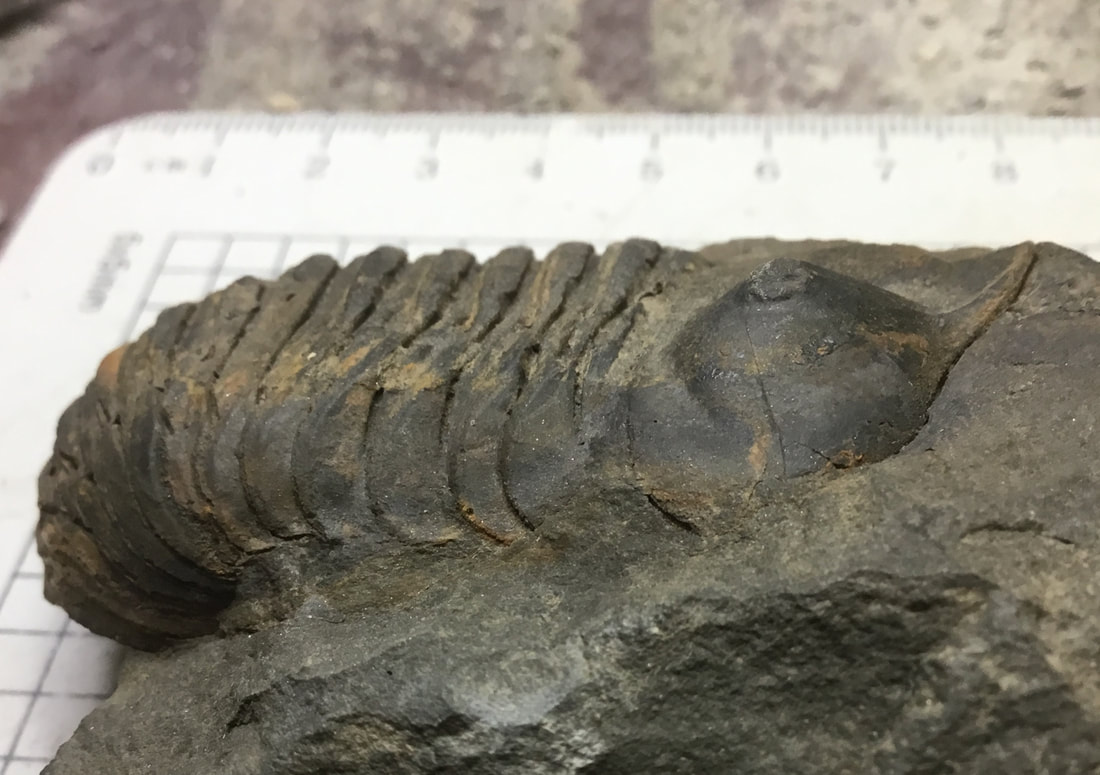 This one measures 10 cm along the axis if full prone, and so close to the upper end for how big these got. It is speculated by Whittington that it was a benthic critter that buried itself in sand with only its turret-like eyes protruding, hunting in a manner reminiscent of modern day crabs. This is one great Devonian delight for me.
Will there be more trilobites? There will be more trilobites, as they are en route as I type this. Stay tuned! Winter is still dragging, and so one is forced to trade in the rock hammer for the credit card, or otherwise engage in some friendly fossil trades. Today was a good one for receiving a few new delights. 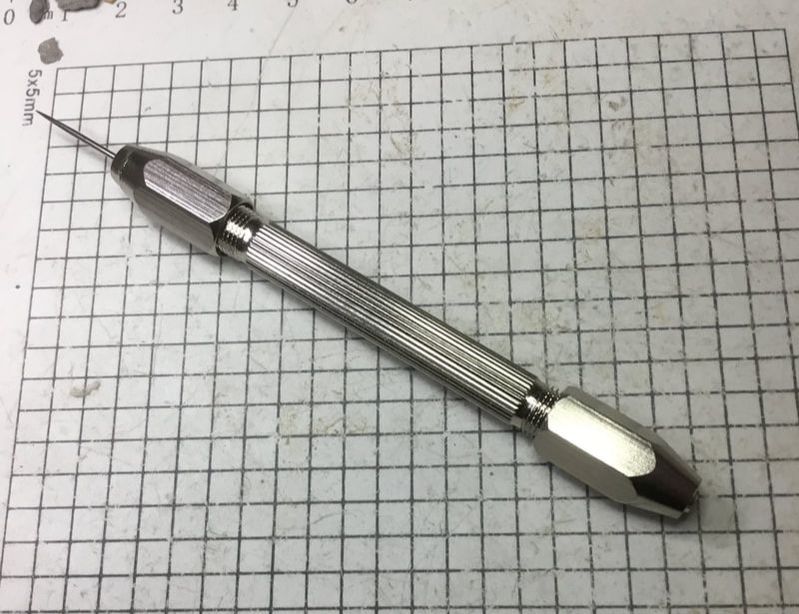 This might not be exciting to, well, anyone, but I quite desperately needed this prep tool. This is a double-collared pin vice that will make any of my pin-prepping much easier. Up until now, I've been holding the sewing needle between my fingertips, and after a while my hand starts to cramp. This tool will give me much more control. This tool didn't quite break the bank at about a dollar, free shipping. 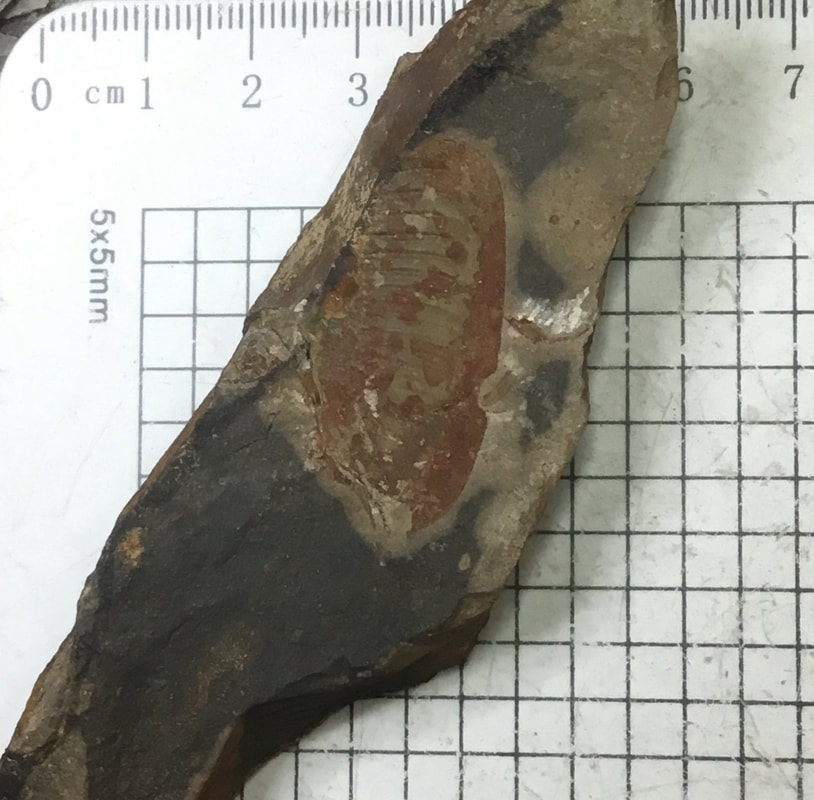 This was part of a marvellous package sent to me by Hong Chan Ui from South Korea. I had sent him a package of trilobites last month with a few other fossil goodies, and he in turn sent me two trilobite species I don't have and also perked the package with some South Korean coins and tektites. How cool is that! The specimen above is a partial pygidium of the rare Ordovician asaphid, Dolerobasilicus sp. from Taebaek, Gongwon-Do, South Korea. 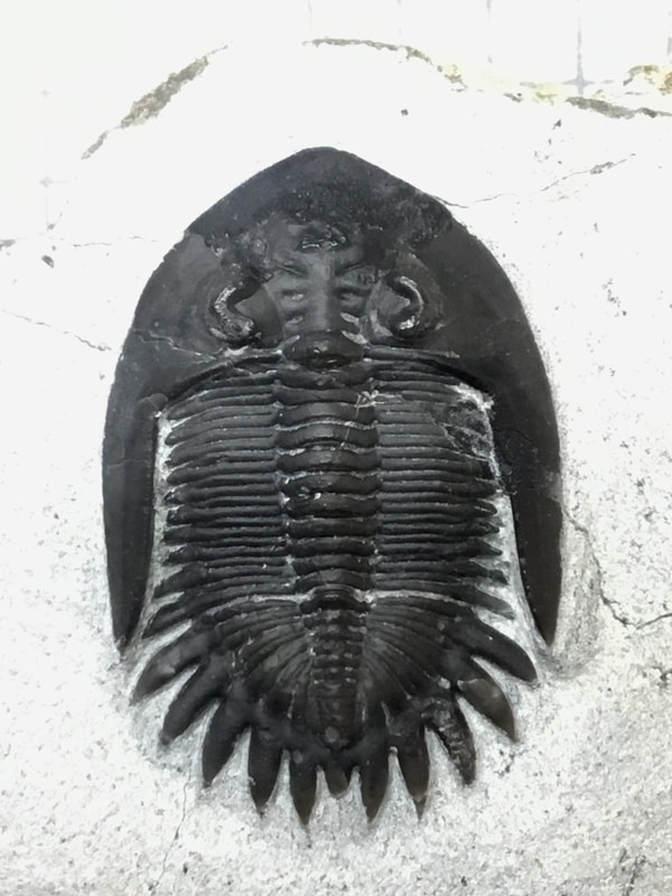 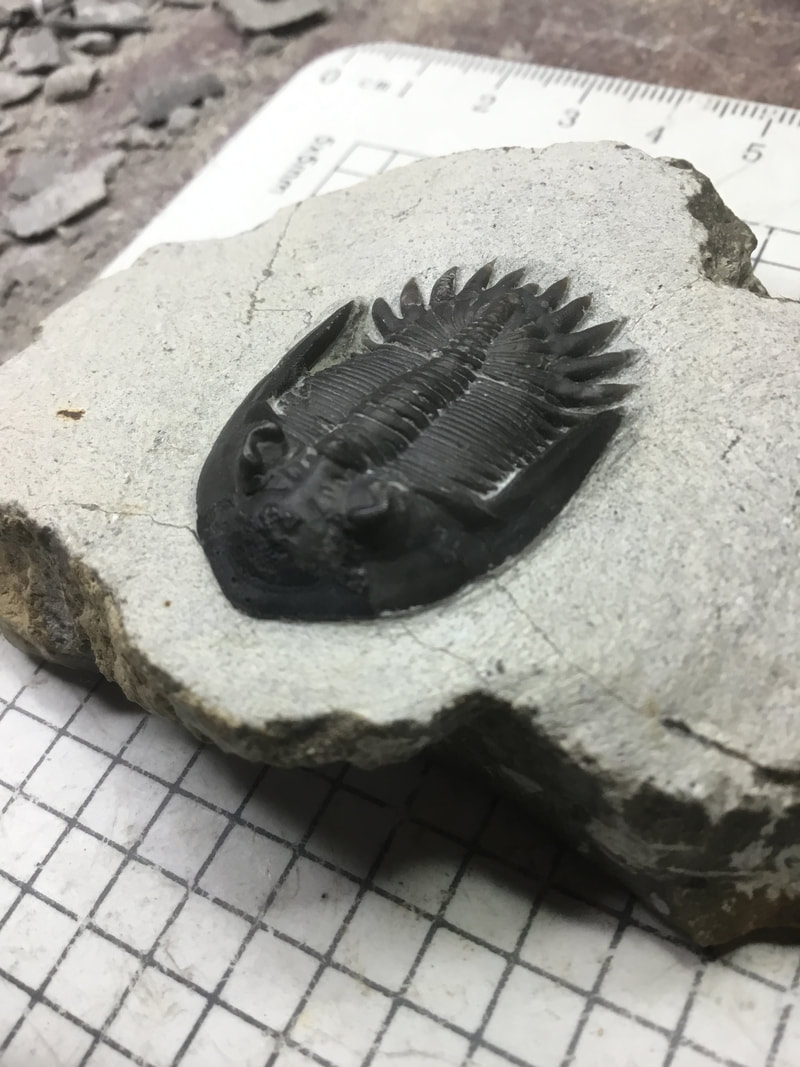 This glorious Devonian phacopid in the same package is Mrakibina cattoi from the El Oftal formation Jebel Mrakib, Ma'der, Alnif, Morocco. A near cousin of Greenops. The preservation detail and preparation is just remarkable. 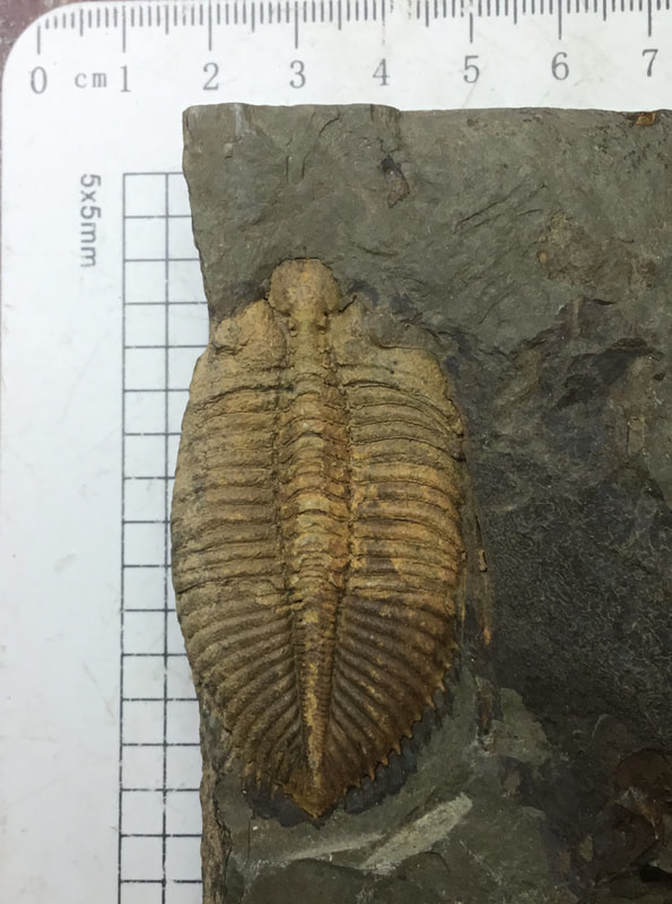 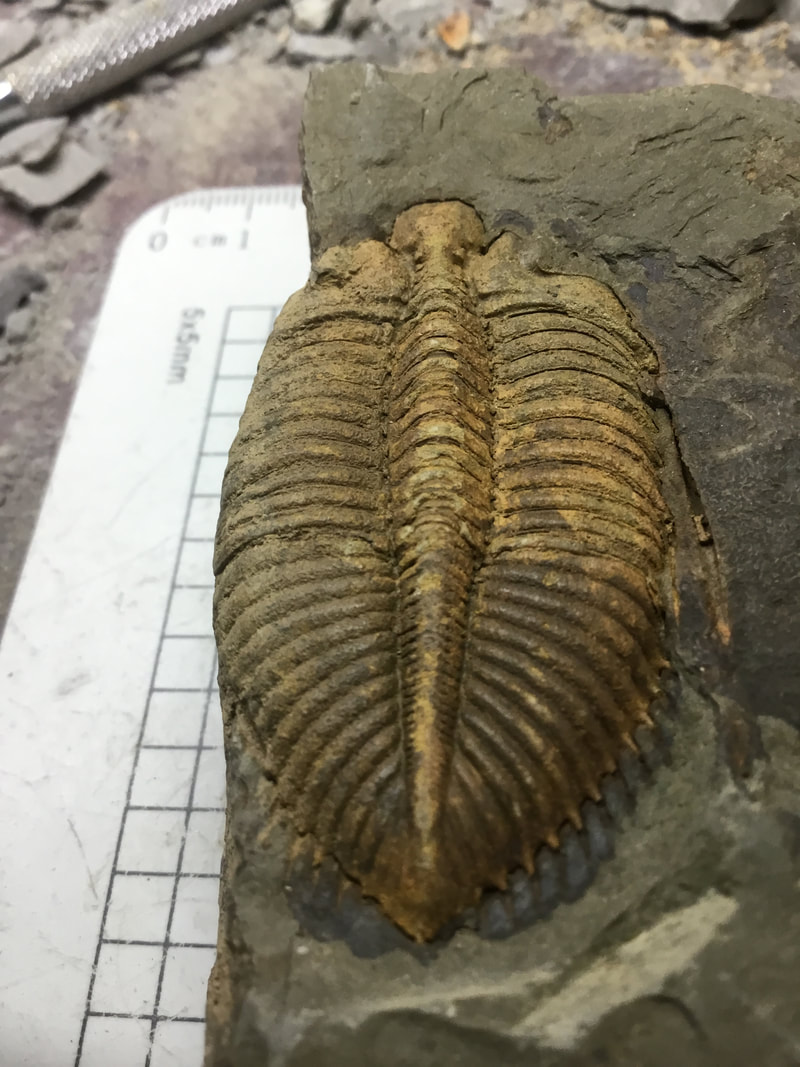 This large Silurian phacopid was an eBay steal. Meet Coronocephalus gaoluoensis, coming in at 7 cm, or 3 inches long. Note the impressive pygidial spikes, if not the crazy number of segments. You usually find these as pygidia only. This is from Hunan Province, China.
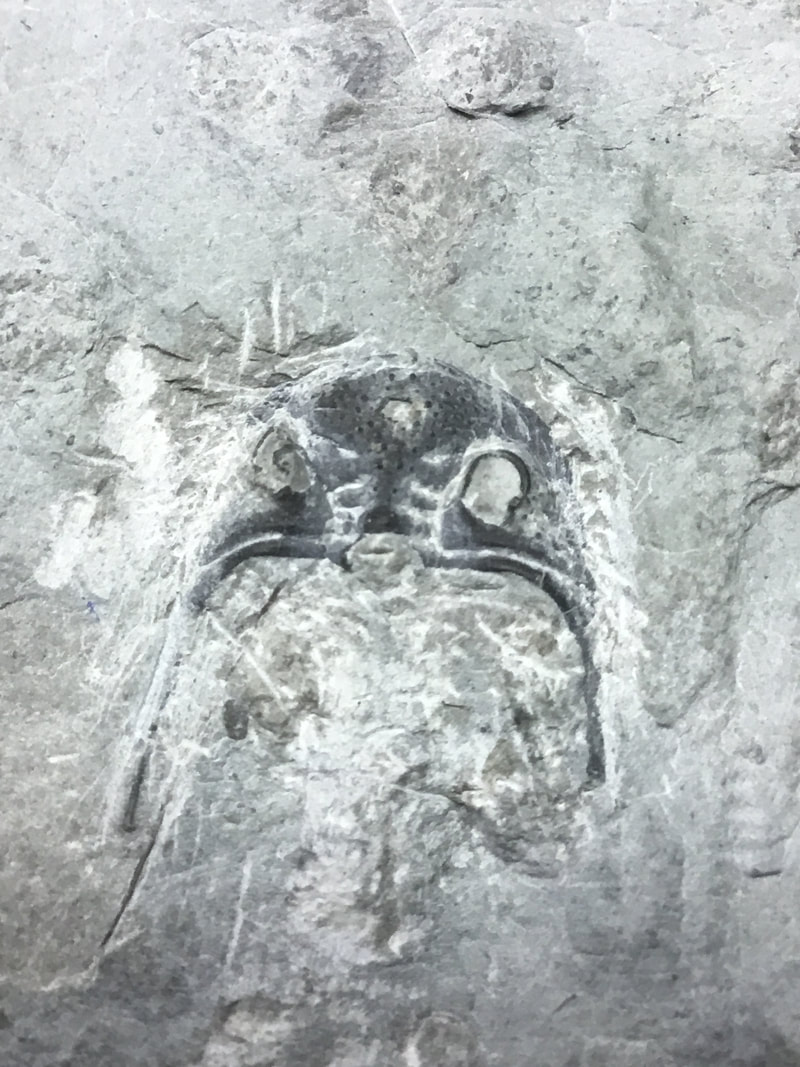
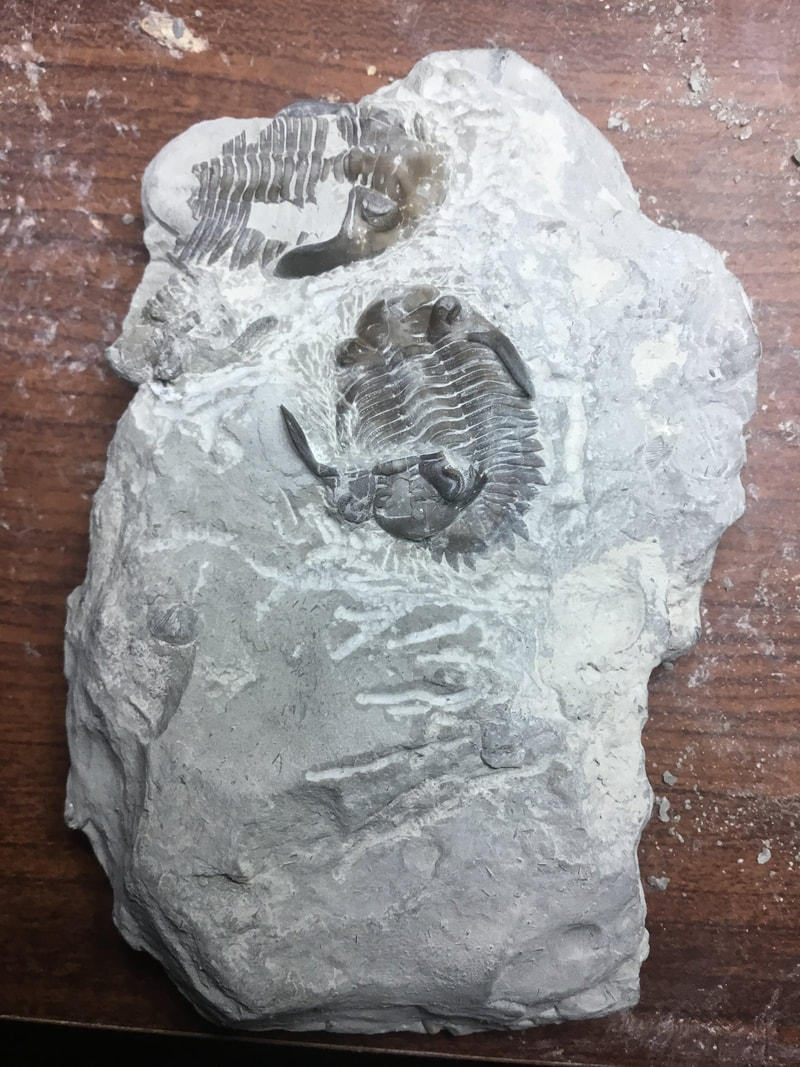
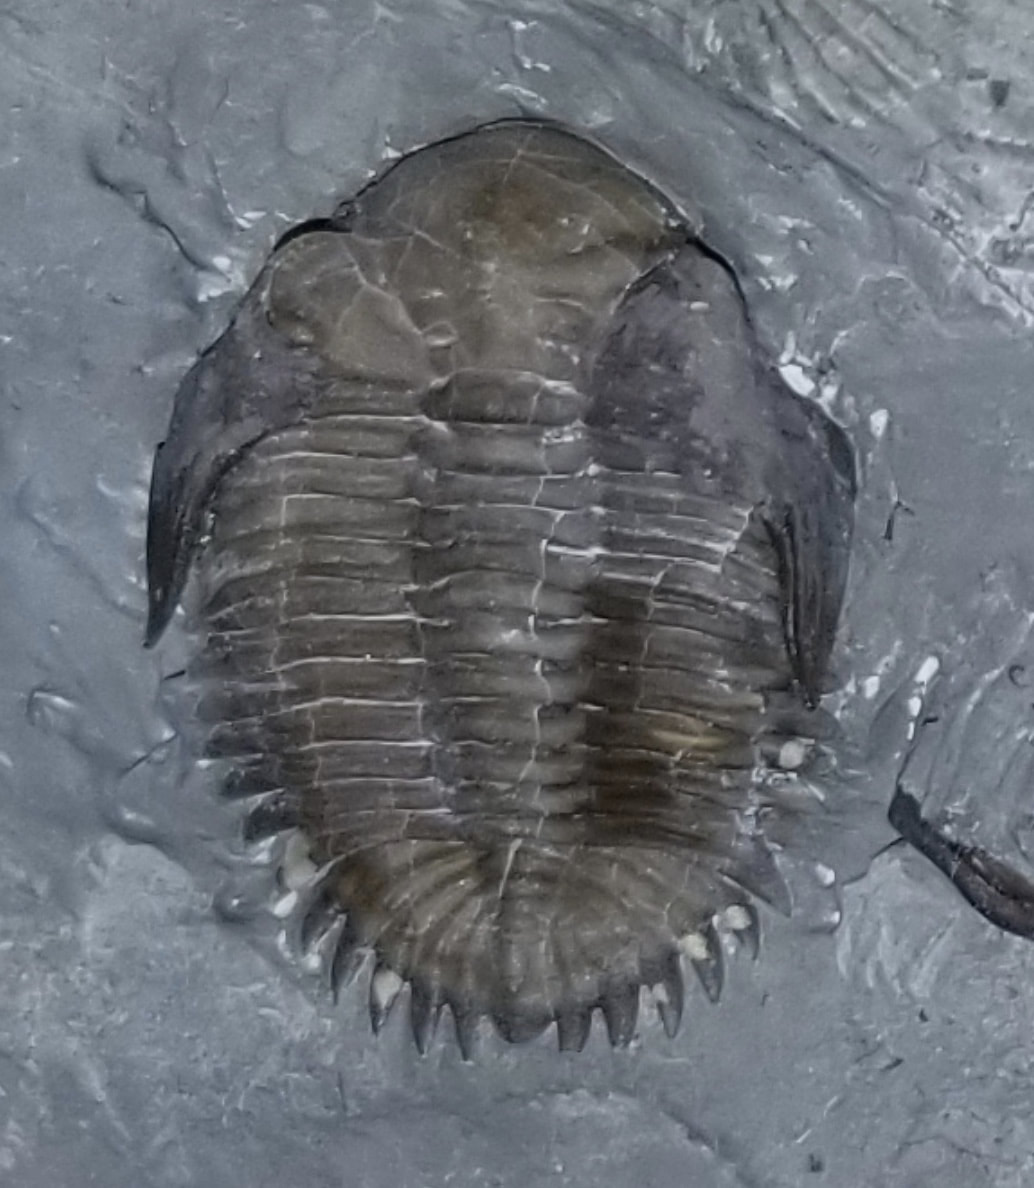
These new acquisitions surely take a bit of the grinding gloom out of winter. But, as always, stay tuned: six or more bugs are still on their way, and it isn't even the official start of the 2018 collecting season yet! A very brief reprieve from the biting cold has meant a small thaw. I did do some poking around at my nearby honey hole, but didn't come away with anything worth showing. So, instead, I've been fiddling with my own fossils at home and exploring the productive postal formation. Let's have a look at prep fun first... 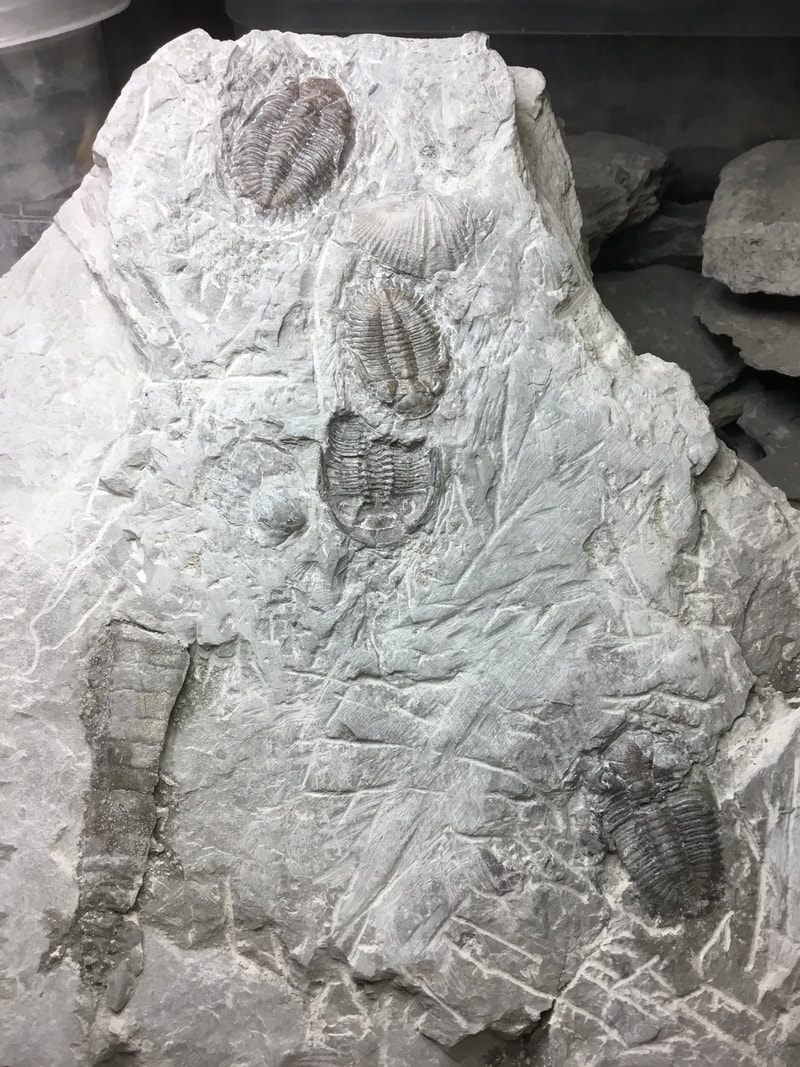 Readers of this blog may recall this slab that has undergone a bit of transformation since I found it back in October. Initially, there were two in the slab, and then I found a third one. Well, I probed some more and this rock keeps on giving. 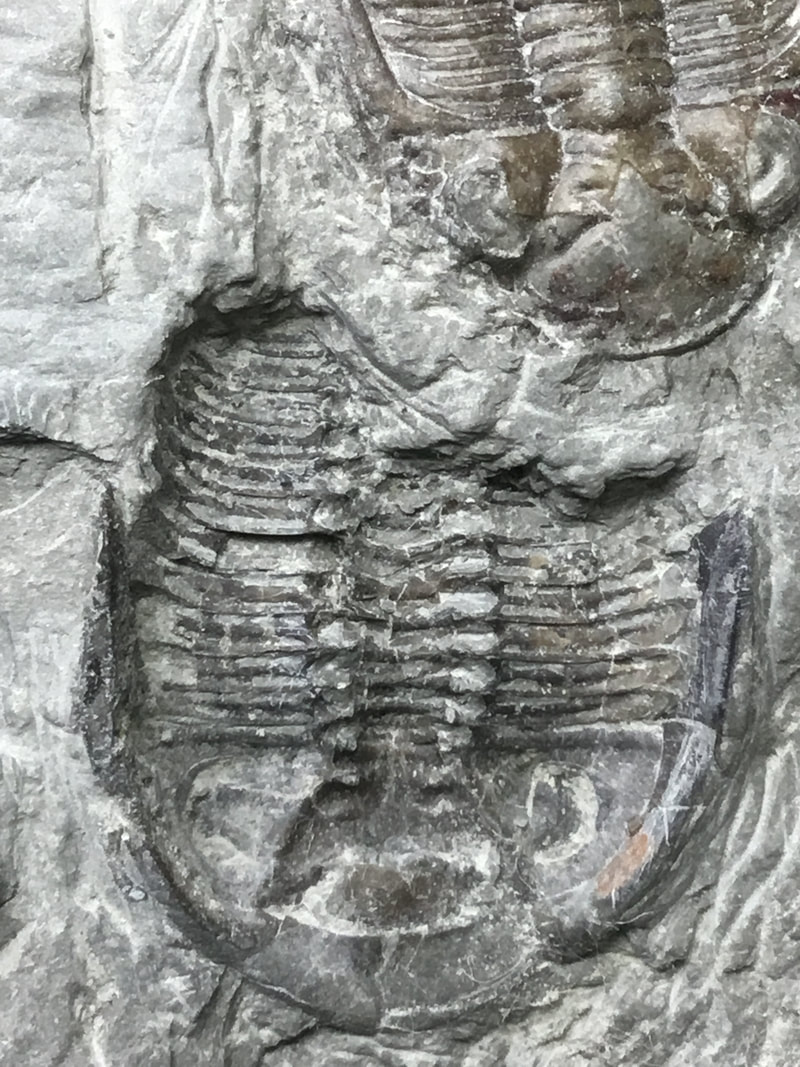 So what's new? This close-up image tells the story. This is not an impression, but a ventral (underneath) side Greenops. Keep in mind that these guys are very delicate and have a tendency to flake easily even if you breathe too hard on them! This was a nerve-wracking experience as I've never prepped from the ventral side before. I suspect it is complete, but it is uncomfortably too close to a full specimen on top that is not laying directly on top, but that there is a few millimetres of matrix separating the two. If I go too close on the ventral bug, it may shatter the top one. Of course, I can shave it a bit closer, which is what I plan to do when I get the nerve!  Speaking of prep that can make one nervous, this is my new acquisition from the postal formation, courtesy of a trilobitologist in the UK. This is from Mt. Isshamour. Morocco, a Ceratarges sp. nov. from the middle Devonian. It is my second lichid trilobite. Although the pygidium is disarticulated from the main body, it does have those very nice "horns" that at the moment look like mouse ears until I can prep the matrix off (carefully!). The genal and pygidial spines are quite impressive, and it is likely these were developed as a form of protection against predation.
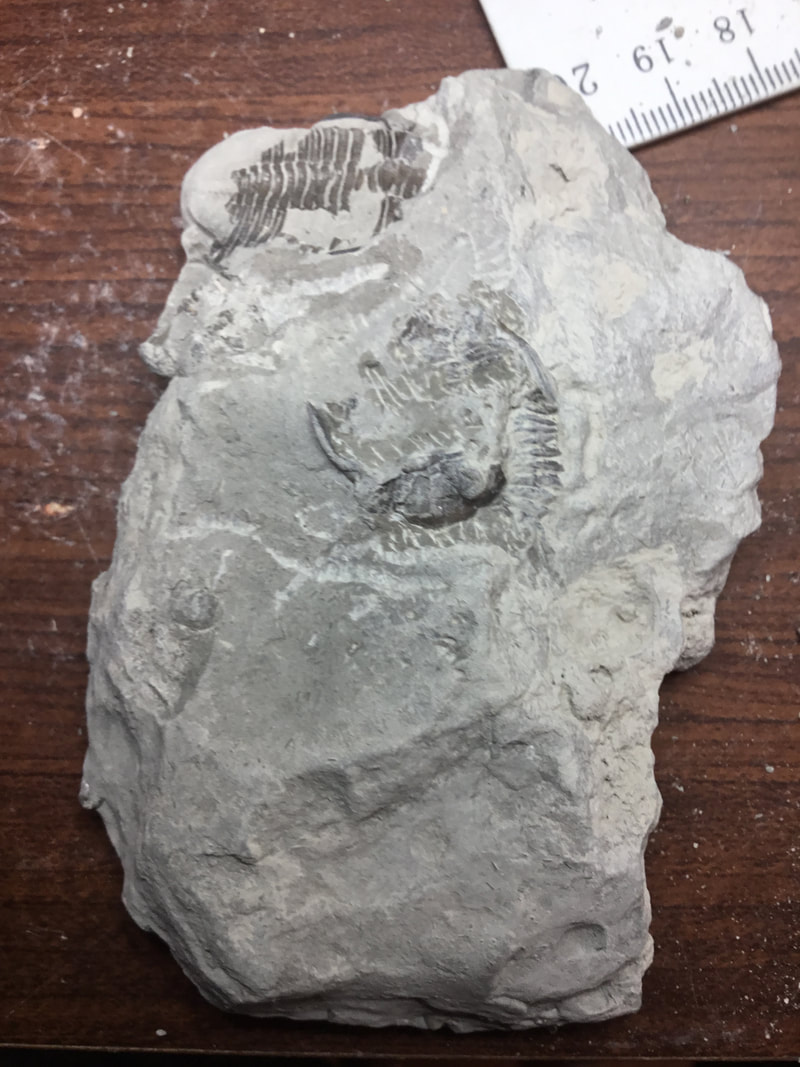
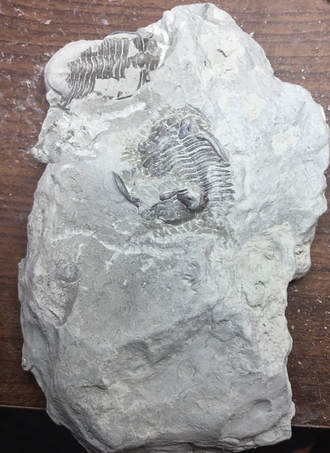
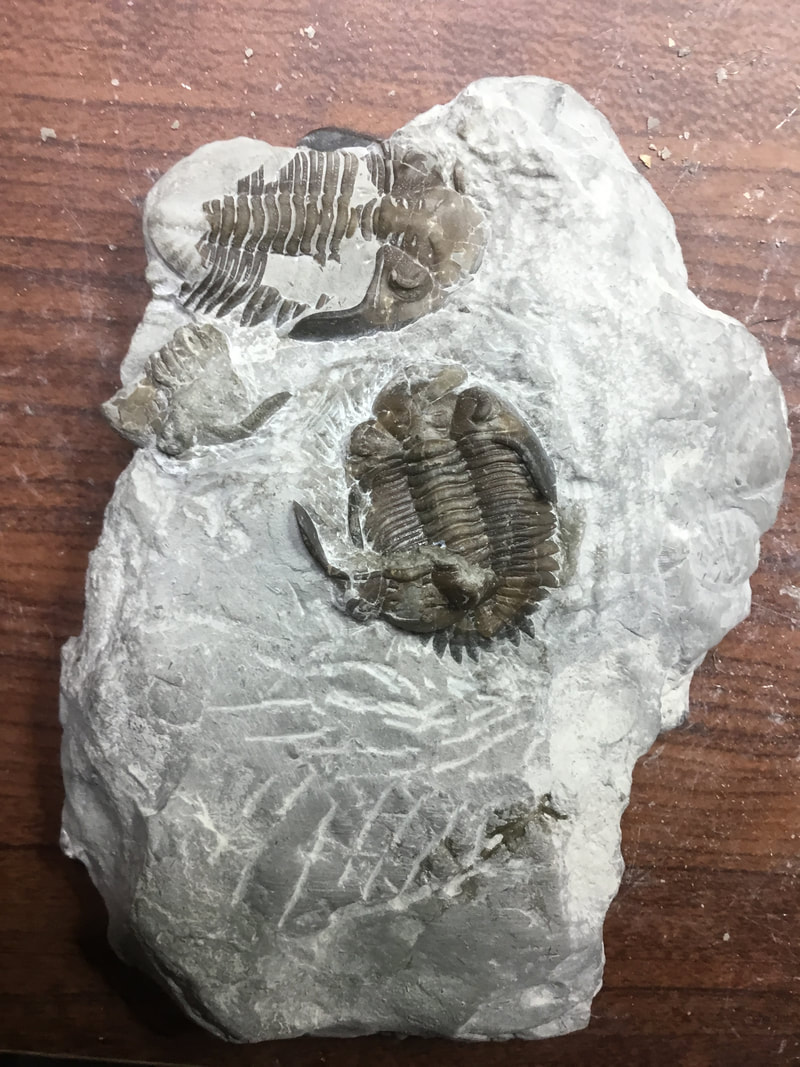
I am waiting on no fewer than four (and possibly more) packages from the postal formation in the next while, which will have to sustain my trilobite fever until winter ends and the collecting season kicks off in earnest. I was fooling around with the new microscope, taking some unimportant pieces from trips past to practice a bit of sewing needle prep. Back in the summer I had crossed the river at Arkona to check out the south banks for the first time. It was underwhelming as it looked pretty picked over, and exposures were too dangerous to access. I had noticed a pile of Widder shale that someone had obviously placed there - mostly broken bits and other stuff that would be somewhat decent for a first time collector. I make similar conspicuous piles for others of stuff that doesn't meet my standards, or of fossils I already have too many of. 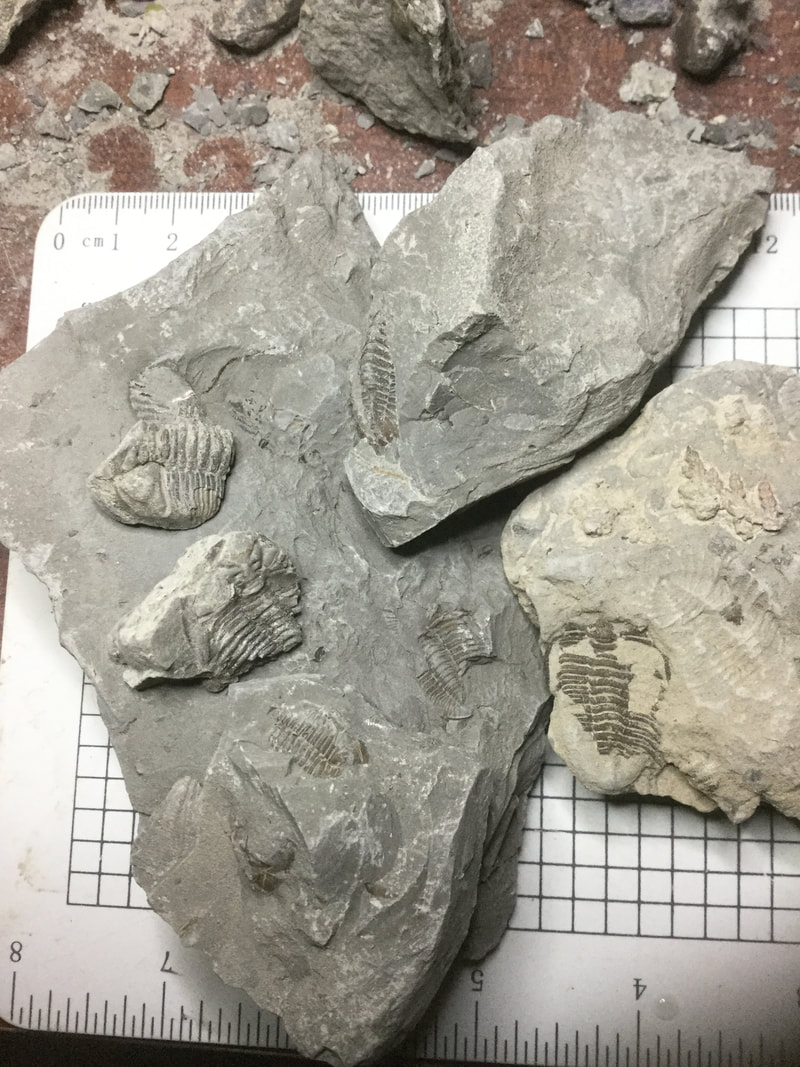 So the piece I was fiddling with is the light beige one on the far right, found on August 18th. You can see the impression of a full prone Greenops widderensis, as well as a busted up prone next to it - a classic piggy pile. Whoever got the other side probably felt pretty lucky. Although it was not a complete one, I put it in my collecting bucket anyway. My delightful discovery of a third Greenops on that slab I was working on back in late October (post here) taught me something: the rich yet very thin Greenops layer tends to have them in multiple assemblages. Fast forward to now. 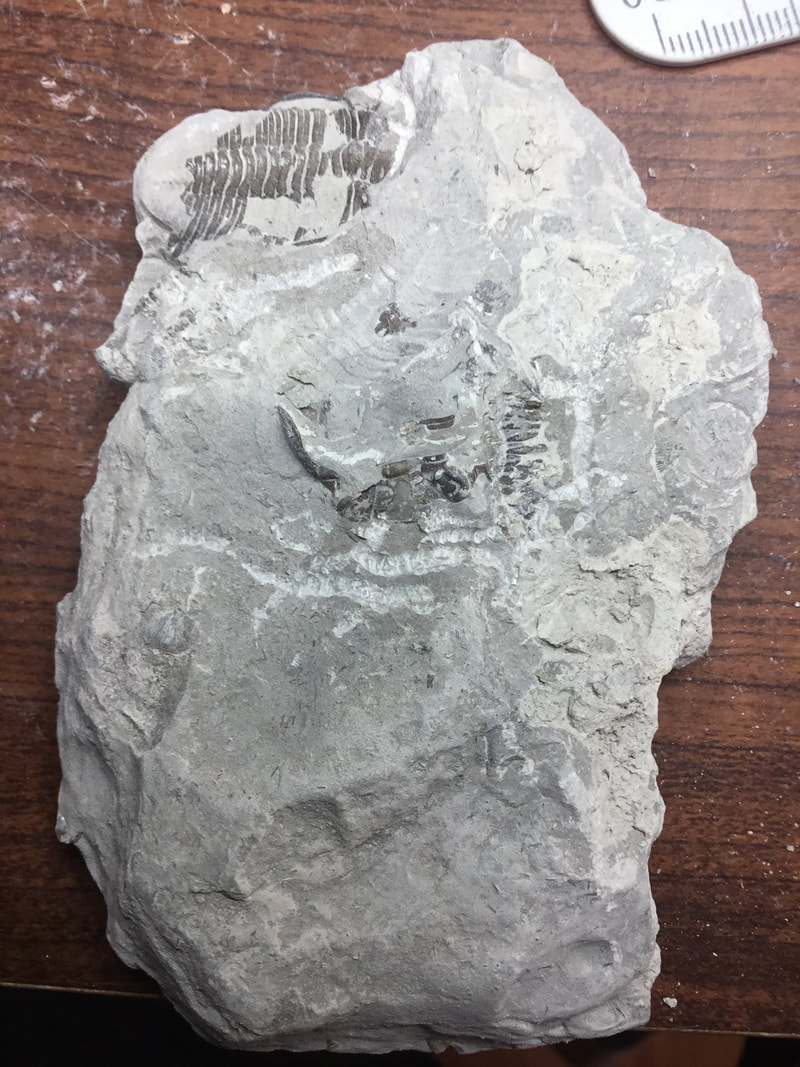 I figure why not take the chance to see if there are any more lurking under here? I think you know where this is going! I began chipping away at various spots and saw some thoracic segments sticking out beneath the broken cephalon in the centre.
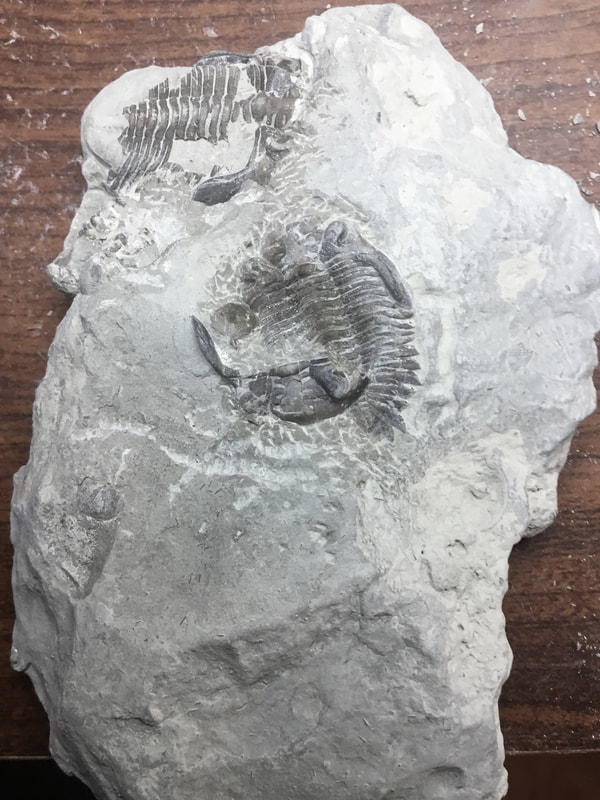
Over two hours of using the sewing needle, I continued chipping away. Under serious magnification, it gave me a great deal more precision in removing matrix. Yeah, the impression had to be sacrificed, but for the good cause of a full prone trilobite! I decided to keep the broken cephalon on the top to make it an interesting association piece. I also uncovered more of the head of the top one, and discovered a pyritized partial below it. The next step was abrasion under serious magnification (where a single segment might take up my entire field of view), followed by some more sewing needle work.  Not too bad! It has a few problems (two right pygidial spike tips are broken, parts of it seem to be rolled underneath itself slightly, and the glabella got crushed during preservation), but I'm proud of this one. A last step may be to find a way of getting out the ugly tool marks.
This is a comparison of where I began, and where it ended up. 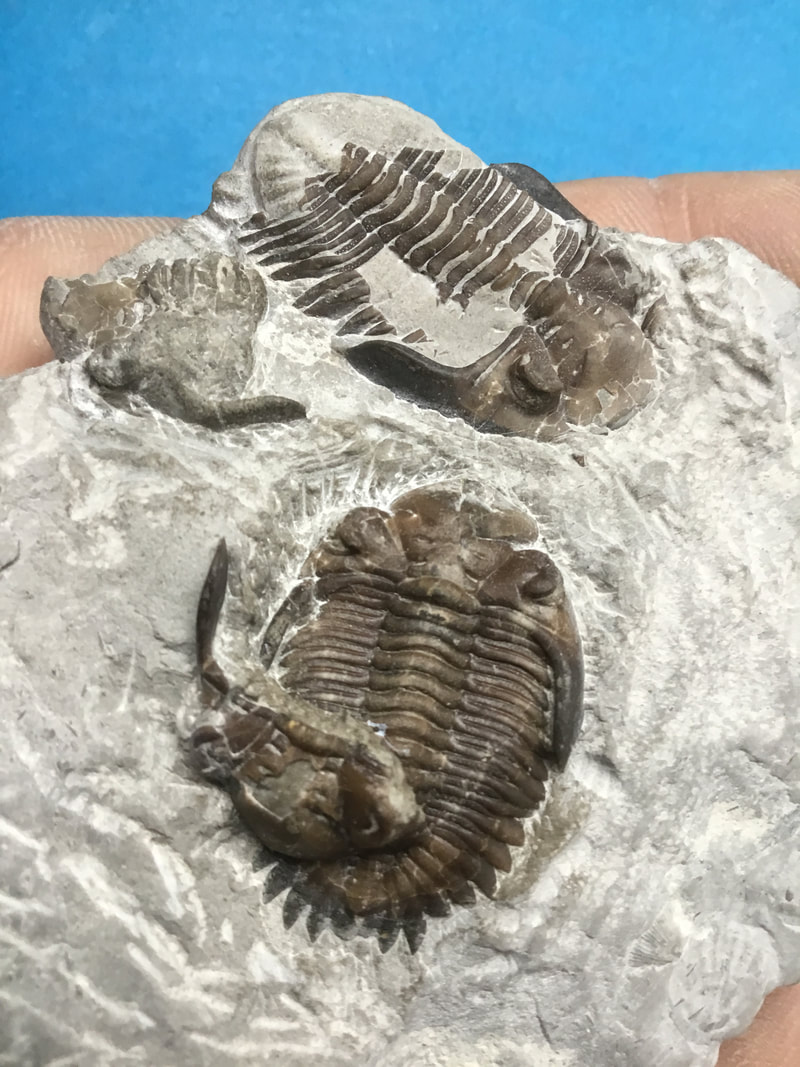 So, not as good as some of my more seasoned and experienced fossil preparators I know, but a good start where the right tools make a real difference. I still have some other Widder shale from previous trips that were disappointments showing a full impression and little else, so perhaps I ought to have a closer look. Or, as my fossil comrade Malcolm says, I should go out and buy a lottery ticket. 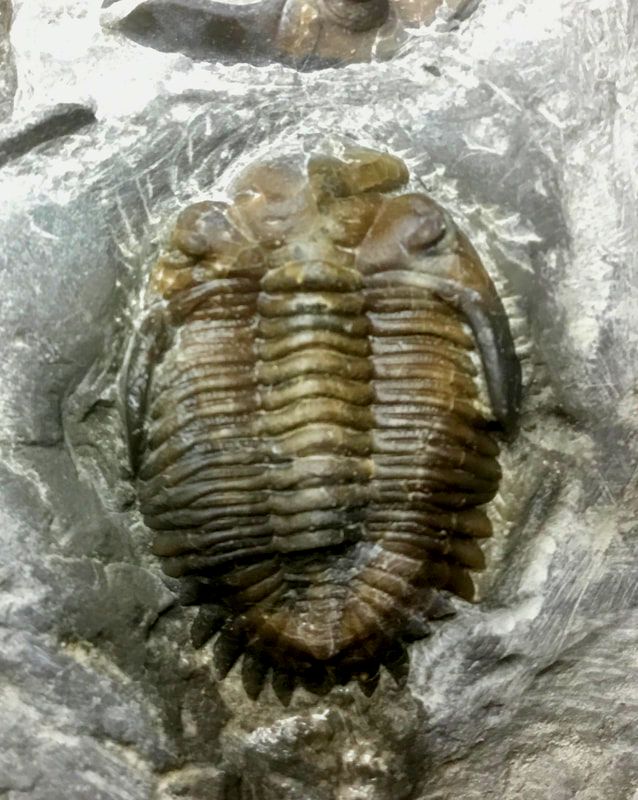 Until the big, thick, white blanket of winter is yanked off, it looks like my adventures will be confined to what I can do indoors. Over the past year I've been gradually adding more fossil preparation gear, and although there are a few more items left on the list, it is coming along nicely. Let's start off with a before and after picture of the space that I finally got around to clearing up: 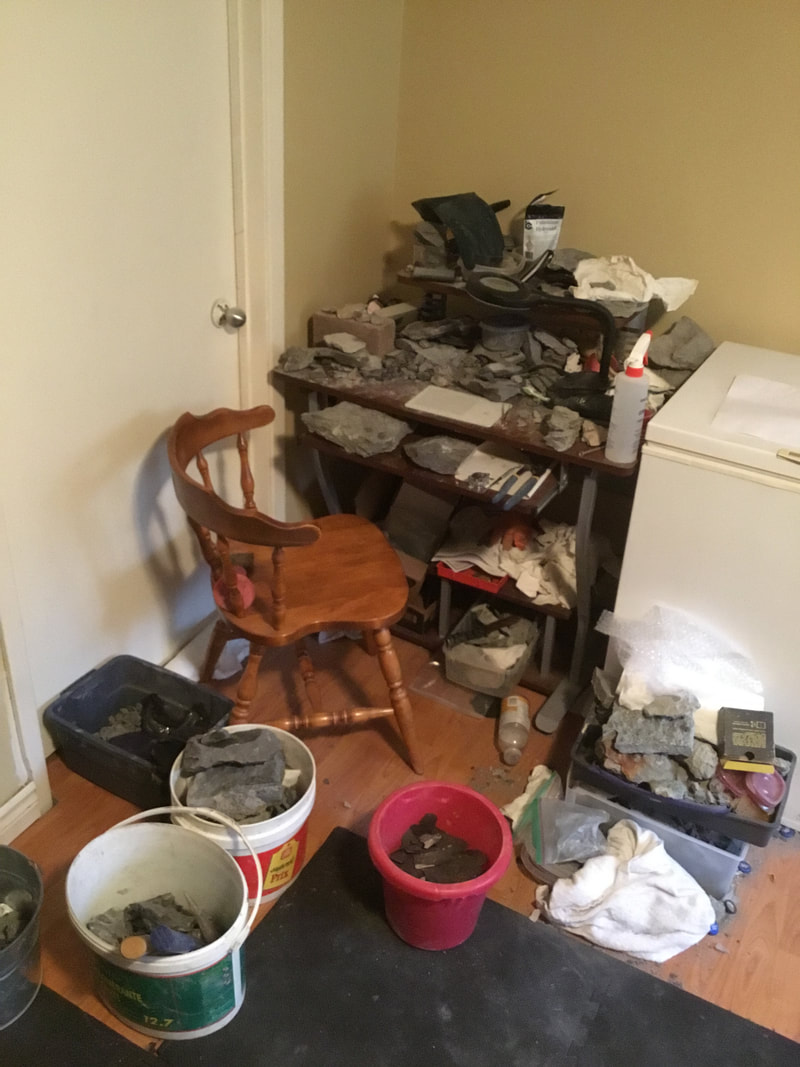 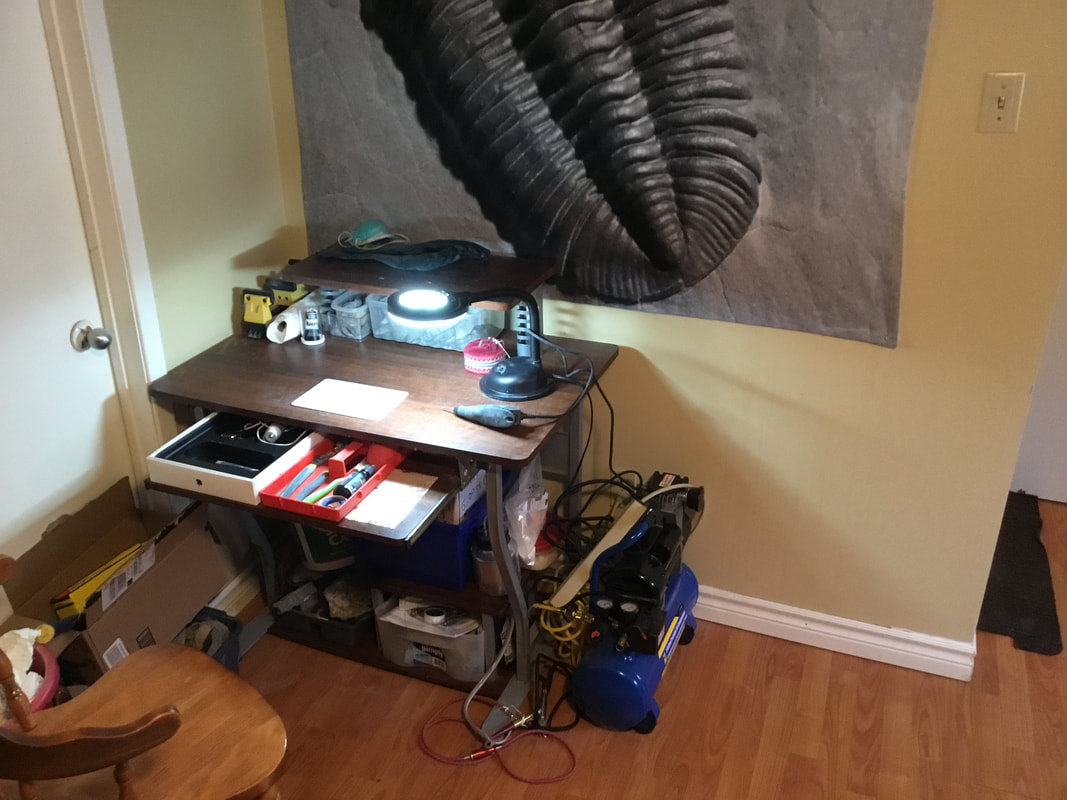 Much neater. There's not terribly lots of space in my house, and the basement is largely dominated by exercise equipment. Still, I did manage to secure this corner of the basement. All I now need to complete the furniture is to get a second working surface to the right of the first one. All the necessary tools are in their rollout drawer or on the top. I'll need to develop a system to place the compressor in a better spot, with holsters for the scribe and abrader. A work in progress, but definitely an improvement! 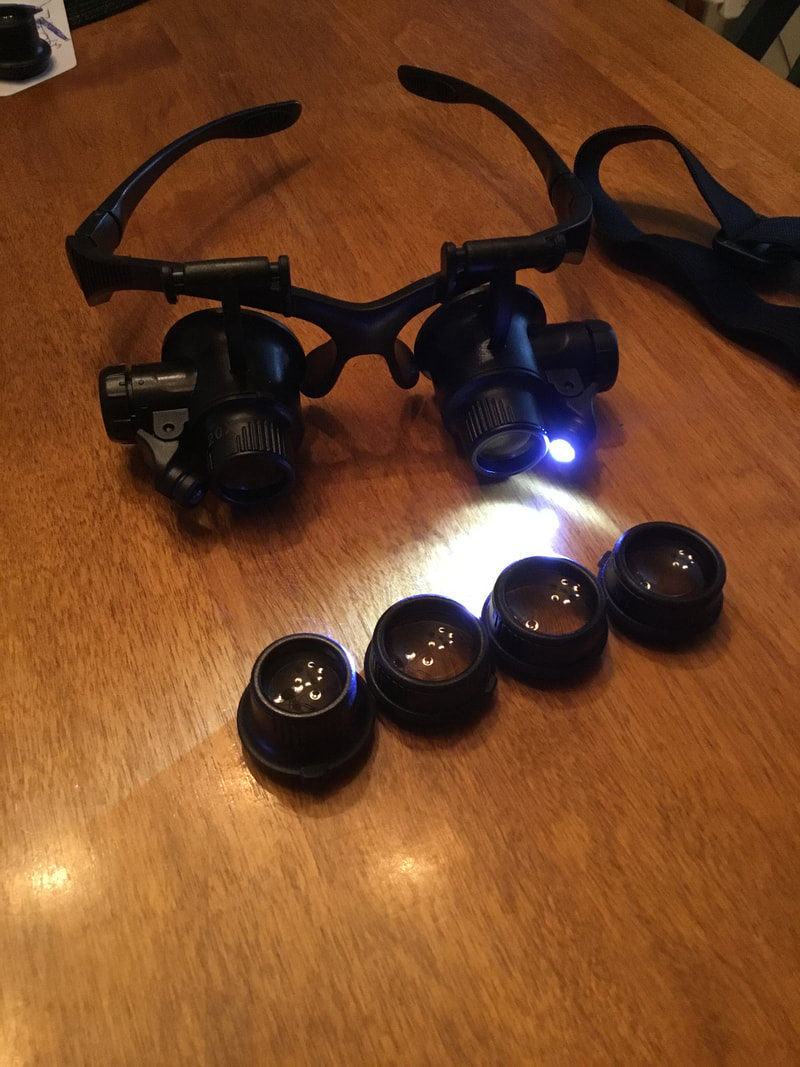 This little toy may make sewing needle based prep a bit easier. The lenses swap out at different magnifications of 10x, 15x, 20x and 25x, and comes with neat side-mounted LED lights. These might actually be very helpful in the field for getting close to the ground and looking for tinier fossils. 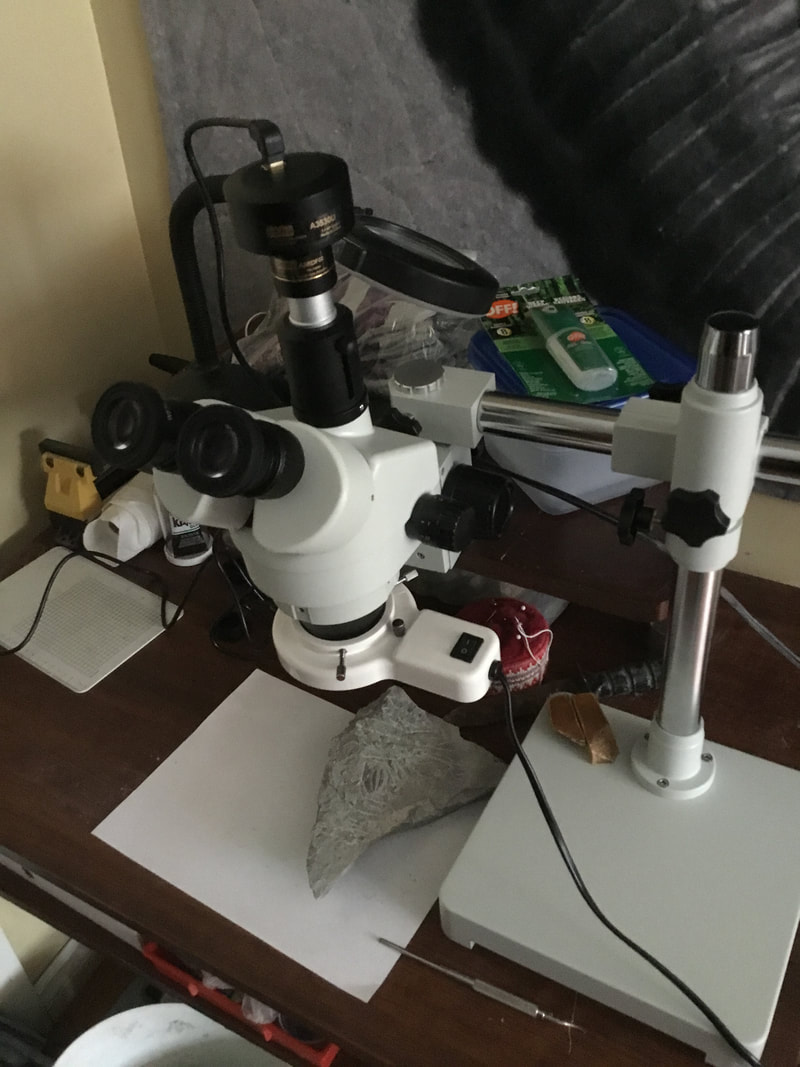 And this arrived the same day as well. An OMAX 3.5x-90x trinocular scope with a USB-fed 3.2 MP camera. It took a ridiculous amount of time to assemble this as it came in a zillion pieces, and the instruction manual that it came with was for an entirely different model (and written in that transliterated Chinese that reads very awkwardly. It comes with 10x and 20x wide-field eye lenses, and a Barlow lens to permit working at a distance - essential once I get a blast box. I went with the adjustable boom as the scope needs to rest on the outside of the blast box glass. Looking through the eye pieces at the right distance takes some getting used to. 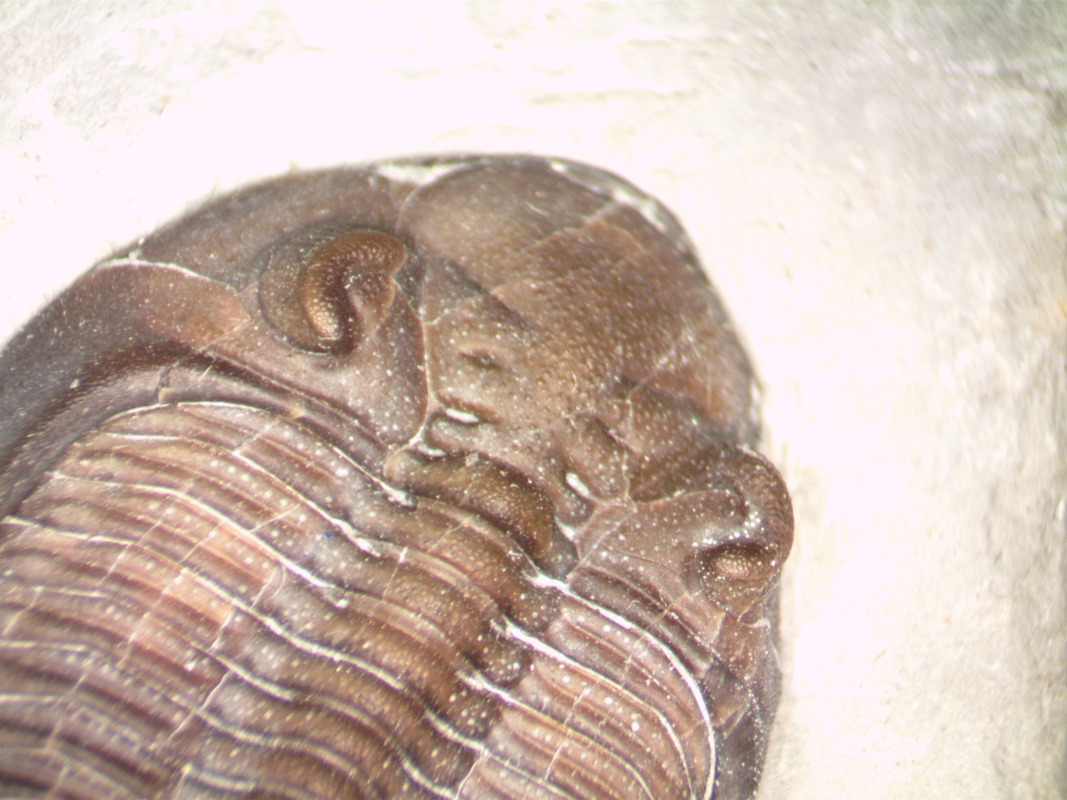 The scope came with camera software, but it was on a CD... and no Apple products come with a CD/DVD drive anymore. It took some sleuthing online to find the software for download. It will take some learning with the software and how to line up the specimens properly for photography. There is a pull-out stop that sends the light up through the camera lens mount, which cuts out light to the left eye piece. What I see through the eye piece is not what shows up on the screen, so some jiggering about is necessary. Pictured here is a fairly nice closeup of a Greenops trilobite that would be about an inch long, of which you can see about a quarter of it here.
This will be very useful for detailed preparation. It would not be useful to get too much closer than 40x-50x for that purpose. All that remains now is to get the blast box, shop vac, and to work on how to vent it outside (maybe through the dryer vent). I anticipate my next blog post here will either be something to do with the fruits of preparation, or in a package of trilobites from Europe from a forum friend - whichever comes first! Hunkering down to keep warm in snowy London, until next time. 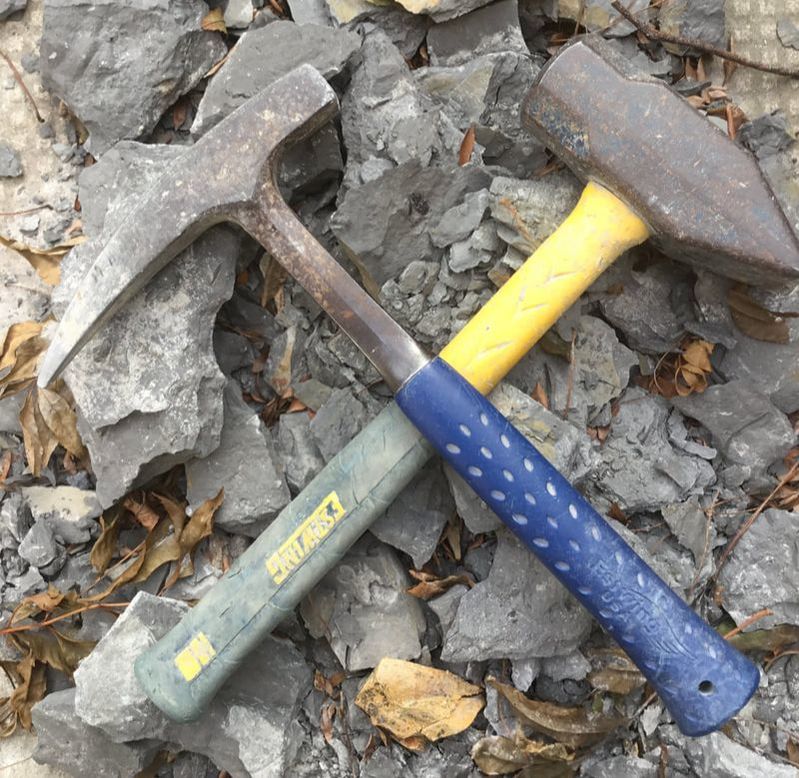 Given the heavy grading work at the backend of this year, and the dodgy weather, I am having to call it on the collecting season. November has been a fairly poor month for collecting: if it wasn't raining (or snowing), the nicer days frustratingly coincided with days I had to be on campus. But as I lay down my trusted tools in my move from labour to refreshment, I can look back on this year having been my absolute best. And, perhaps, much credit is due those reliable tools that have served me so well in breaking through hundreds of tons of rock. Of course, credit is mostly due my lovely partner Deb who not only added thousands of clicks to the car, but for being such an enthusiastic co-collector. This year's trips included: * 2 to Penn Dixie (Devonian) * 2 to Brechin (Ordovician) * 1 to Bowmanville (Ordovician) * 1 to Collingwood area (Ordovician) * 12+ to Arkona (Devonian) * 30+ to my nearby honey hole (Devonian) Many of those trips have reports posted here in the blog. It has also meant meeting plenty of new collecting friends with whom to break rock with. If that were not in itself fantastic, I also got into preparation courtesy of having purchased an air eraser and air scribe. I've upped my game considerably, turning a casual hobby into a true passion. It was not that long ago that I may have made a few short visits to Arkona and in my backyard with little more than a nail hammer and a wood chisel. Now, with the right tools, I carved out hundreds of feet of benches and cracked hundreds of tons of rock. The collection has grown by an order of magnitude. I also purchased or was gifted several delightful pieces this year. Another aspect that has made this a banner year would be a surge of trilobites where 2017 added no fewer than 29 new species, a few of them very rare and not reliably reported in the literature. 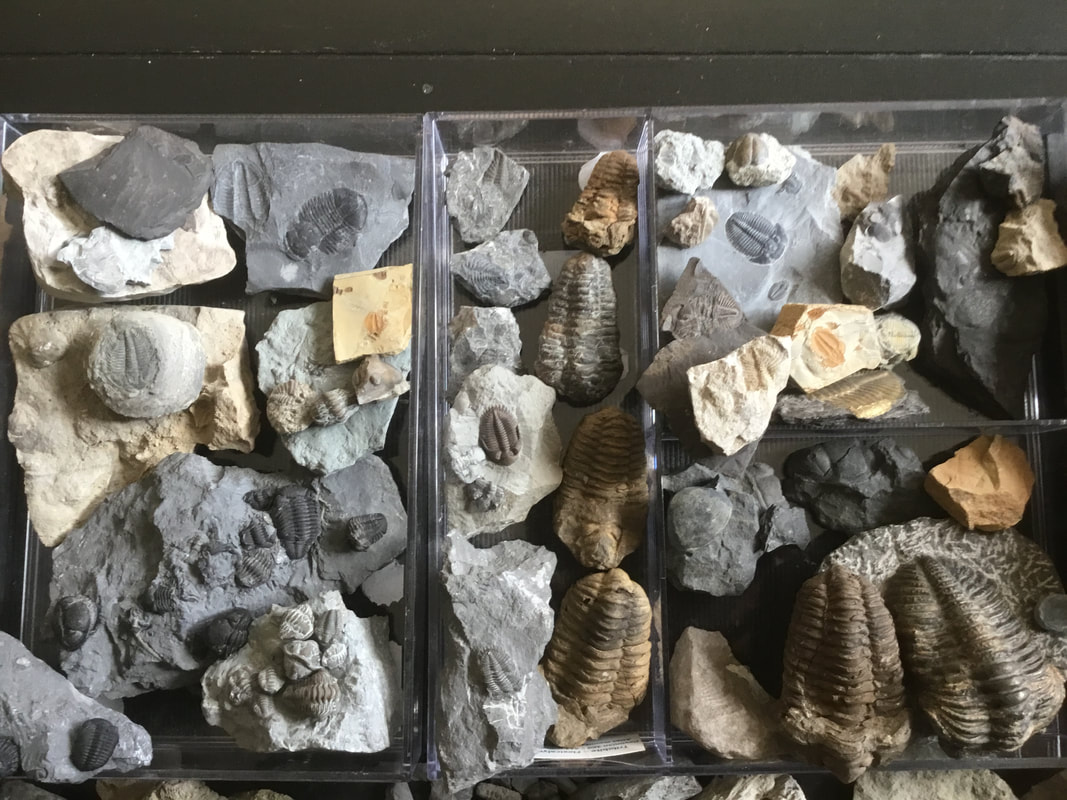 Above is a snapshot of many of the new species in my display. So, last year I made a "best of" post for each category. This year is going to be immensely difficult to make those choices as so many of them are deserving of the honour. But try I must. Best trilobite of the year Despite all the lovely ones I've purchased, received, and found - particularly from the Ordovician - I'm giving the nod to this lovely plate of three full Greenops widderensis. Certainly this species is not new to the collection, but the rarity of finding so many clustered together like this in a difficult matrix makes it worthy. My runners-up would be Mannopyge halli, and Isotelus, Ceraurus, and, well, all the other ones I found!  Honourable mention goes to this beauty, expertly prepped by Malcolm Thornley. Best cephalopod of the year
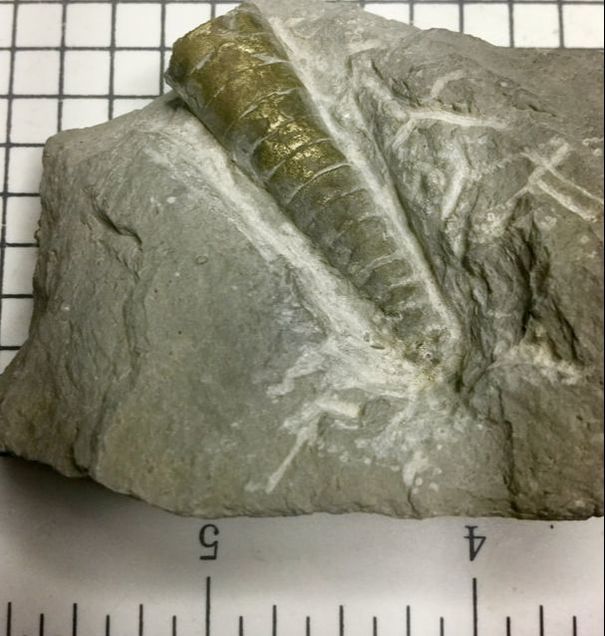
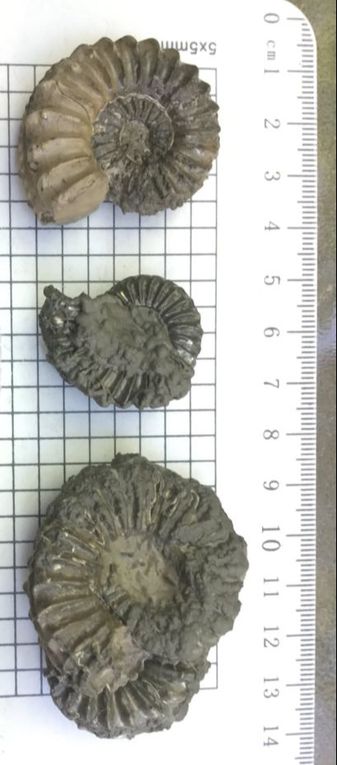
It's a three-way tie. It could have been four if I included the the big nautiloid whoppers I found at Brechin. Clockwise from top left: a lovely Goniatite from Arkona, some lovely Jurassic ammonites from Roger, and an exquisitely pyritized nautiloid from the Widder shale. Best PISCES of the year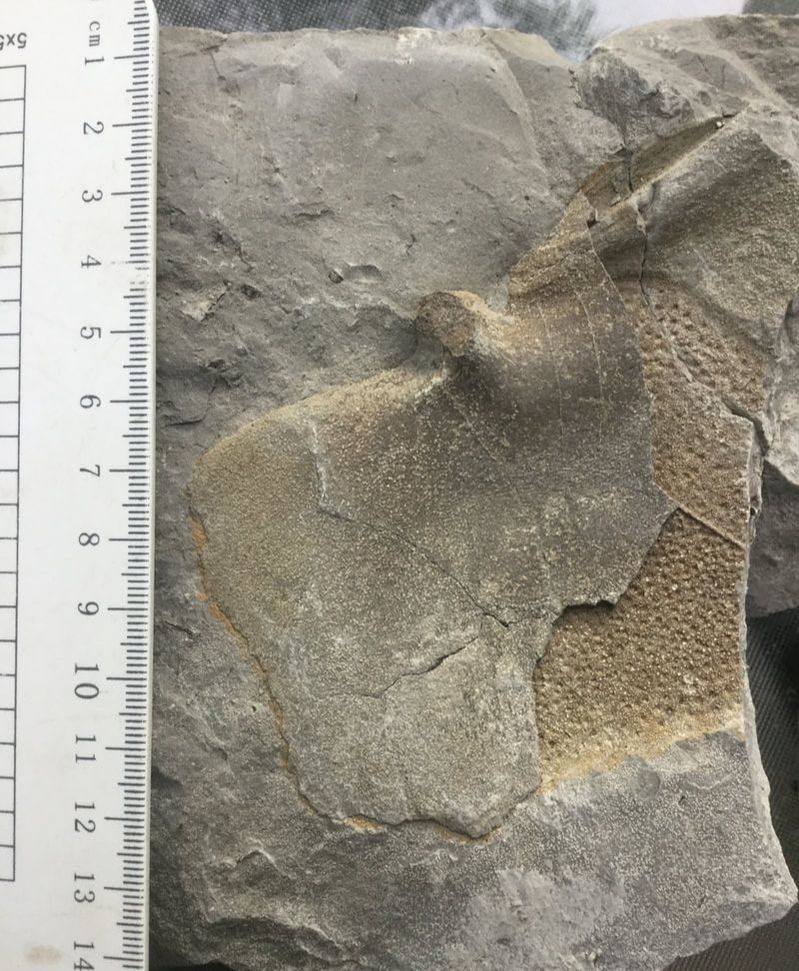 Amidst some cool placoderm pieces, and some really neat Diplurus pieces from Tim, the prize this year goes to Deb and her huge chunk of placoderm armour belonging to Protitanichthys. Best gastropod of the year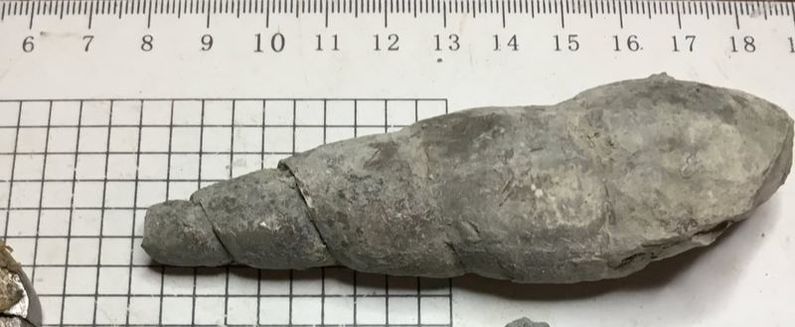 Plenty of contenders this year, including some nicely preserved Platyceras, and some rarer spired gastros from the Verulam Formation, but I'm settling on this long one from the Verulam for its size alone. BEst bryozoan of the year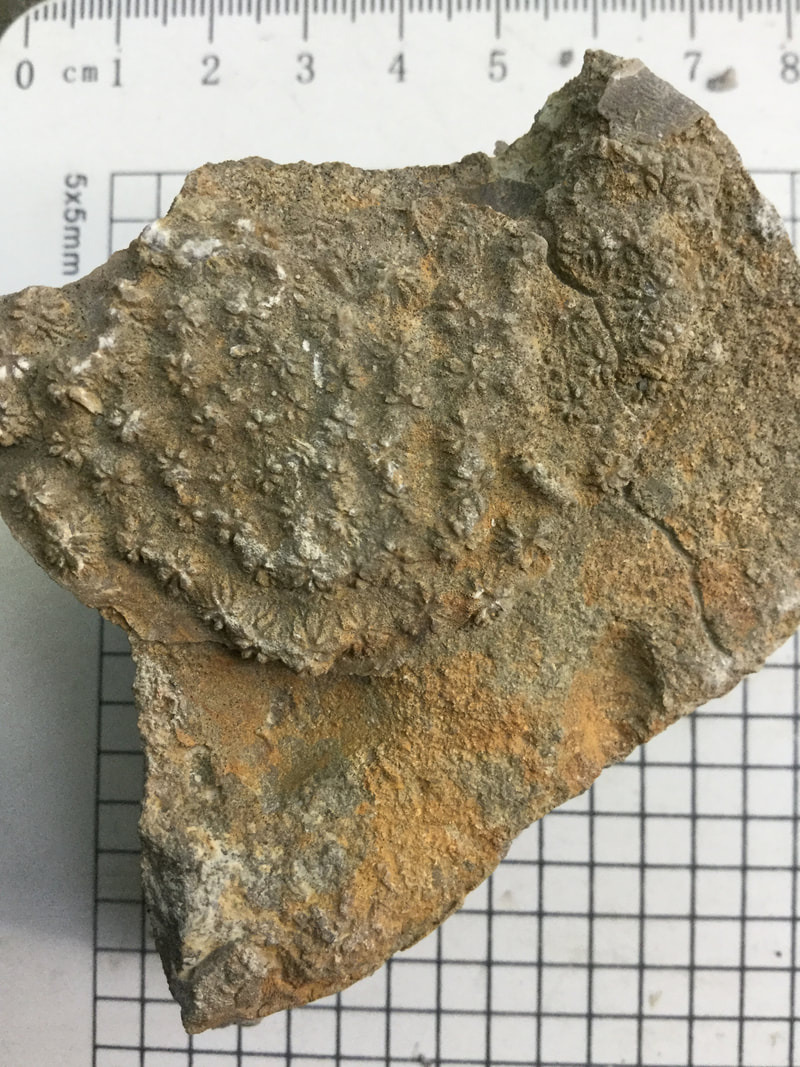 I always pick up interesting looking bryozoans, and this year saw quite a few. However, hands down, this Constellaria from the Verulam Fm will take the prize if only on account of its exceptional rarity in that formation. Best ichnofossil of the year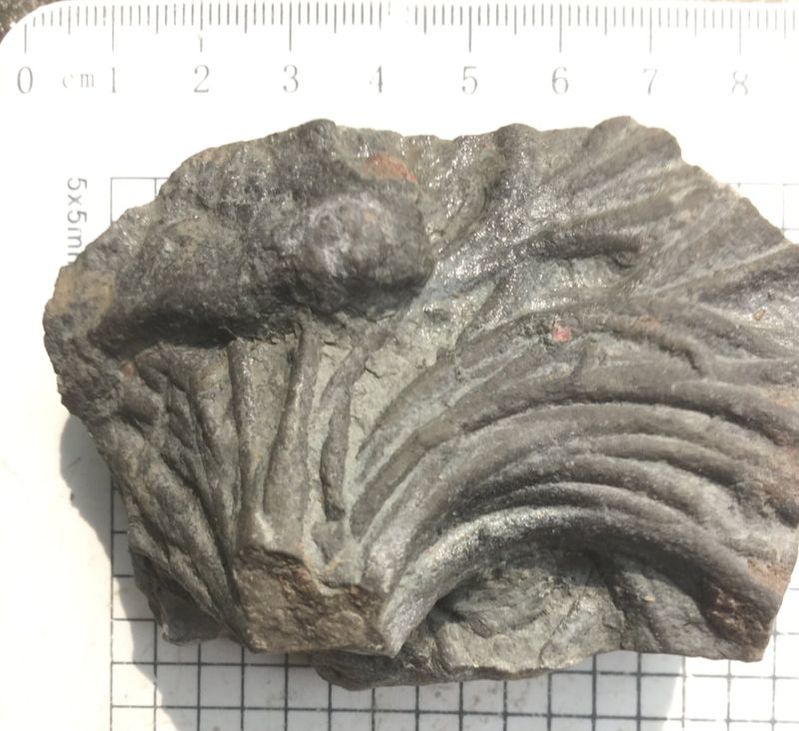 I don't really get jazzed about ichnofossils, but this broom-headed one was so worth picking up that even Deb found one on our second trip to Brechin. This one is Phycodes ottawensis, and these are formed by worms burrowing from the same spot repeatedly taking different pathways in the muck. best phyllocarid of the year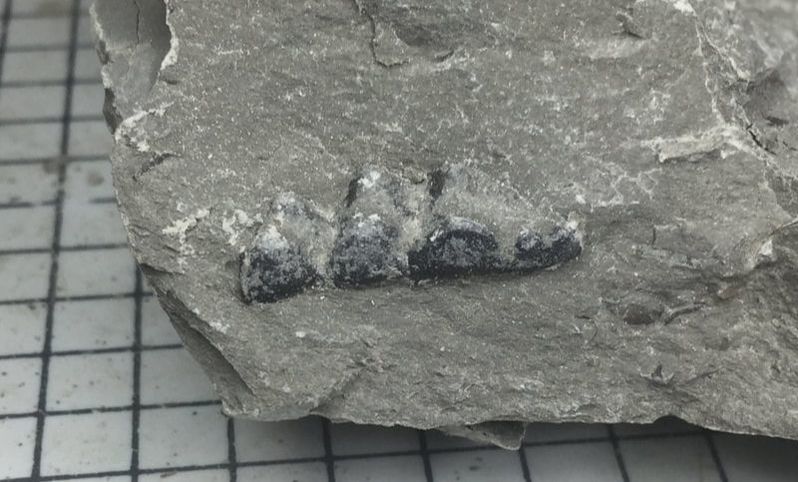 Another fantastic find by Deb at Arkona, a thick phyllocarid jaw. This would be our first. best brachiopod of the year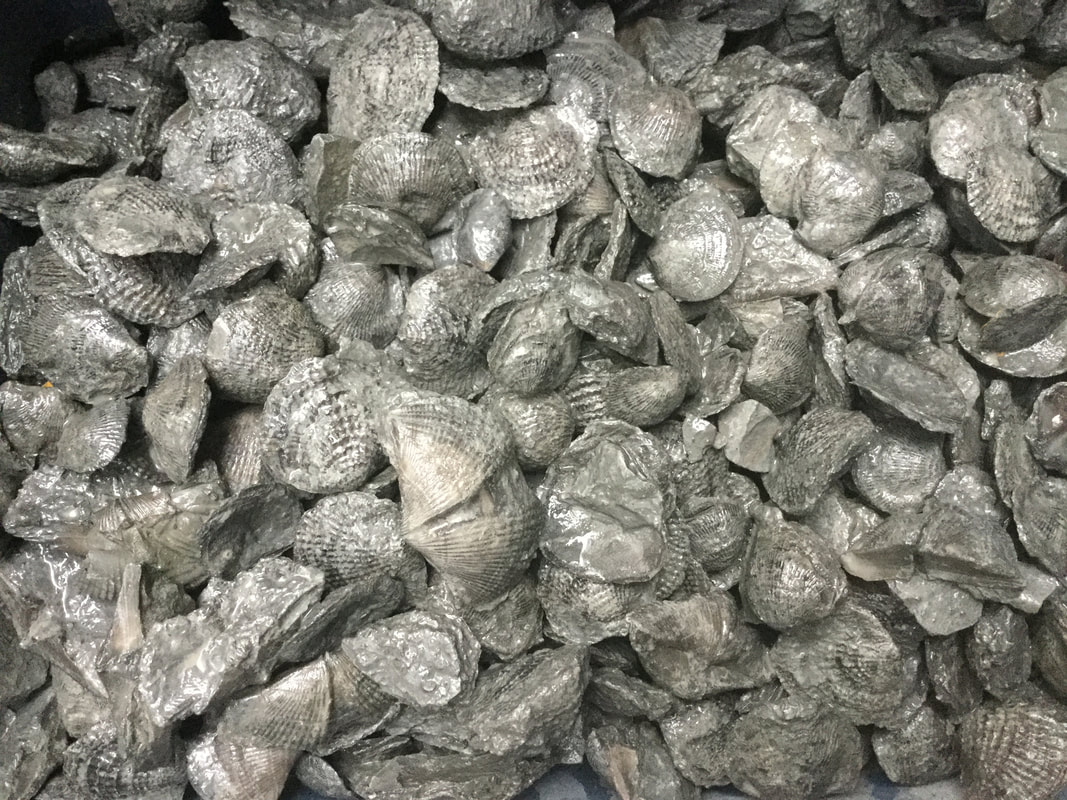 No point making a decision. I've pulled quite a few nice brachs this year, but this smorgasbord of about 1,000 intact ones spanning 6 species from Penn Dixie will have to be the winner this year. I'm begging off the best coral of the year, and a few other categories. I can say the fossil I collected that came from the farthest distance from home would be the Cretaceous oysters and sundry bits from Magoita Beach in Portugal. But this year would not have been anywhere near as spectacular if it weren't for the people whose time, company, and generousity truly made it shine. Apart from Deb, I can certainly add to the roster of great fossil companions, Tim J., Malcolm T., Roger F., Jay W., Kevin B., Kevin K., Jason R., Ralph J., Marc H., Ron B., and others I may have neglected to mention. Best year ever! And thanks to the visitors to this blog for reading. Perhaps more posts will be in the offing as winter time means being holed up indoors and engaging in some prep. UPDATE: Malcolm just showed me a few bugs of mine and Deb's that he prepped. A true master. The left one is Ceraurus and the right one is a Greenops.
I was tinkering around this rainy autumn morning at the prep bench. After finding and preparing that lovely pair of Greenops I found at Arkona (report here), I figured there wasn't much else to do with it. Aesthetically, it would have been nice if I could safely trim the rock down as the pair are clustered at one end of a larger slab. So, I figured I'd play around with exploring the rest of the rock, seeing if there was anything else on the bedding plane. While I was doing that, the rock broke at the far end. Fortunately, the pair of trilobites were unaffected as the split happened at the opposite end of the rock. But it was then that I spied the impression of a third Greenops! 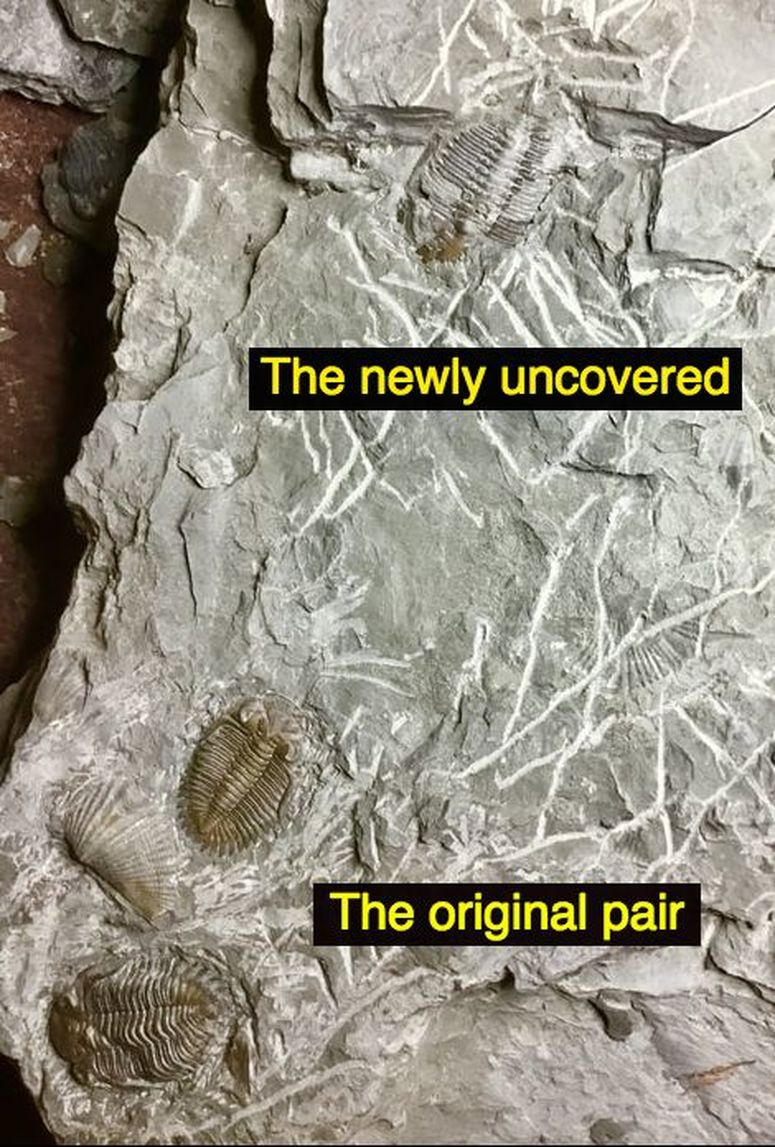 The first task was to glue the rock back as it had split across the contact point between the cephalon and the thorax. You can barely see the crack now, and it seems well stabilized. Once the glue dried, it was time to uncover a bit more. 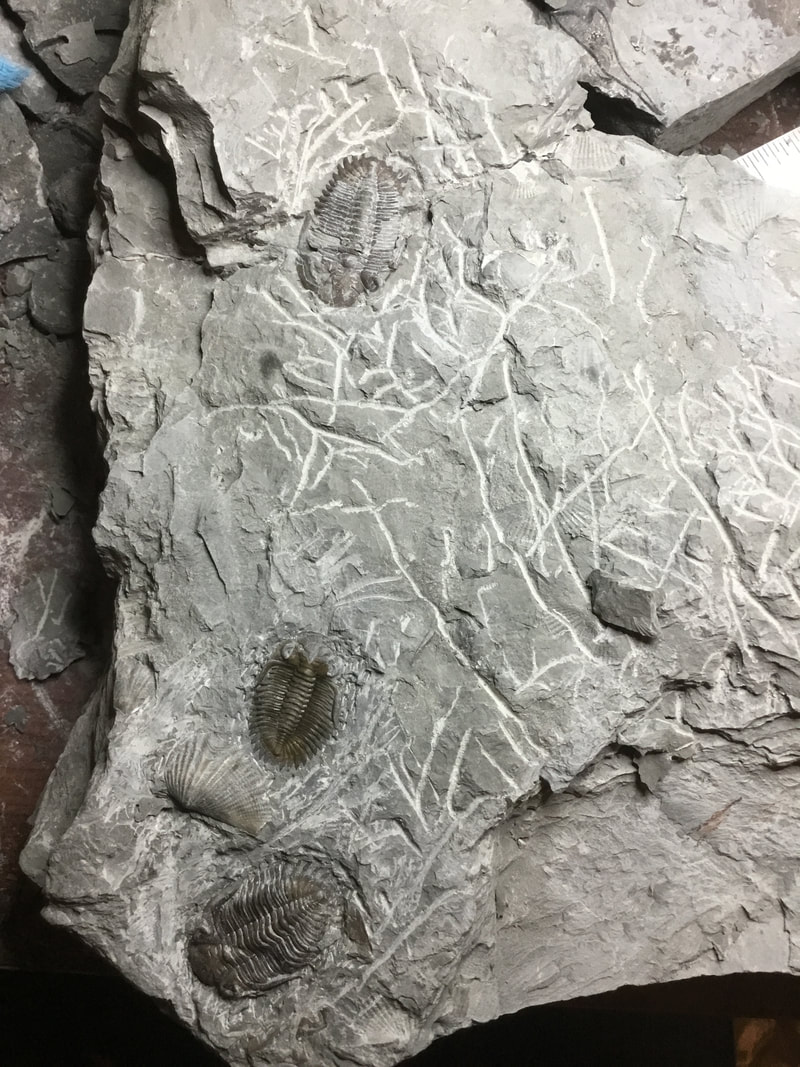 The pygidial spines were uncovered, and they seem to be in good shape. 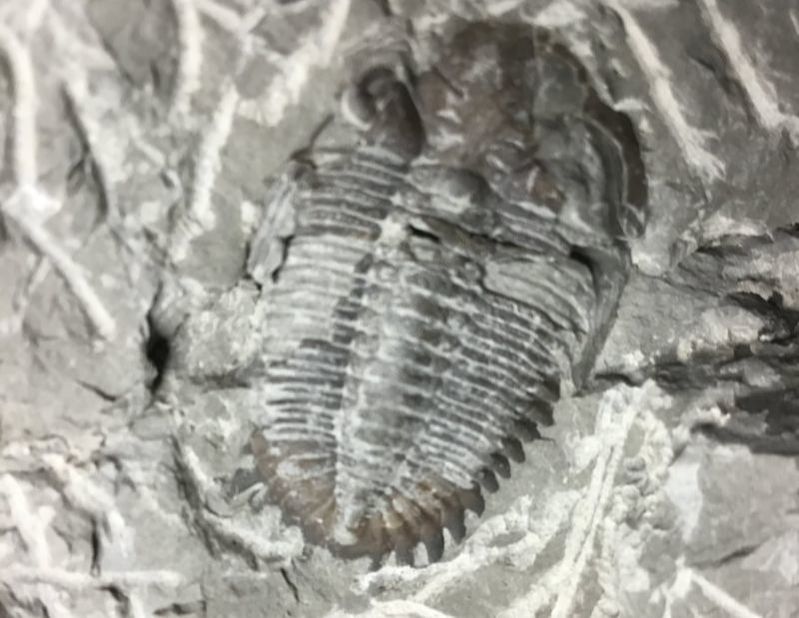 A close-up. There is some significant damage on this one. I've flipped the image to show the trilobite right side up. The right side is missing a piece of its cephalon, the eye, and the genal spine. Also, there are two missing segments on the right side of the thorax. The left is also in rough shape. I'm not sure if the genal spine is intact, and it is missing portions of at least five ribs on its thorax. So what is next? I'm going to have to learn how to do restoration, using grafting of pieces from some of my spare partials that I've collected in the past. For that I am going to need a good mix of glue, magnification, and patience. I'll update this post when I can get around to performing this surgical task! UPDATE: As I was poking around a bit more, a nautiloid joined the party. It came flaking off, so I had to glue him back down. 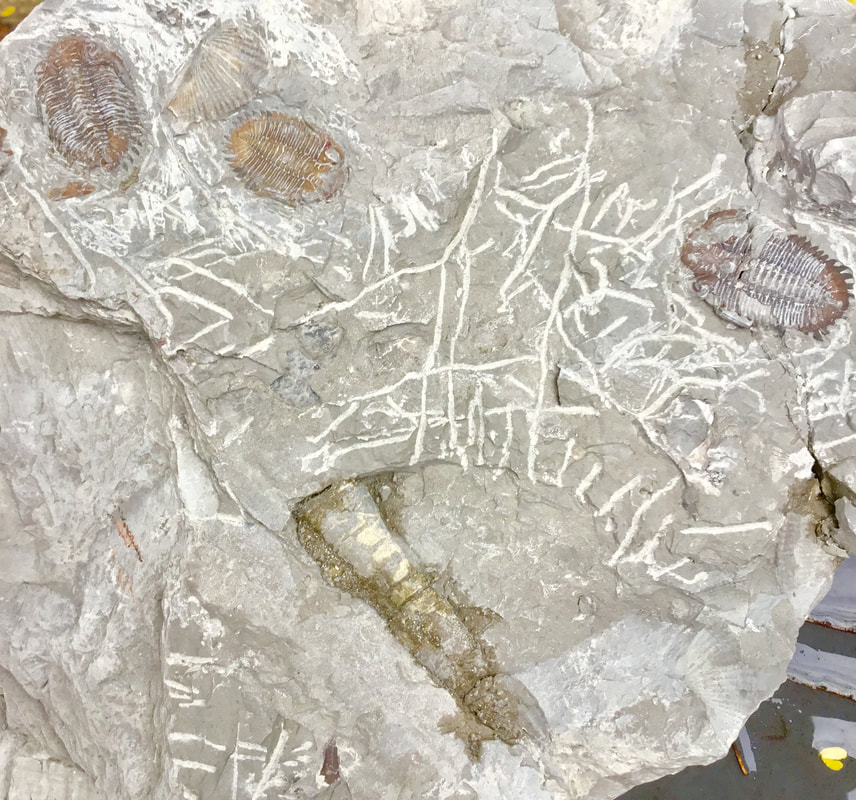 I also had some time to prepare an Eldredgeops rana roller I found at Penn Dixie earlier this month. 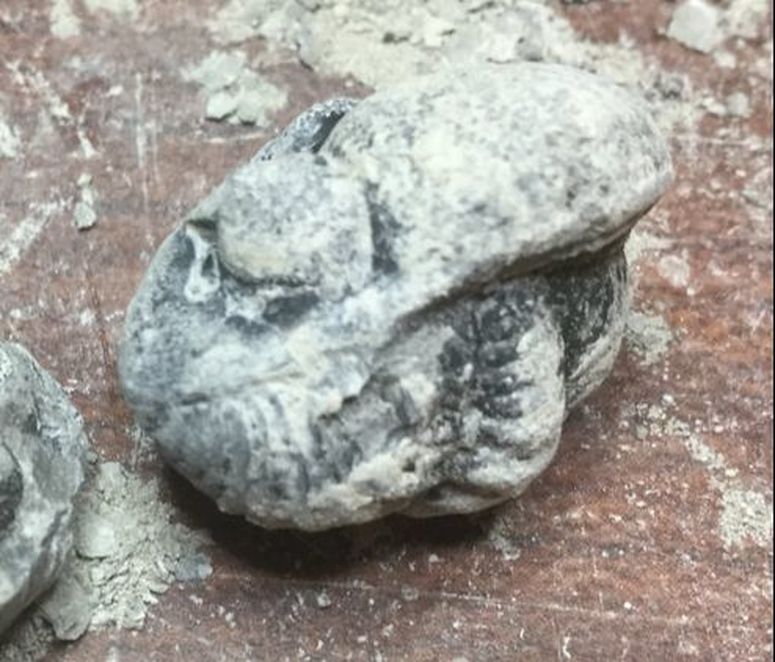 Once I pried it out of the matrix, here it is in all its dusty, caked glory. This won't be simply a good scrubbing, but will take a mix of needles, air abrasion, and a special solution for softening the tough and stubborn matrix. So I used the Paasche air eraser at 20-30 PSI, using 40 micron dolomite, for about 30 minutes. That, and other finishing touches, this one is nearly flawless. Have a look at the detailed pictures below: 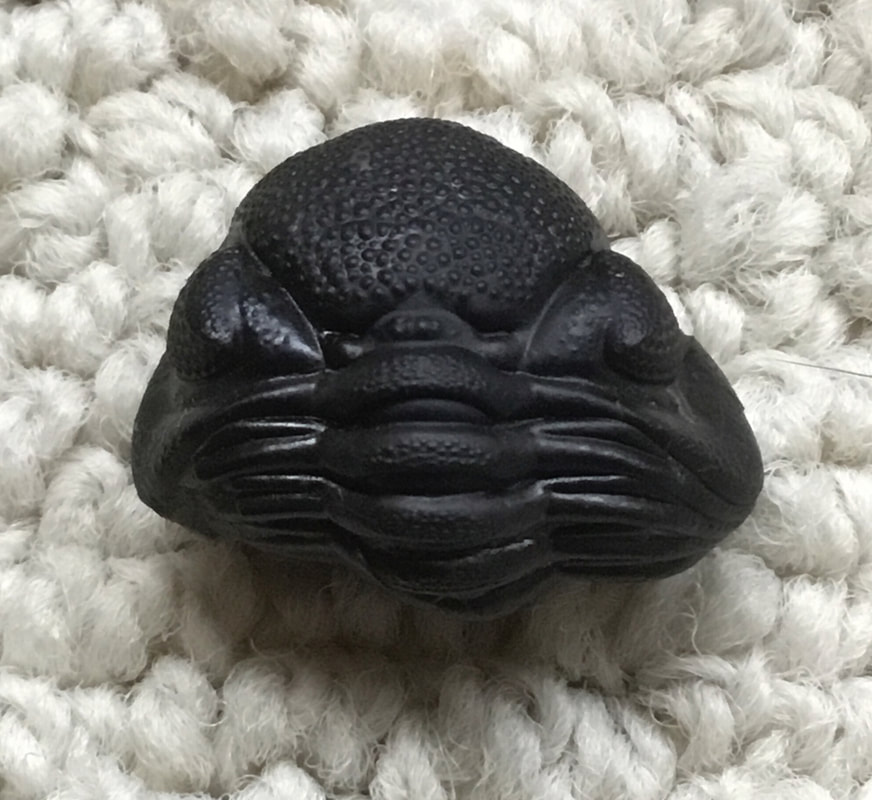 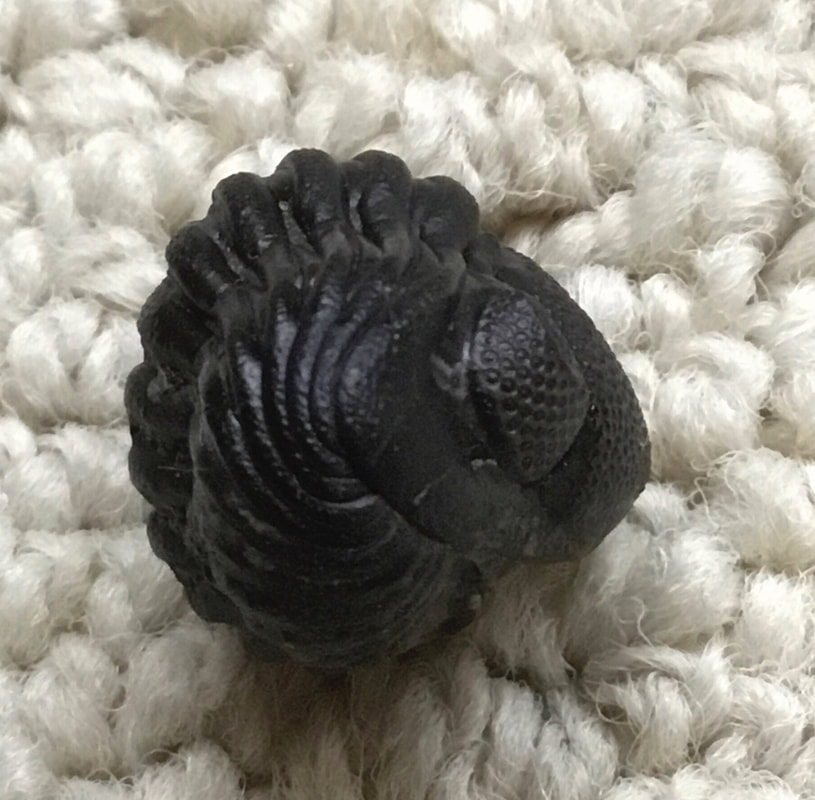 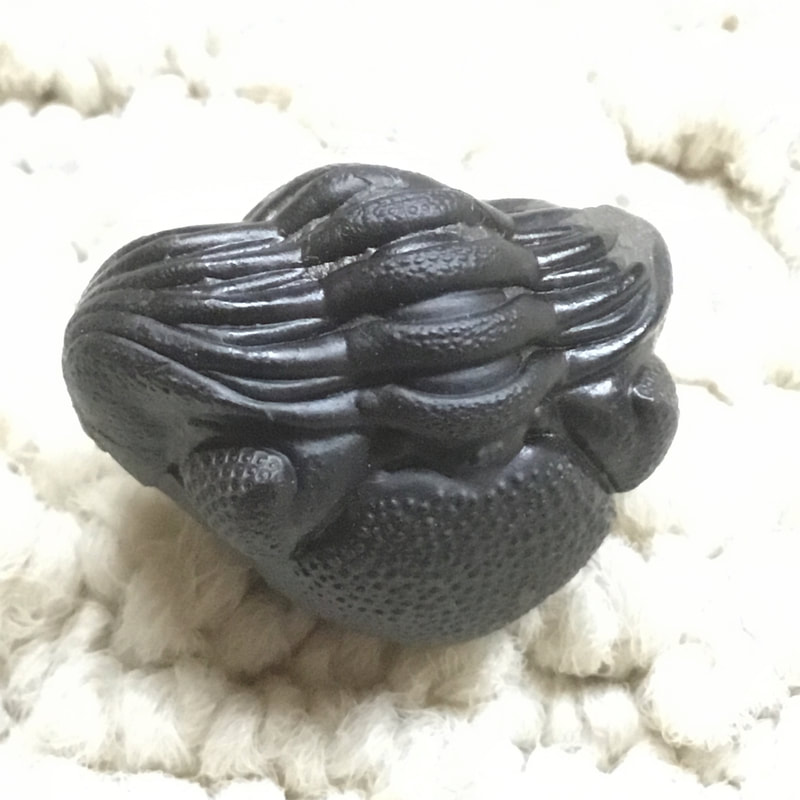 |
Kane Faucher
Archives
February 2024
|


 RSS Feed