|
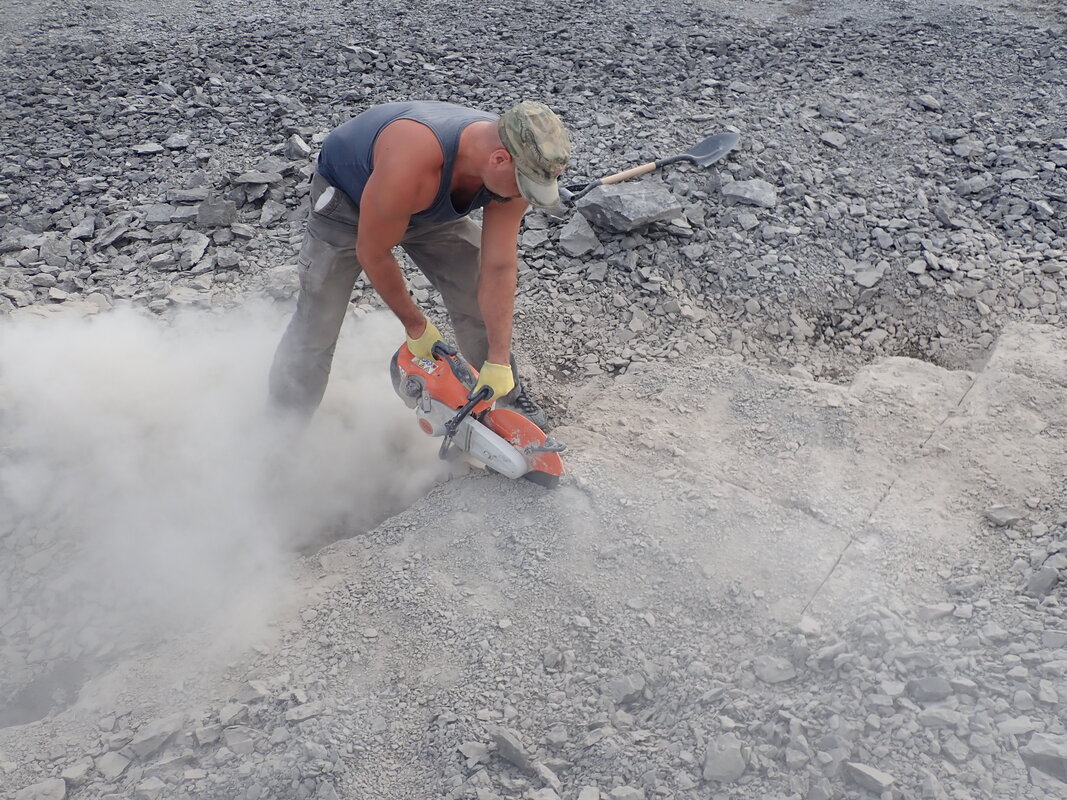
I haven't really gone anywhere since the big field trip. Instead, it has been more at-home activities. I finally went through my trip finds and can show the "safer" items, although they are not spectacular. So, this entry will include trip finds, trip gear, a book, and prep. 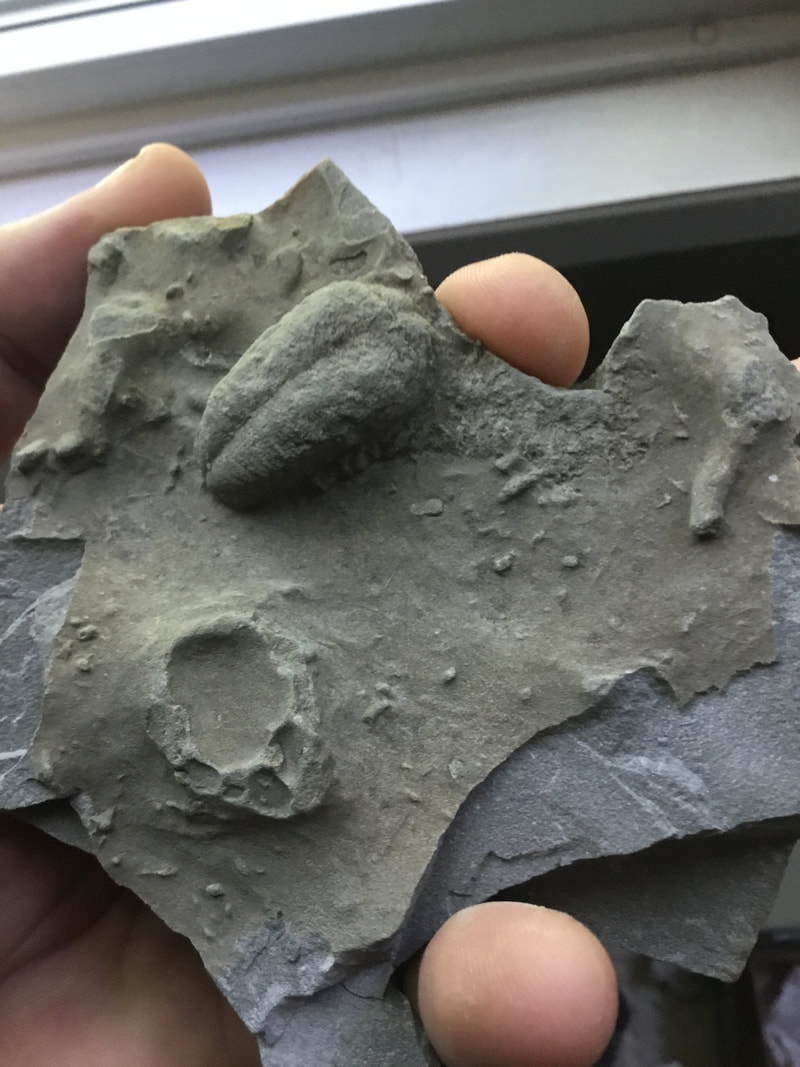 
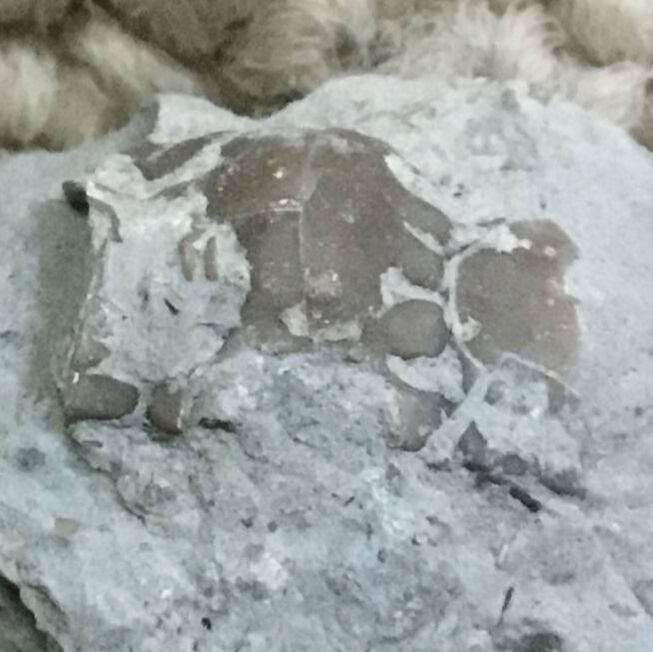
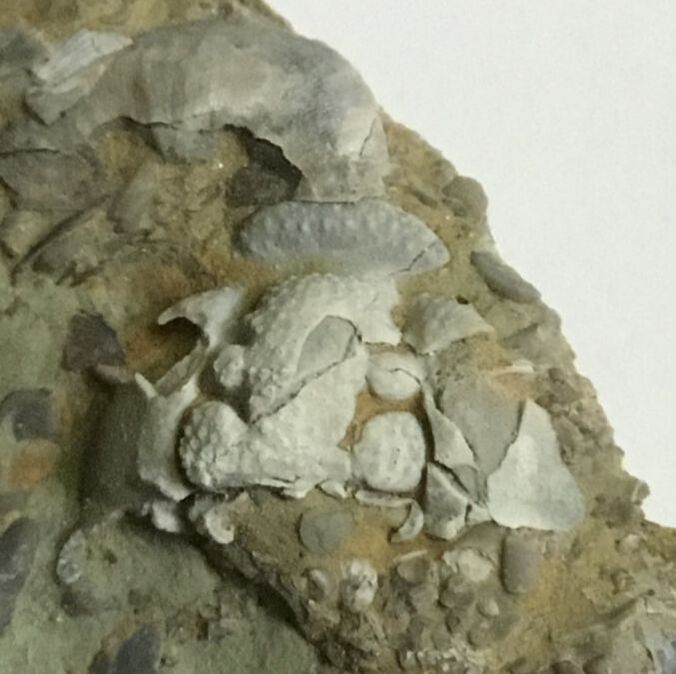
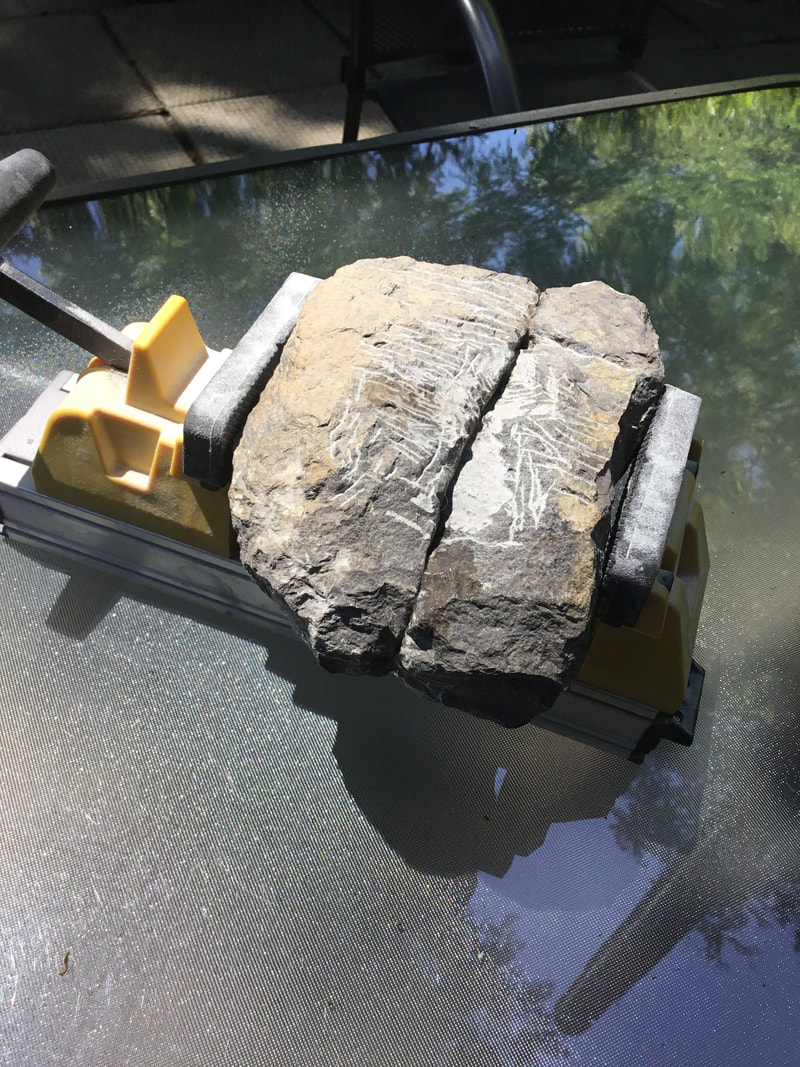
The top image is a Rusophycus from the Georgian Bay Formation. There are several intervals within the formation where there are just trace fossils, and this was one of them. As opposed to the more vermiculating sorts of traces, we can at least identify who made this one on account of the bilobate appearance. Also from the GBF was this hash of Isotelus maximus -- another new one for me, at least on account of my not having as much ready access to this formation as those who live near "Turrawnah." The long genal is nice, but I'd chuck it in the garden if I could find a much more complete, diagnostic piece. The bottom two are just fragmentary cranidia of a Ceraurinus marginatus (a new one for me; and note the four lined up glabellar lobes), and a Flexicalymene croneisi that I picked up only because of its bone white appearance. Both of these appear in the Cobourg Formation. I also bumped into a Flexicalymene granulosa bit in the Georgian Bay Fm, but it wasn't worth the hassle to break down the block. In the Cobourg outcrop, tons of Isotelus "mafritzae," Ceraurus sp., Thaleops sp. / Nanillaenus (I don't want to get dragged into that debate!), some Pseudogygites latimarginatus. Keep in mind that all of these were just fragments in a very high energy environment. 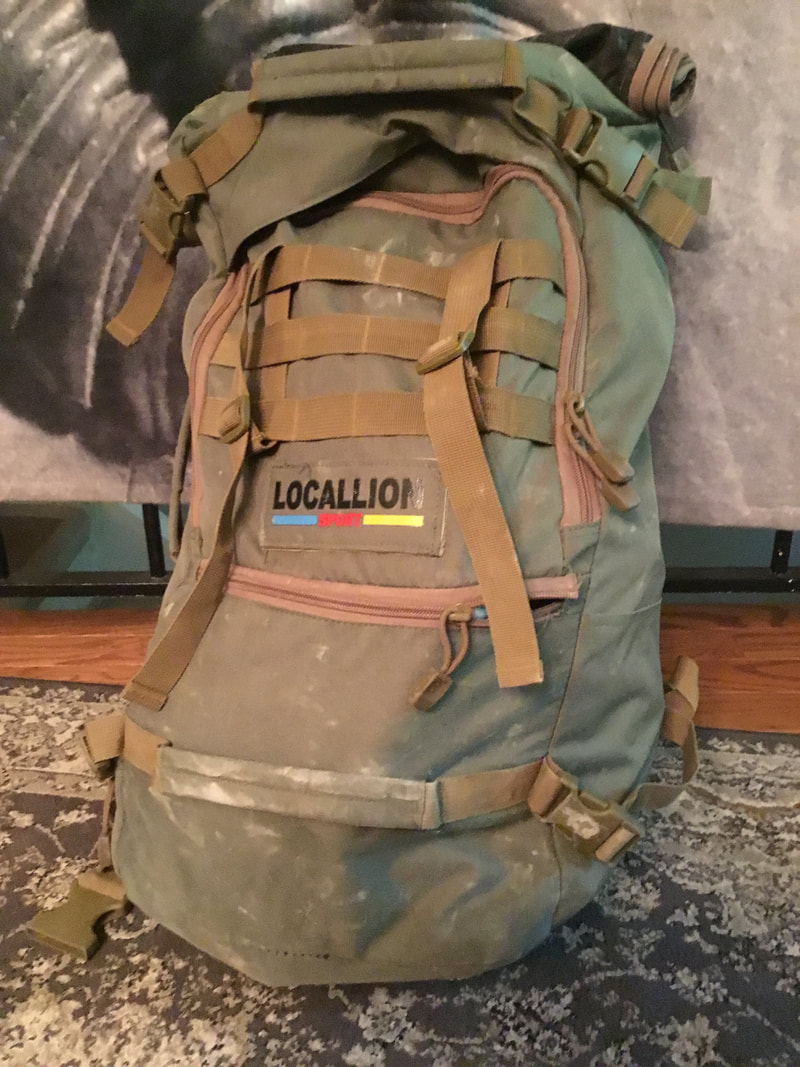 This tactical field backpack that I ordered back in mid-April finally made its way by boat from China just a few days before my big trip. Nice timing. Tons of pockets and good capacity (50 litres), but I may only get a year out of it just like my last field pack. Just from one trip, a small tear and a pooched zipper. It would be nice to find a proper, well-made canvas backpack rather than have to plunk down 100-150 bucks each year for these disposables. Old man grumble, grumble. 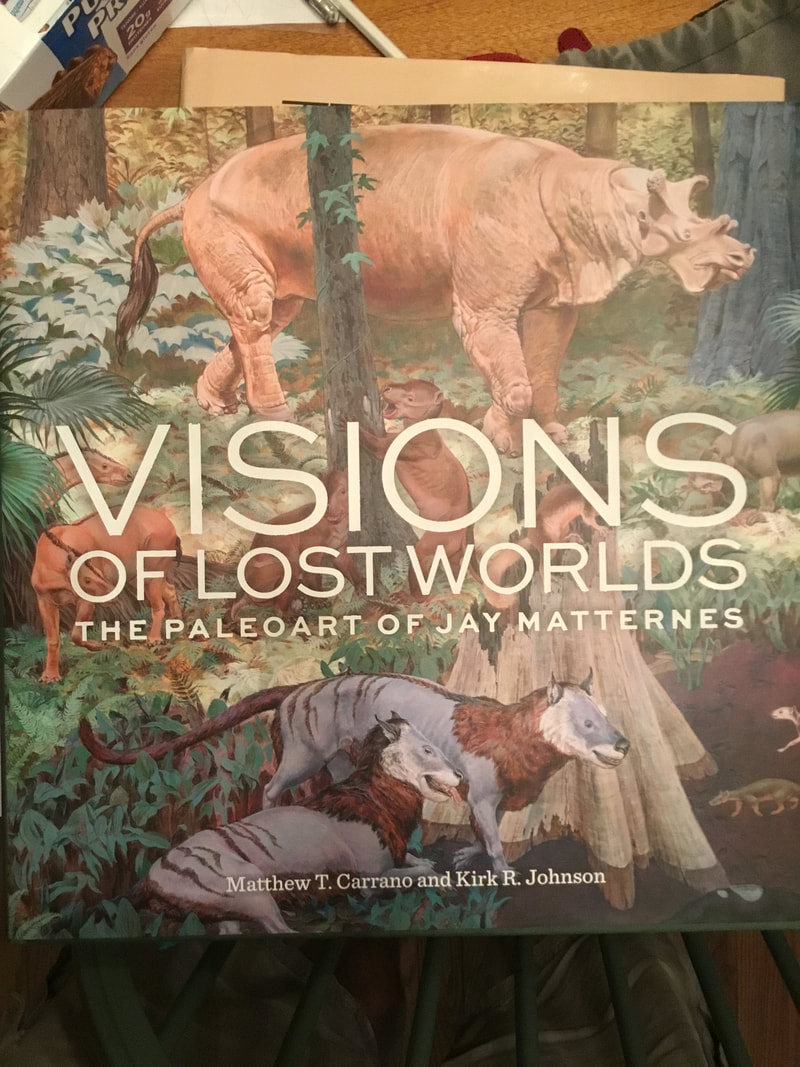 How about a book? I've been seeding my paleo library as of late with physical books as opposed to just relying on digital copies -- which are fine for in the field as reference, or a commute, but having a book is something special. I'm a bit of a bibliophile as my many rooms of bookshelves attest! This one was a special purchase. I've been a fan of Jay Matternes' paleo-art since I was a kid looking at the photos of his classic Smithsonian murals of the Cenozoic in the Time-Life book, North America. I get lost in dioramas and murals like that.
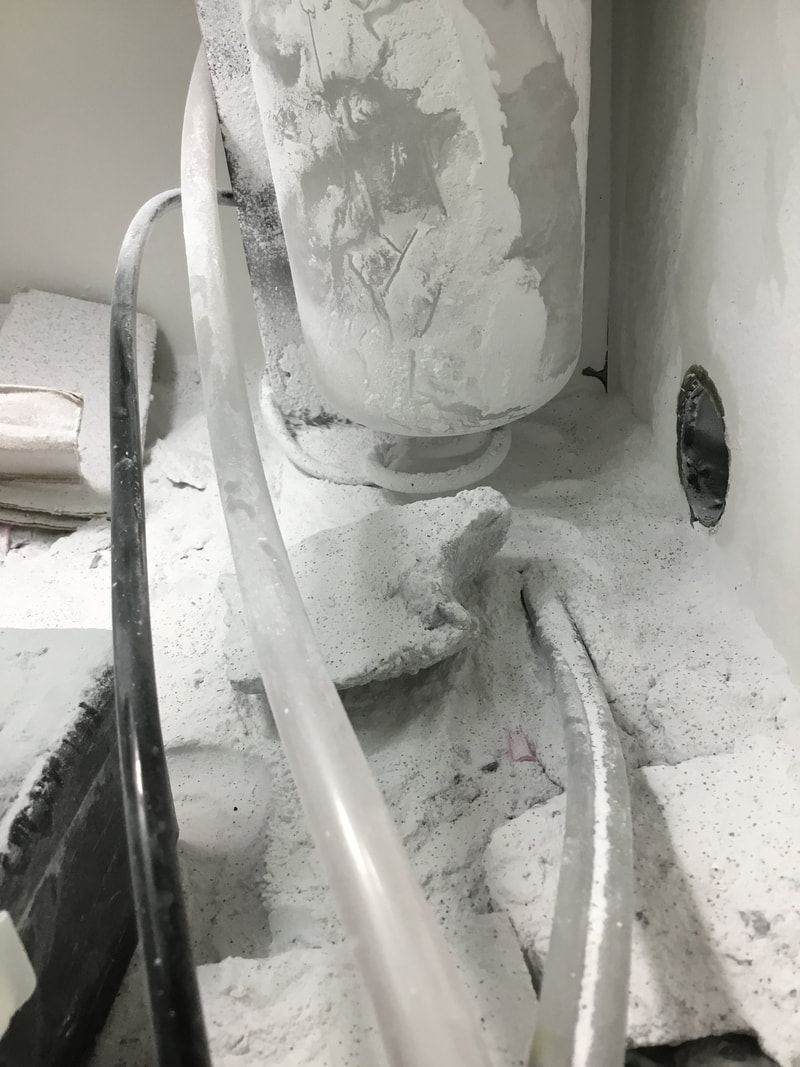
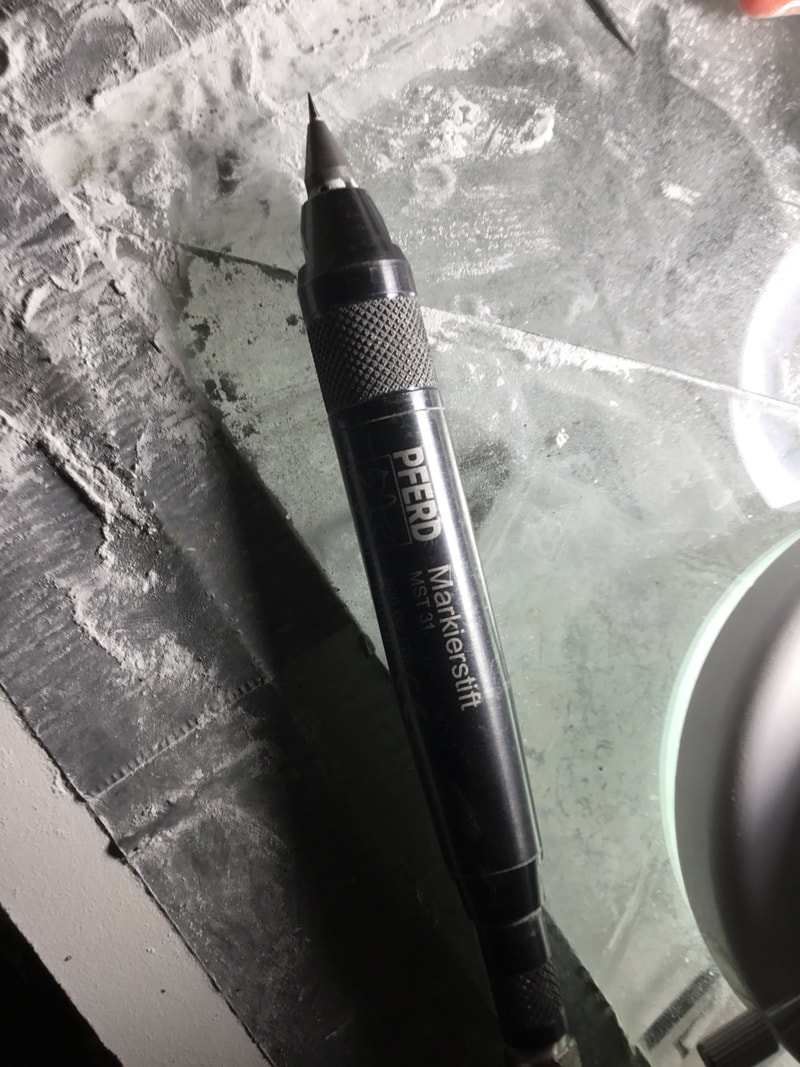
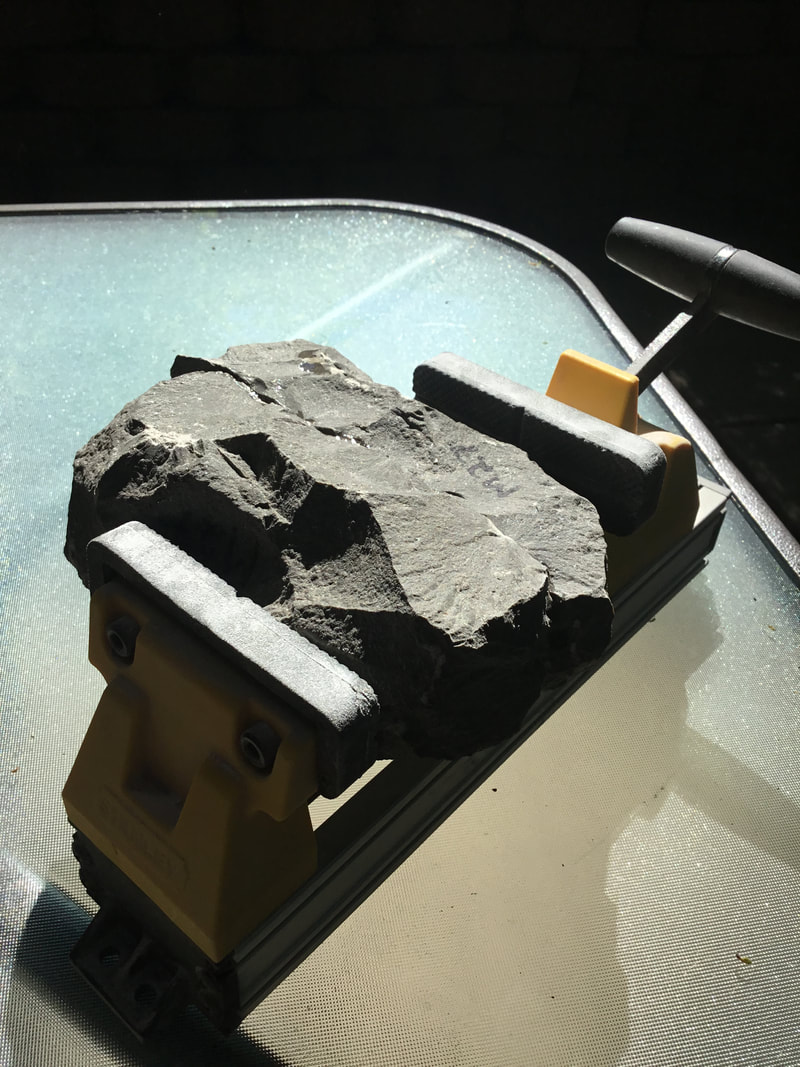
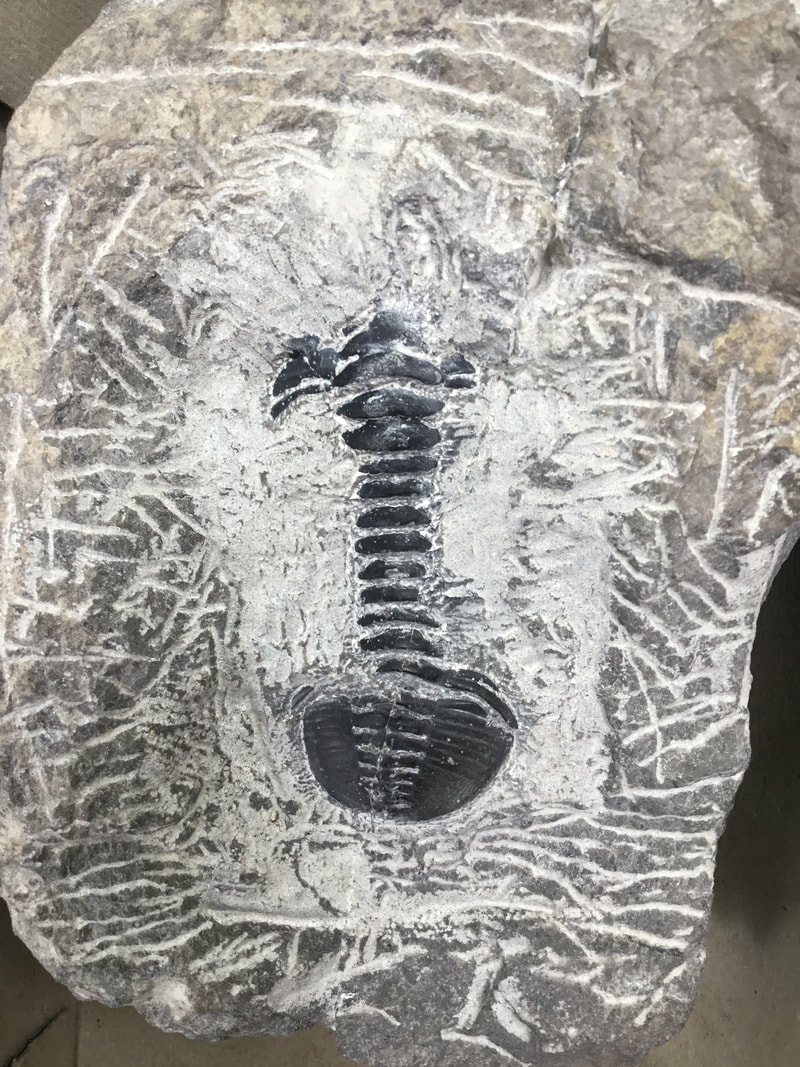
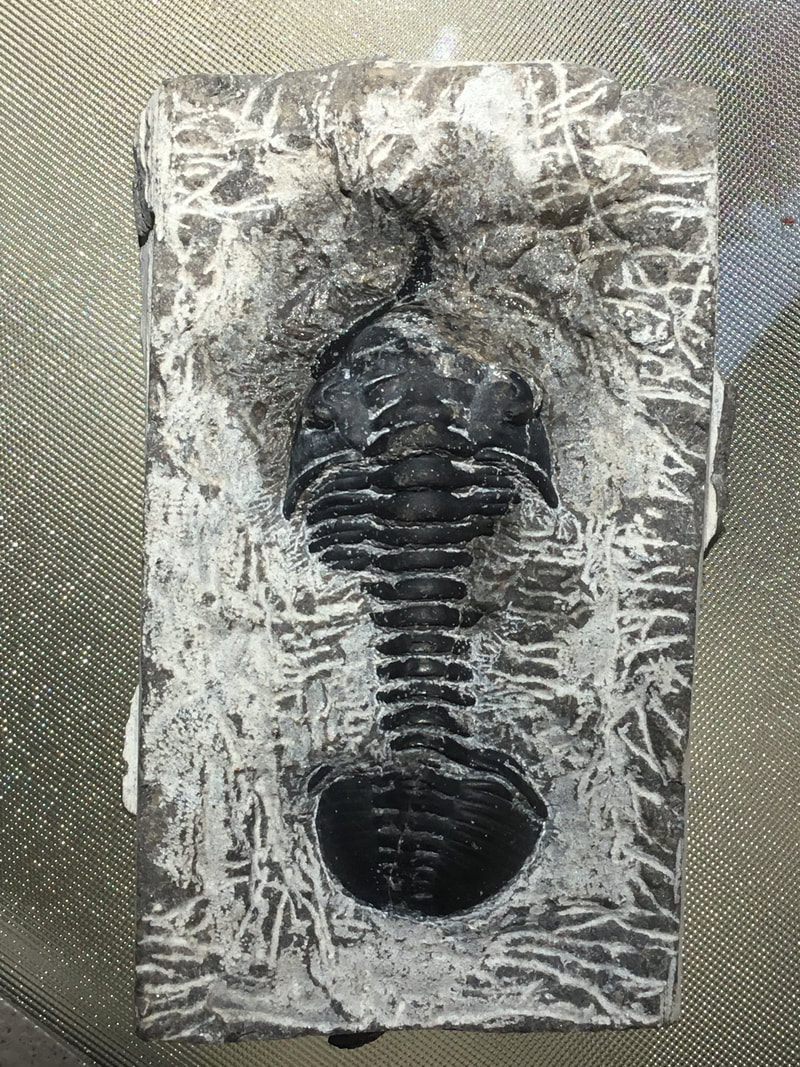
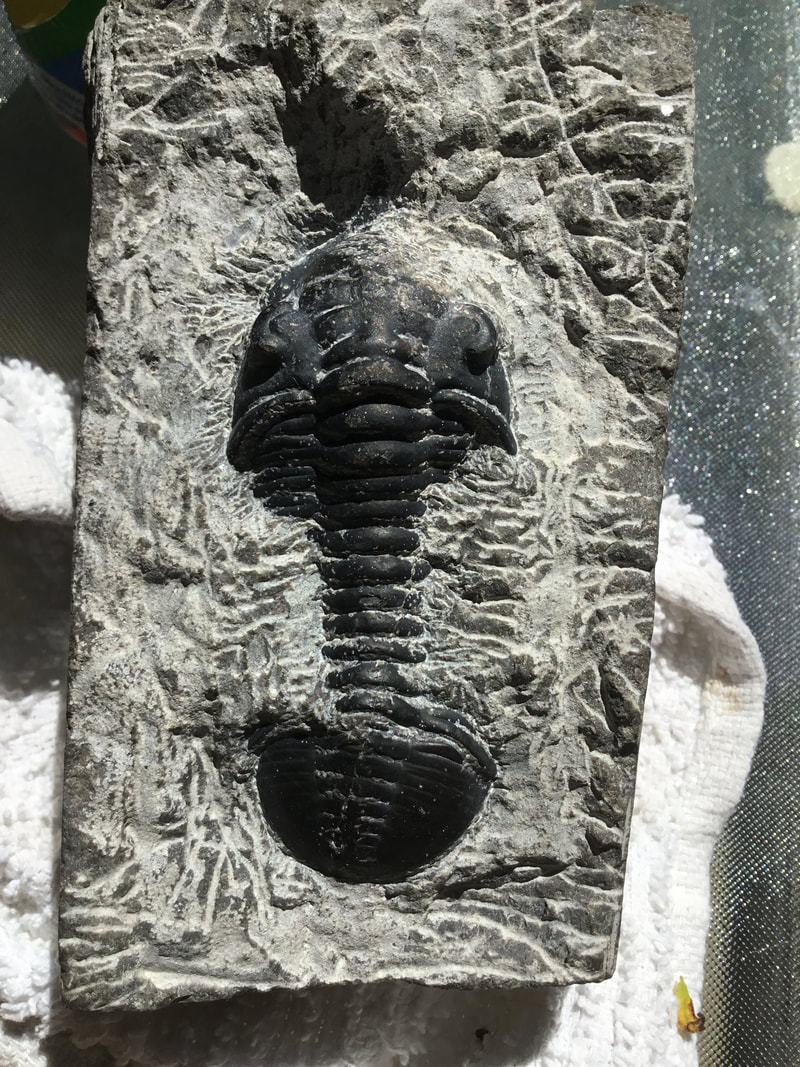
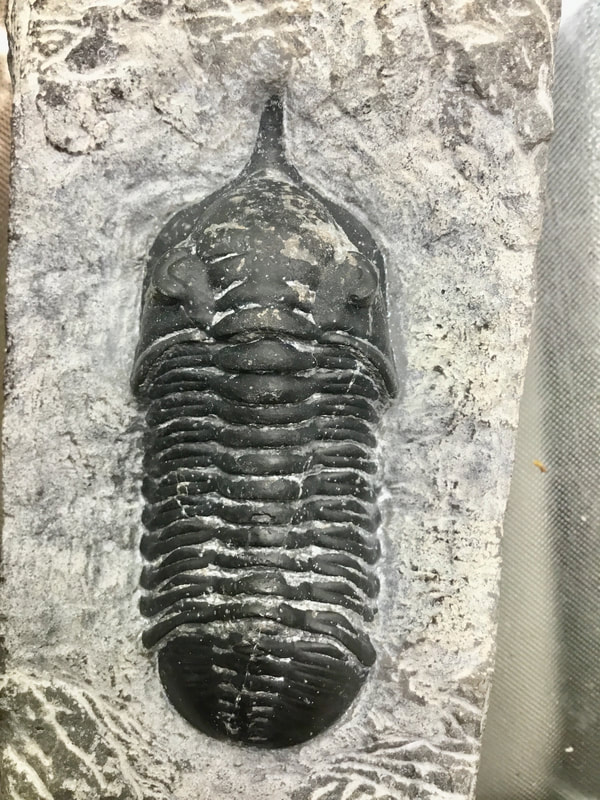
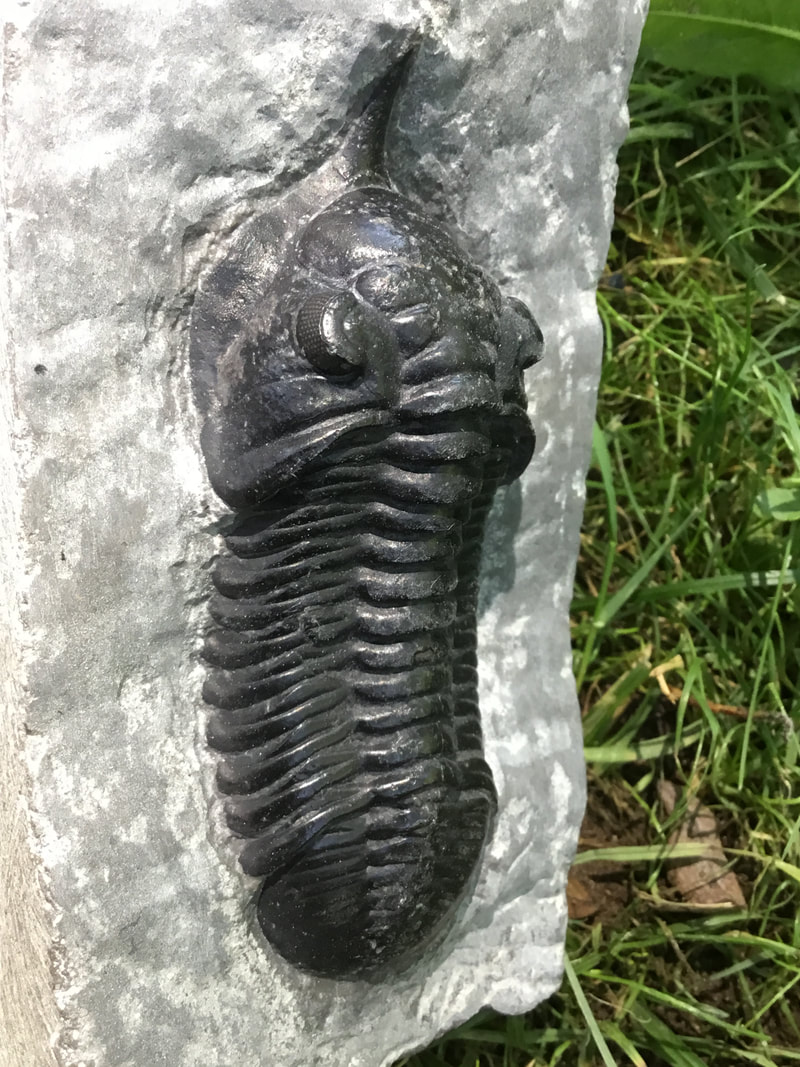
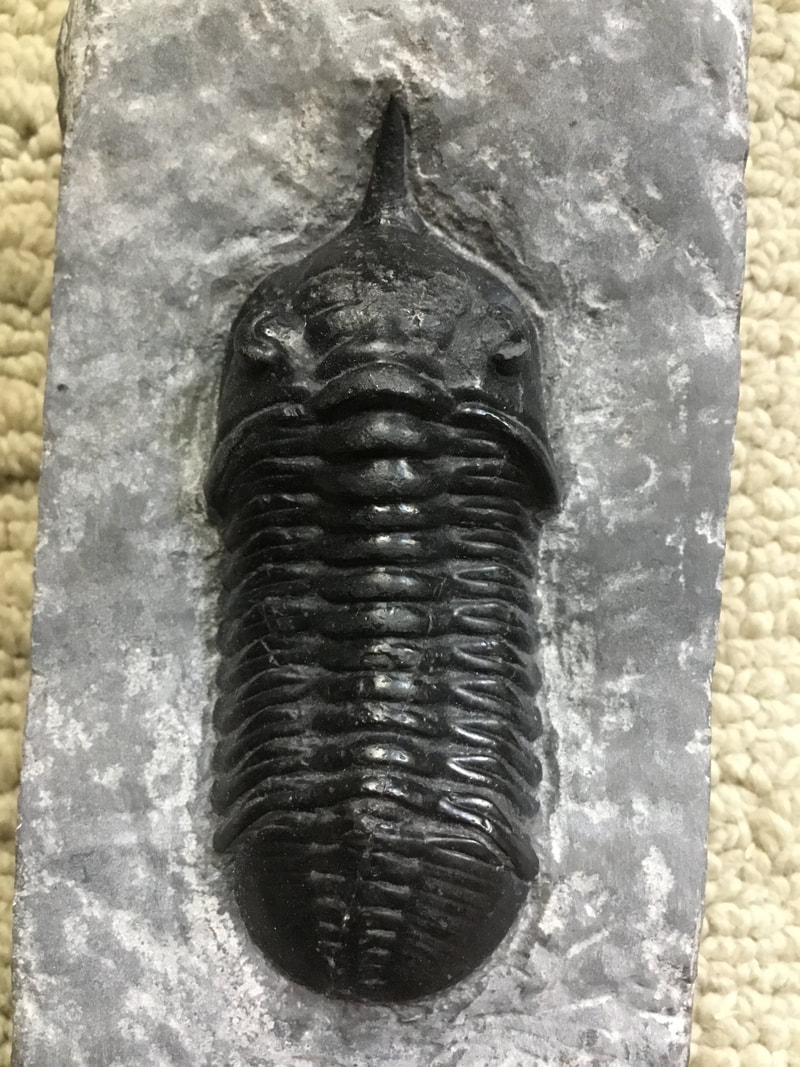
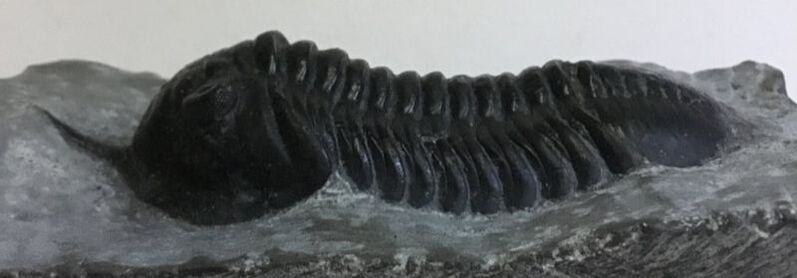
New tools for the lab. Pardon the dusty photo on the left, but I didn't feel like opening up the blast box to snap a pic of the Vaniman. So far, it works far better than a Paasche for air abrasion, with good flow. And, rather than push down on a button to fire, I operate it with a pedal. On the right is a very splendid scribe indeed: the German-engineered Pferd MST. It puts most other companies to shame. This thing is a precision tool for detailing, so not for bulk matrix removal. 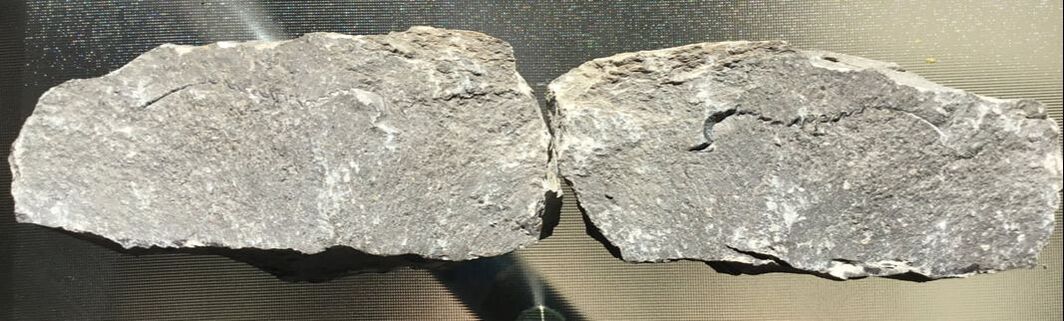 Good timing, too, as my good friend and field comrade put this in my hands just as our trip was over. The next day, the new tools arrived. So, what do we have here? This is a Morocconites malladoides, and like most Devonian bugs from Morocco, it is discovered by breaking very hard rock and revealing a trace line of shell. The matrix can be incredibly hard, and even a trilobite with a relatively simple body plan like this is going to take time. If an Eldredgeops rana from Penn Dixie takes at most an hour to prep, the equivalent phacopid in Moroccan matrix will be about 50+ hours.
This one took me about 70 hours spread out over a week. I could have trimmed about 10-15 hours if I had a better functioning mid-scribe between the ME-9100 and the Pferd. So, the process... As the bug is about an inch or so down into the rock, I scribed to the highest point where the bug's shell would be (in this case, the pygidium). I then scribed guidelines. This is using the ME-9100 as this is tough matrix. Then, ensure both halves are clean of all dust/debris, using a brush, let dry, and then glue the halves together with cyanoacrylate. Clamp together for a bit, and then wick more cyanoacrylate all around the crack. Clamp again and leave to cure for about a day.
So begins the long scribal work. I first trace from the pygidium across the axis to the cephalon and eventually reveal the median spine (take care here because it curves upward on most specimens -- so don't plane across!). I switched constantly between the ME-9100, Pferd, Aro clone, and the Vaniman. The crack runs from the midpoint of the pygidium in northeast direction taking a bit of the right eye with it. I managed to get the eyes perfect regardless. Early in the process, once I had a good sense of the bug's size and orientation, I took the angle grinder and lopped off the excess area to make it a bit easier to move around in the blast box. The Pferd got put through its paces on this one. Some areas were so encrusted with sticky calcite that abrasion was not an option. This meant very patient kiss-scribing by the micrometre under the microscope. In fact, I do all my prep under the scope anyway. 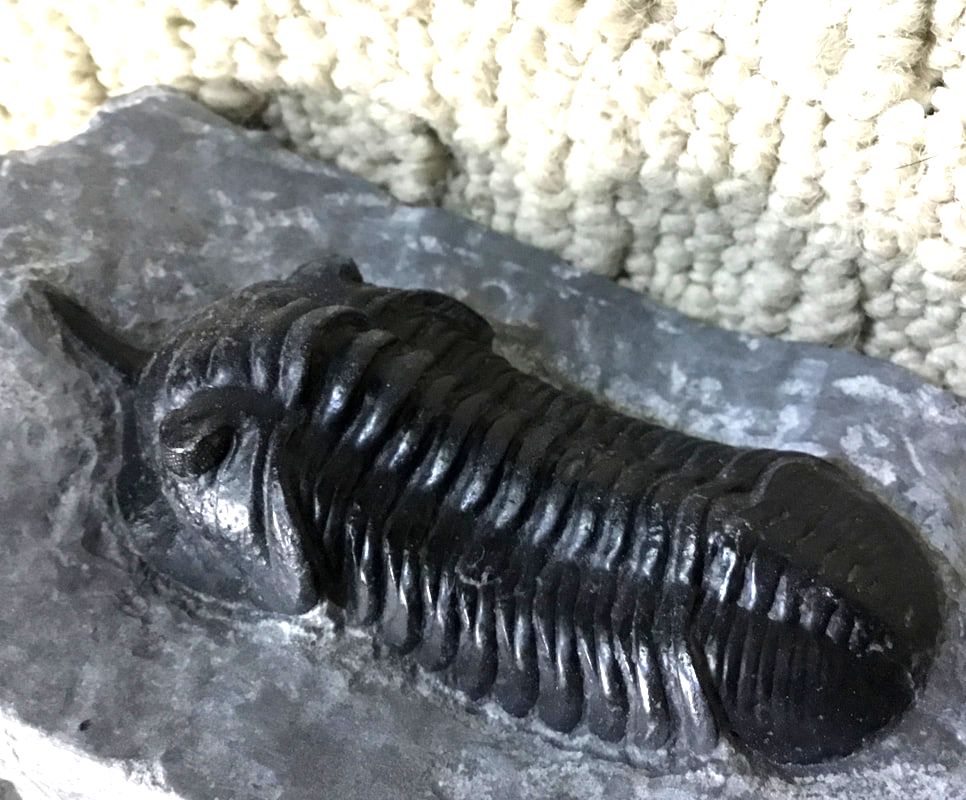 Result after several more hours of abrasion and fine scribe work, some matrix shaping. It's not 100% perfect, but as far as I can take this -- which is likely a few steps up from the typical quick commercial prep of Moroccan bugs that one can find at many rock shops.
So, not freestanding shenanigans here -- just a straight-up prone prep. There are definitely areas I could improve, but sometimes one should just know when to say something is done enough to one's satisfaction. I didn't butcher it, which is something to be said about what commonly happens with this material for lack of proper tools, or the massive amount of patience required to do it right. The trilobite looks even better in person than in these photos.
Comments are closed.
|
Kane Faucher
Archives
February 2024
|

 RSS Feed