|
This was posted as part of an ongoing thread on The Fossil Forum. I am putting it here for those who are not members of the Forum. - I thought I'd show the steps in how I go about drawing trilobites. I usually begin by sketching one of my bugs from different angles, and experimenting with lighting. Once I hit upon the angle and lighting I like, I get to it. Here is the simple setup at the dining room table: adjustable neck lamp, the subject, magnifier, an array of pencils, tunes, and water. At this stage, I've already gone about four hours. 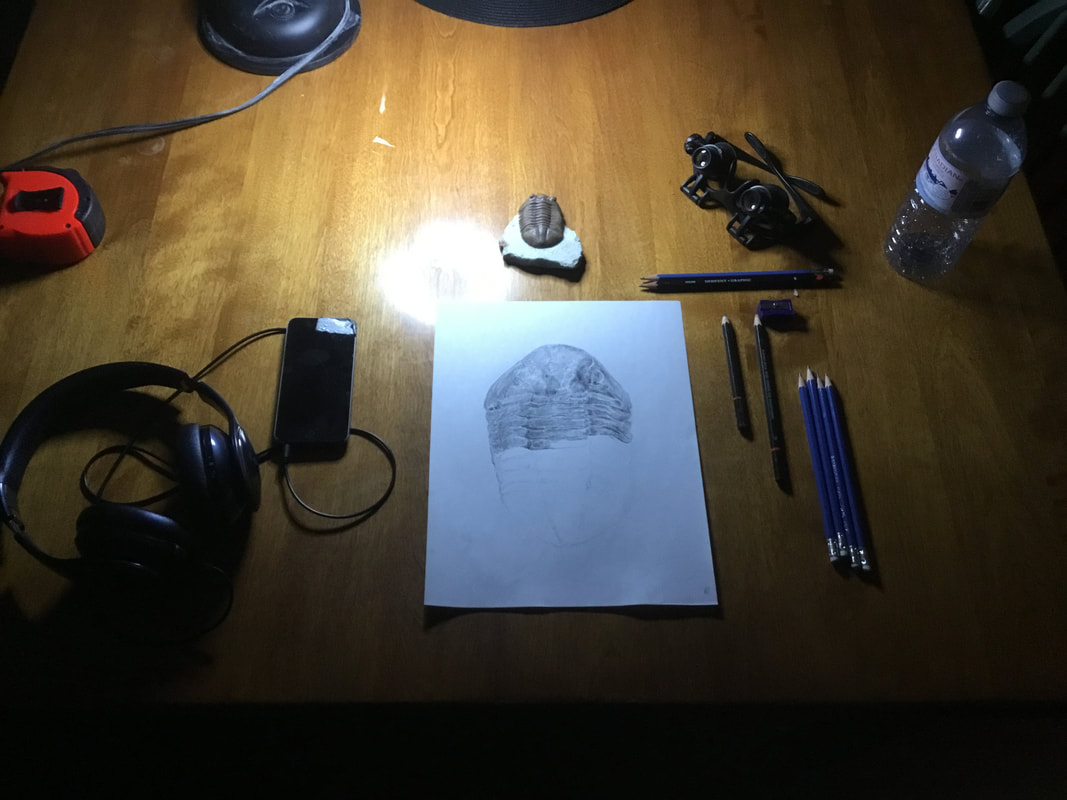 I spend a ratio of 4::1 in terms of putting my eyes on the subject and putting the pencil on the paper. Each area and segment must be treated as unique to ensure some relative degree of realism; to draw what one thinks is there is liable to produce a result that looks... not so real. At the same time, it is important to stop often to check against the entire drawing lest the myopic focus of a slight deviation result in some wide variance later. Using the magnifier, I can check in on the finest details of each crack and bit of microsculpture. I lay down very faint guidelines once I have the proper scale down. In this instance, the trilobite is not very big, but I want it to fill the page. The pencils are all sharpened at different lengths, which only vary so minutely (and why I use so many at a time). I lay down the more detailed work as I go, working top to bottom so my hand doesn't smudge it. I use erasers very sparingly, so I need to get it right the first time. No matter how careful I am to remove eraser rubbings, it can make fainter penciling too dark if the pencil tip is going over microscopic grit. 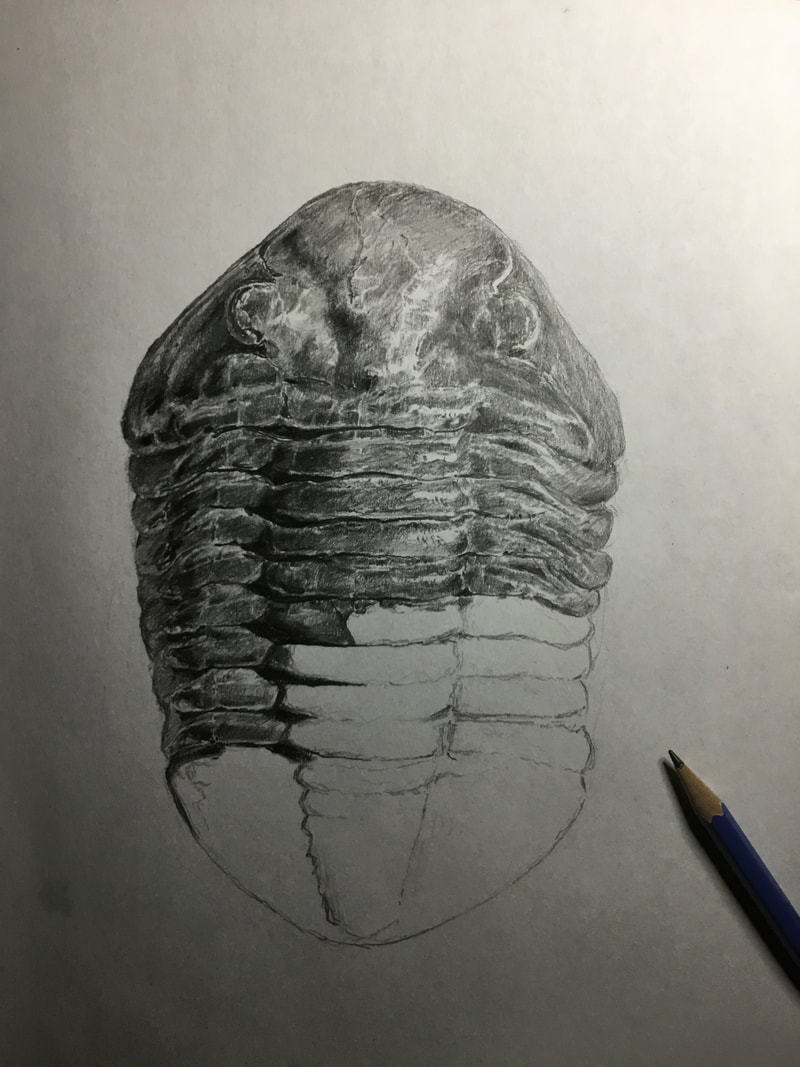 Once the rougher detailing is done, I spend an hour fine tuning and checking against the subject. Another hour or so is spent blending. I don't like the smudging technique to burnish as it is much harder to control, and the result looks a bit, well, smudged. Instead, I use a harder graphite (H to 7H) to try my best to remove or mask more obvious pencil strokes, while also working in the fainter areas and incident lighting. I then use a softer graphite (3B-5B) to darken the shadows a bit, and blend it in with a basic HB. In this drawing, I've put in all the cracks, mottled areas, and imperfections. This one was in the process of a moult, and so you can make out the little gap from the cranidium and the cheeks, as well as the slight separation between the two last pleurae on the bottom right. After carefully removing any remaining guide lines with an eraser tip, at 8.5 hours it is complete. 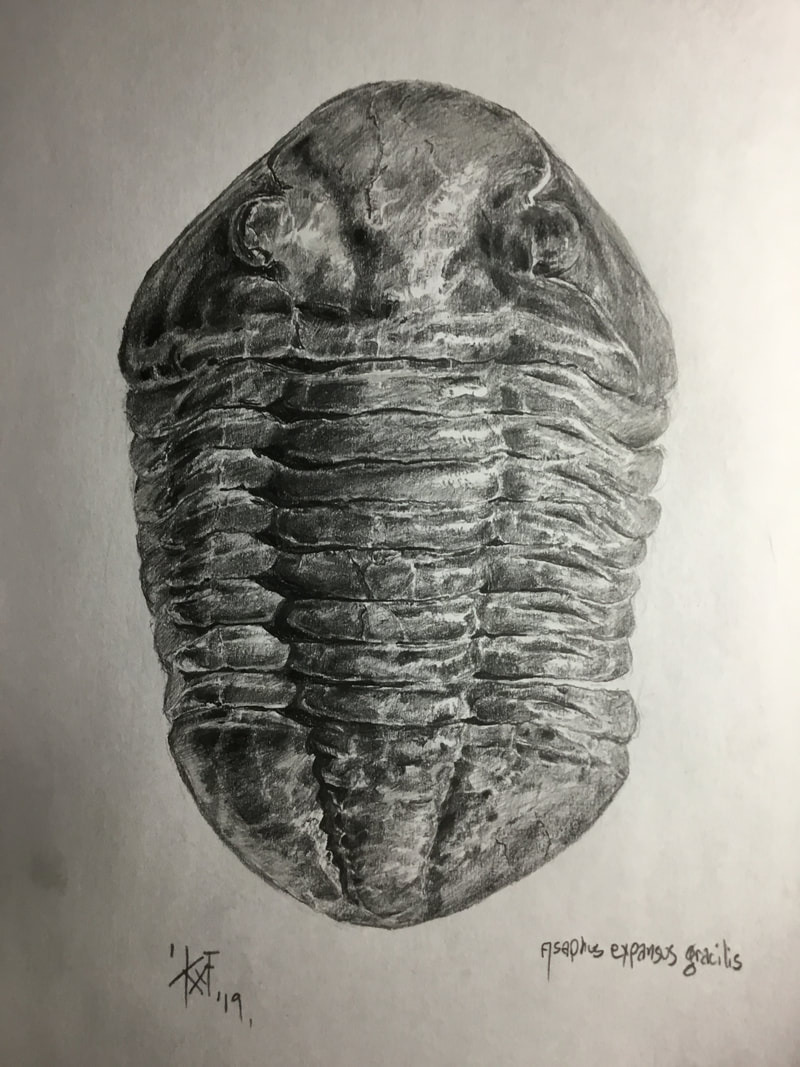 Comments are closed.
|
Kane Faucher
Archives
February 2024
|
 RSS Feed