|
Until the big, thick, white blanket of winter is yanked off, it looks like my adventures will be confined to what I can do indoors. Over the past year I've been gradually adding more fossil preparation gear, and although there are a few more items left on the list, it is coming along nicely. Let's start off with a before and after picture of the space that I finally got around to clearing up: 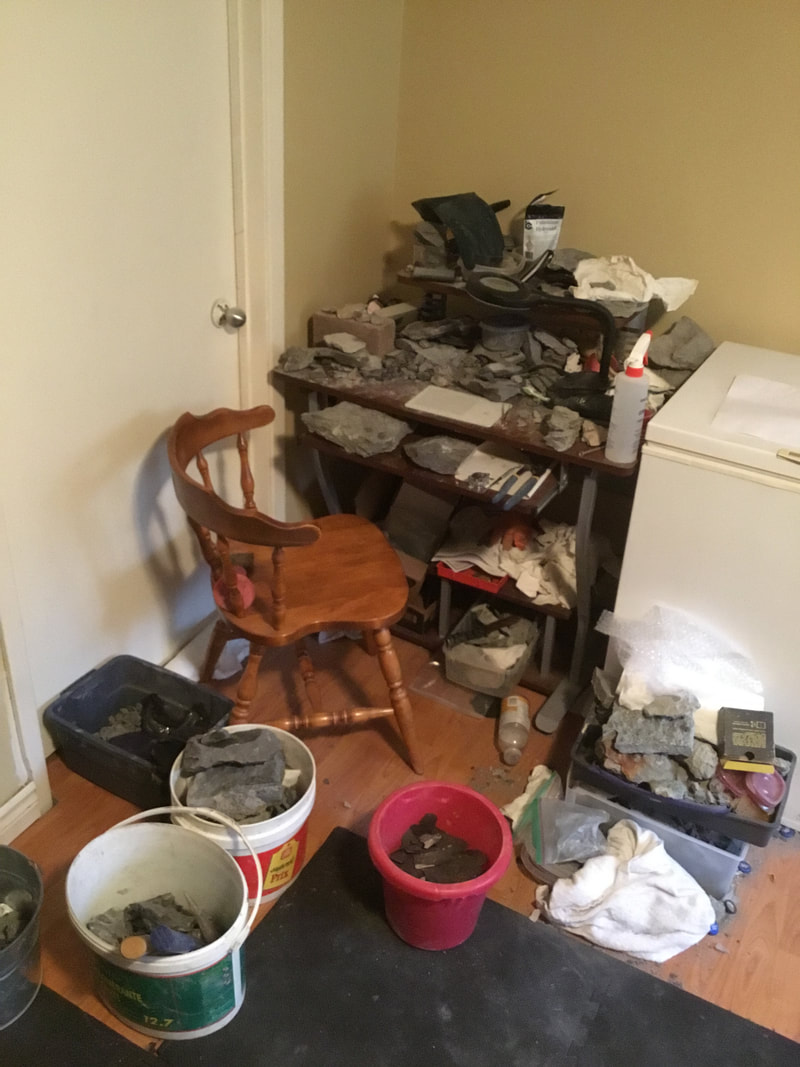 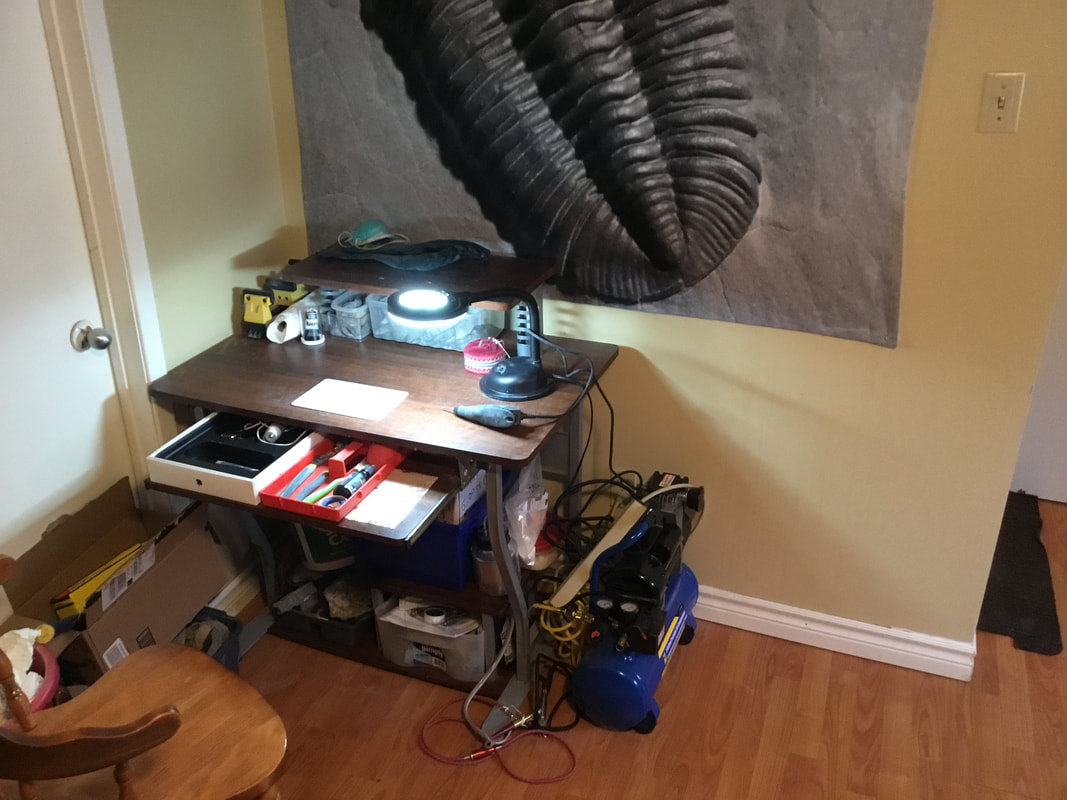 Much neater. There's not terribly lots of space in my house, and the basement is largely dominated by exercise equipment. Still, I did manage to secure this corner of the basement. All I now need to complete the furniture is to get a second working surface to the right of the first one. All the necessary tools are in their rollout drawer or on the top. I'll need to develop a system to place the compressor in a better spot, with holsters for the scribe and abrader. A work in progress, but definitely an improvement! 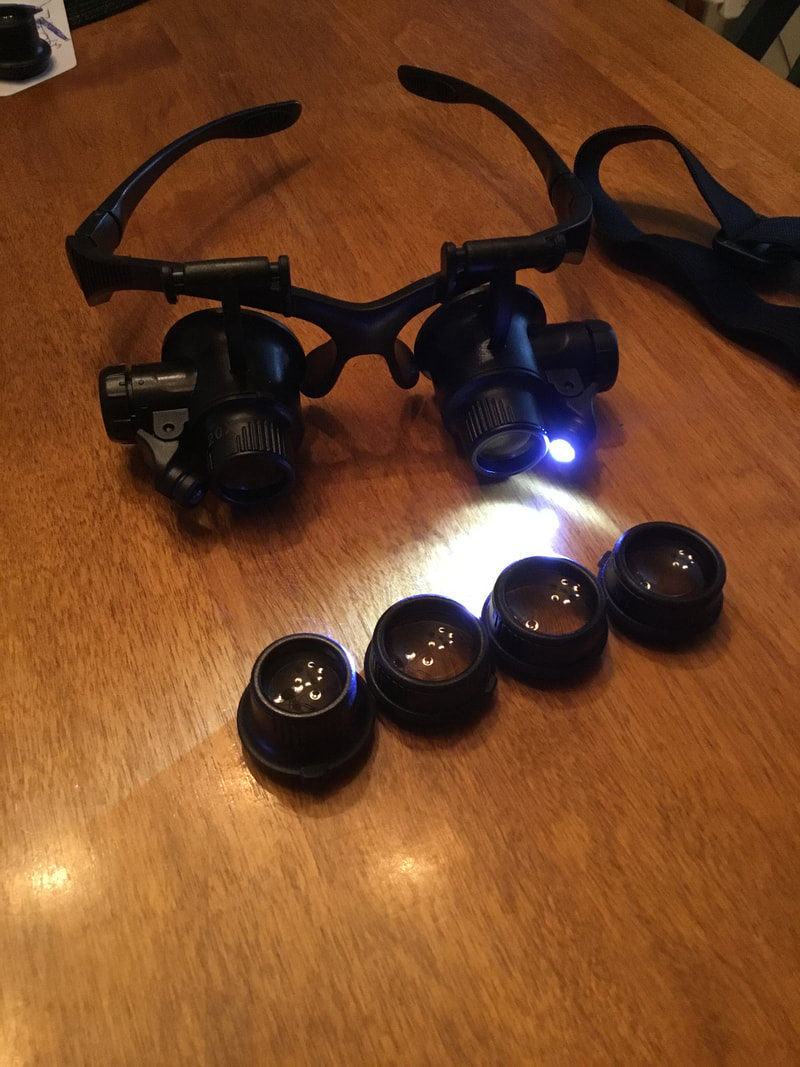 This little toy may make sewing needle based prep a bit easier. The lenses swap out at different magnifications of 10x, 15x, 20x and 25x, and comes with neat side-mounted LED lights. These might actually be very helpful in the field for getting close to the ground and looking for tinier fossils. 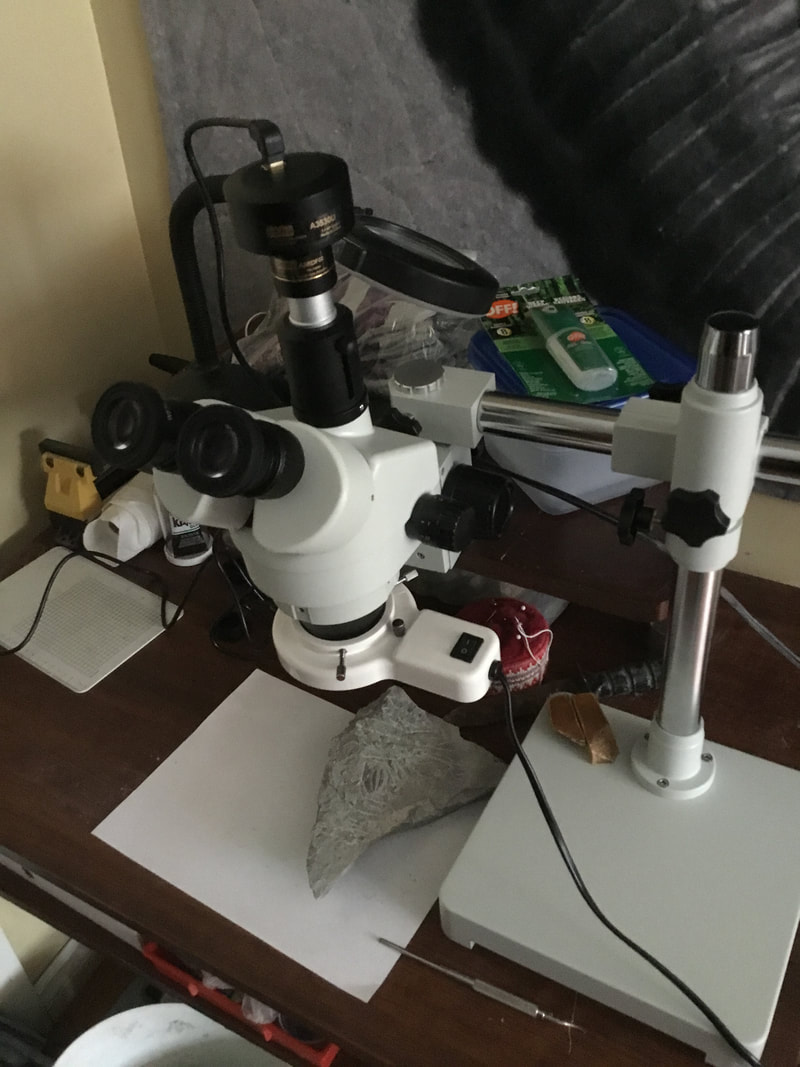 And this arrived the same day as well. An OMAX 3.5x-90x trinocular scope with a USB-fed 3.2 MP camera. It took a ridiculous amount of time to assemble this as it came in a zillion pieces, and the instruction manual that it came with was for an entirely different model (and written in that transliterated Chinese that reads very awkwardly. It comes with 10x and 20x wide-field eye lenses, and a Barlow lens to permit working at a distance - essential once I get a blast box. I went with the adjustable boom as the scope needs to rest on the outside of the blast box glass. Looking through the eye pieces at the right distance takes some getting used to. 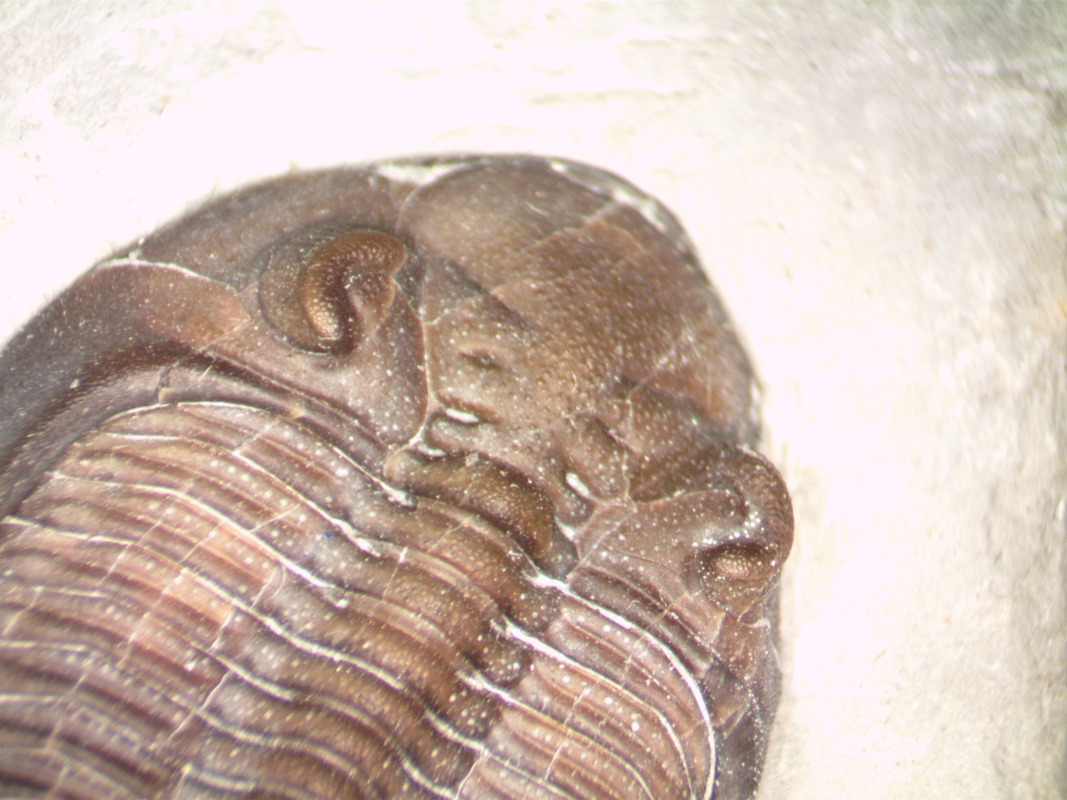 The scope came with camera software, but it was on a CD... and no Apple products come with a CD/DVD drive anymore. It took some sleuthing online to find the software for download. It will take some learning with the software and how to line up the specimens properly for photography. There is a pull-out stop that sends the light up through the camera lens mount, which cuts out light to the left eye piece. What I see through the eye piece is not what shows up on the screen, so some jiggering about is necessary. Pictured here is a fairly nice closeup of a Greenops trilobite that would be about an inch long, of which you can see about a quarter of it here.
This will be very useful for detailed preparation. It would not be useful to get too much closer than 40x-50x for that purpose. All that remains now is to get the blast box, shop vac, and to work on how to vent it outside (maybe through the dryer vent). I anticipate my next blog post here will either be something to do with the fruits of preparation, or in a package of trilobites from Europe from a forum friend - whichever comes first! Hunkering down to keep warm in snowy London, until next time. Comments are closed.
|
Kane Faucher
Archives
February 2024
|
 RSS Feed