|
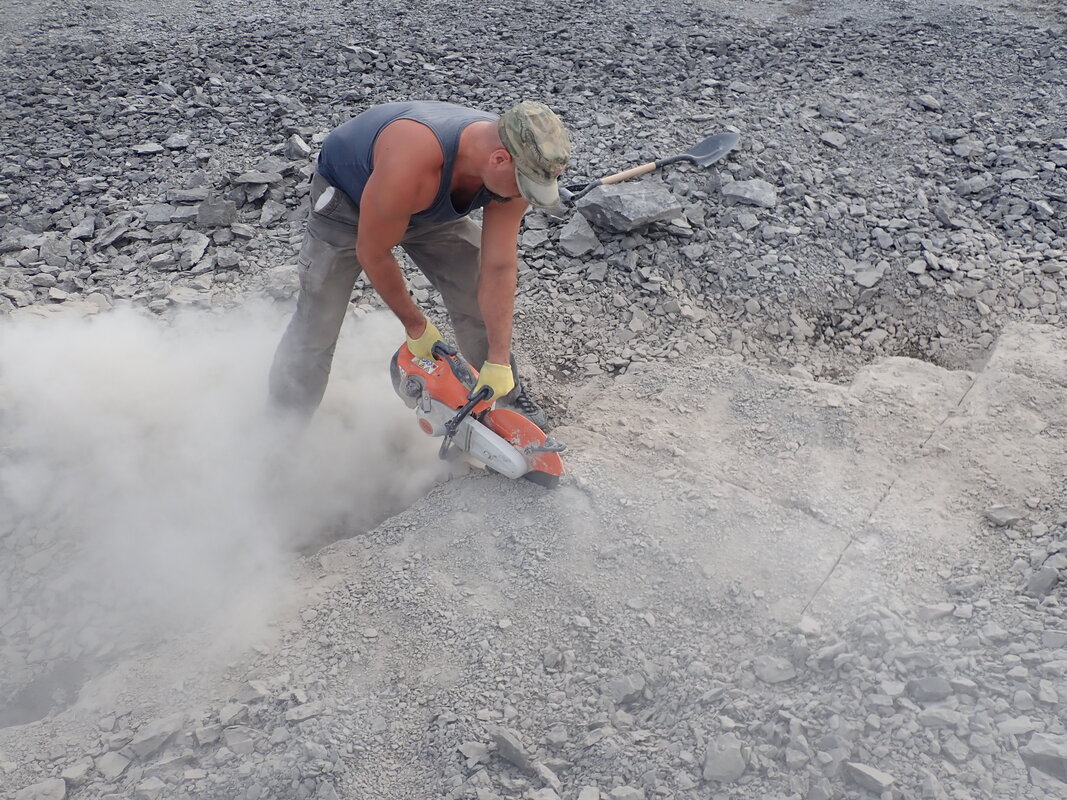
Tomorrow we'll be off and away for the first site, Penn Dixie, and then Saturday for a Fossil Forum group dig at Deep Springs Road. The weather promises to be wet, cold, and miserable, but the alternative is to pass up a rare opportunity to get out and collect. There's no sense in having all these new tools and no new material to work on. In the last few days, I've been able to try out the new tools. The first order of business was to clear up my prep area as it was a bit of a disaster. I was going to get all four of my tools hooked up into the new manifold block, but at the moment I just can't seem to fix a few air leaks... And these fingers are not nimble enough to use the teflon tape very well, and the tube sealant just creates a goopy mess. So for now I'll be swapping out tools using the quick-connect until I can get my hands on something better for the leak issue. So this is the little corner where the prep magic happens, what I cheekily call my "lab": 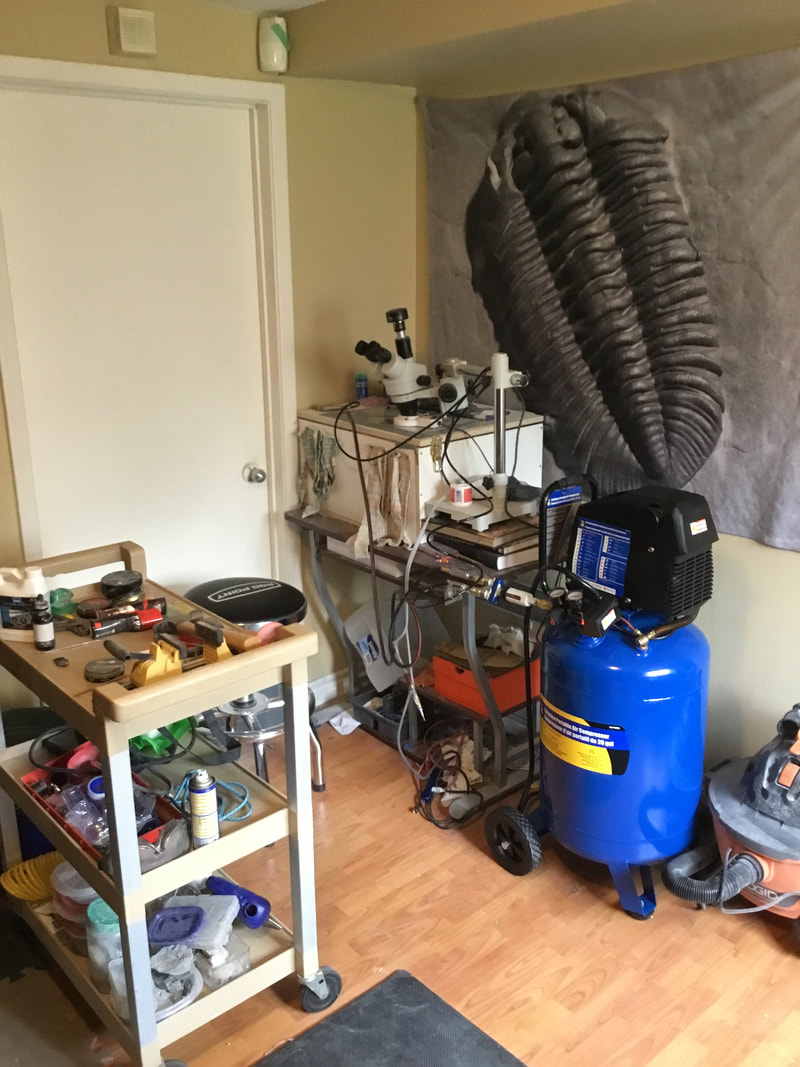 The new 20 gallon compressor is great. The bigger tank means it isn't running constantly, which is important as I'll be running the new tools at 110 PSI.
The ME-9100 was the first tool I tried out of the box. Taking a junky Penn Dixie trilobite in shale, the scribe sailed through the matrix easily. I tried it again on some tougher limestone from Bowmanville, and the chips flew. This is a serious tool with some serious power. The Paleo Aro was next for its trial run. Again, using the same junky bug, it easily (perhaps too easily) chipped off surrounding matrix to reveal the whole bug in five minutes. That same result would have taken me over 30-45 minutes with my old Aro clone. I will have to adjust to the power of this tool and its longer stylus to avoid making mistakes, as I haven't yet mastered the right way to hold this particular tool for ensuring maximum control -- a necessity when doing detailed work around a fossil. After a combined 20 minutes of usage, however, I encountered a problem: it stalled and would not re-engage at all beyond a one or two second "toot." I tapped the housing, oiled the parts, but nothing was quite working, so I got in touch with my master prep friend Kris from Texas to see if he could diagnose the problem. He suggested removing the spring around the stylus base and working it with my fingers, and then to give a bit of oil to the base plate where the second small O-ring sits. And now it works! Next up to complete this picture will be to either get a new goose-necked lamp, or find a cheap source of circular fluorescent bulbs as the light in the box from the scope's ring light is just not bright enough when working under magnification. But for now, it's back to packing for the three day trip. Only a few more days until a three-site visit in the state of NY. I've not been idle on the fossil front -- at least in terms of associated activities. This post features new tools and drawings.
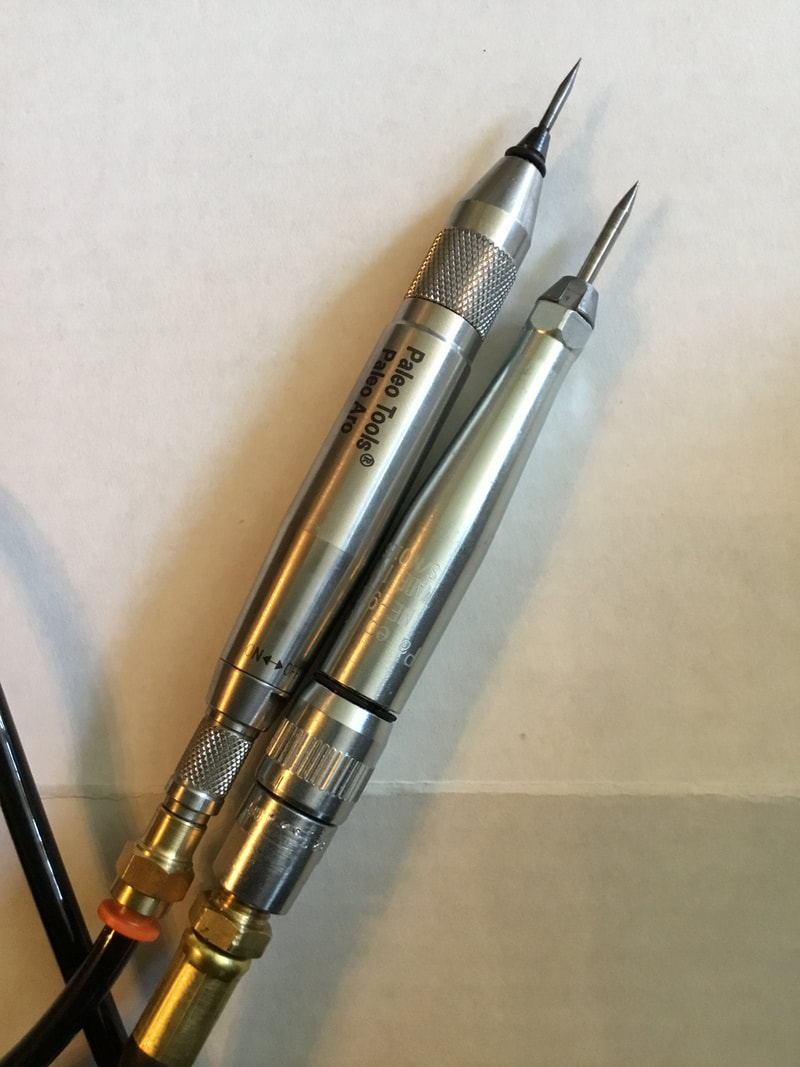
My new scribes arrived from Paleo Tools! I ordered these last week and they arrived lightning fast. Haven't had a chance to take them out for their first spin yet, but I will soon. The Paleo Aro will take over for my Aro clone (finally, a decent stylus!). The ME-9100 is pretty much the same deal as the CP-9351: it is used for bulk matrix removal. No more grinding ineffectively away at tough matrix! The next order of business was to replace my tiny 3 gallon air compressor; these scribes like to be around 125 PSI, and the tiny tank will not keep up unless I want to suffuse the house with the smell of a burning motor. So I'll be unpacking this 20 gallon beauty and hooking it up tomorrow. None of this was cheap! I doubt I'd ever be able to sell enough surplus to break even, but I suppose I could have a more expensive hobby, like collecting yachts or Faberge eggs. 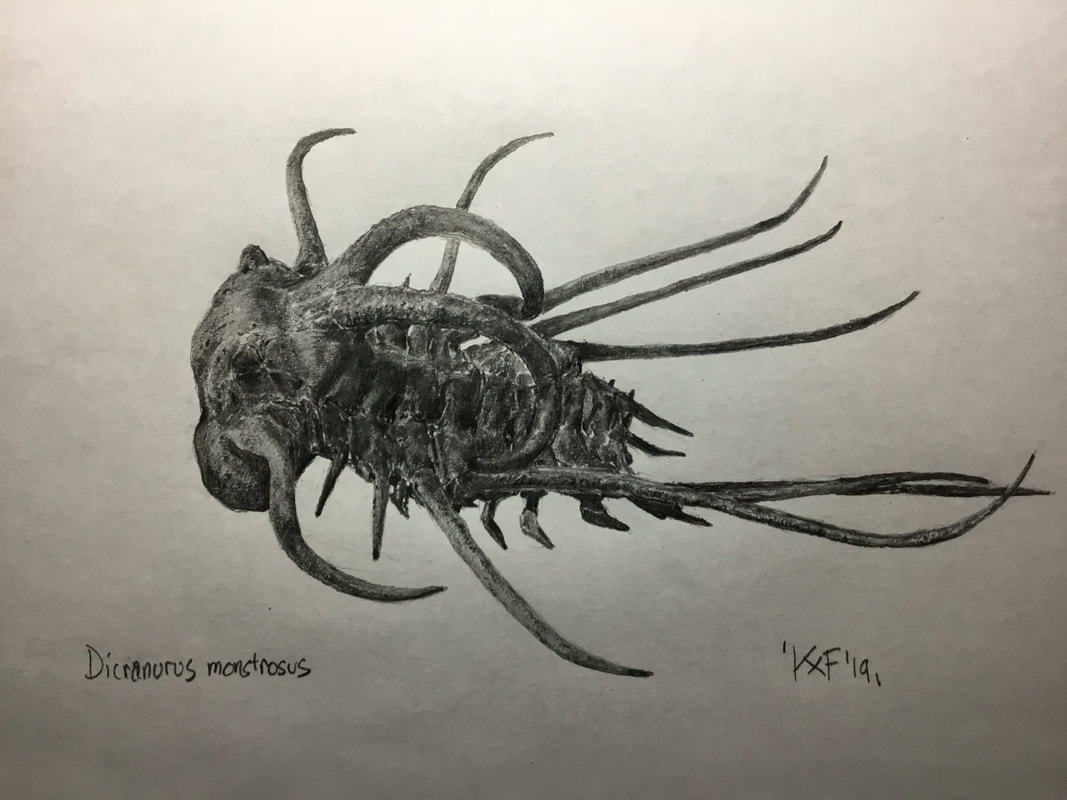 More drawings! It's Cthulhu! I do have a small list of experiments I want to try next week to go beyond drawing the more standard "portrait" style of trilobites. 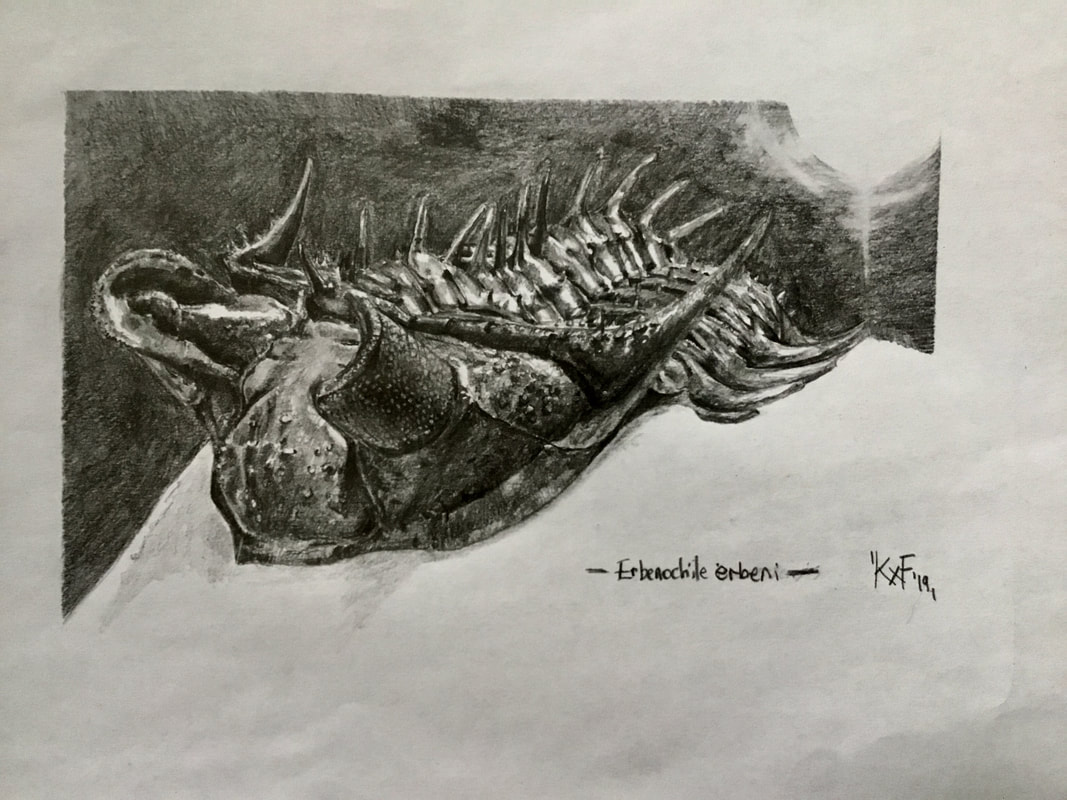 And yet another spiny chap.
For ease of seeing all the drawing in one place, I set up a gallery page (it is the blue button link to the top right, below the Trilobite Gallery, but here's a link). I do have some Russian matrix on its way for me to play with, but first is the weekend trip to NY state. For now, I'll have my hands full reorganizing the prep lab. So, I did get out to one of my local sites for a weekend with my collecting comrade Malcolm. Sadly, the site is pretty much tapped out now, but there are other irons in the fire, not including the annual Penn Dixie and Deep Springs Road group dig at the end of the month. 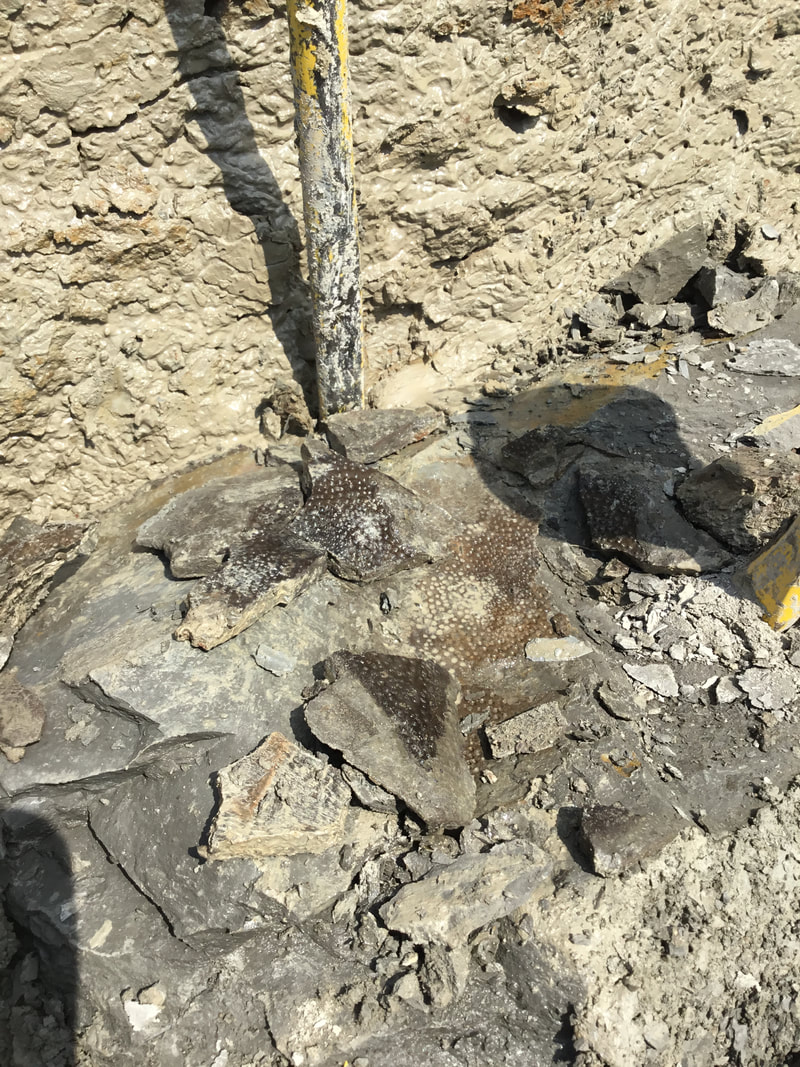 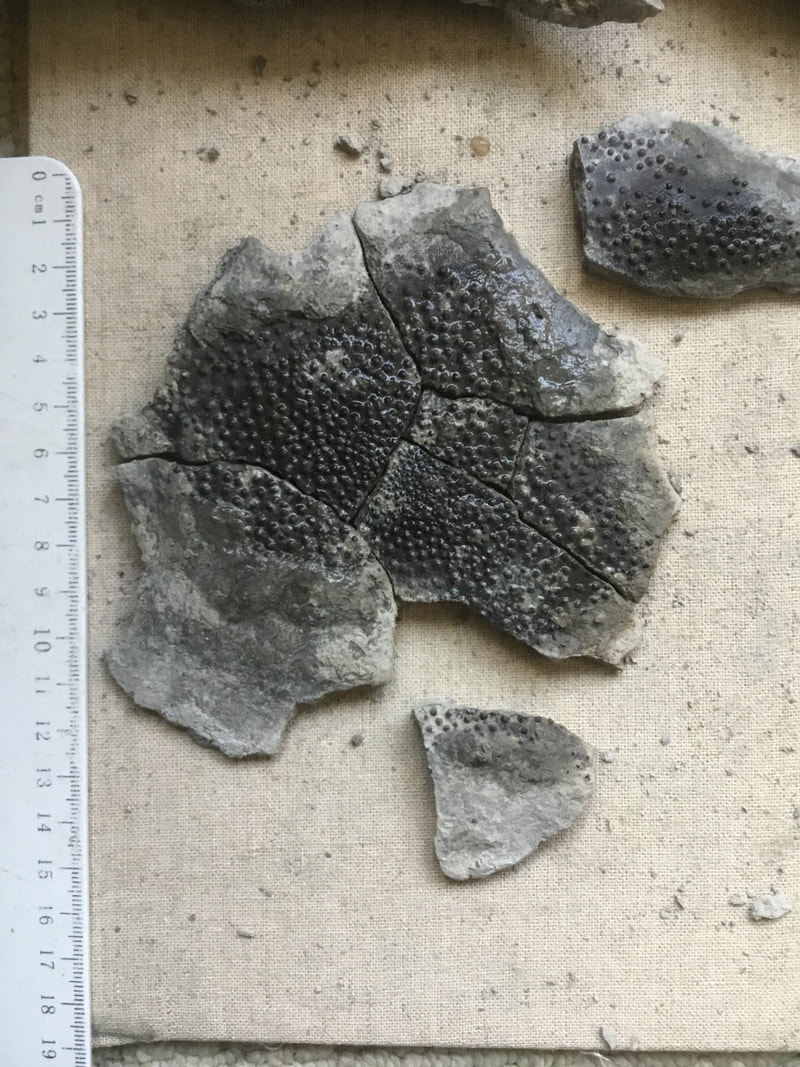 My only real trip-maker: a fair sized placoderm plate (Protitanichthys sp.), pictured in situ and assembling it at home. By far, the biggest plate I've found. Not much else worth mentioning was found, but it was great to feel the swing of the hammer, the sound of rock splitting, and the smell of fresh shale. I'd been waiting five months to get back out there.
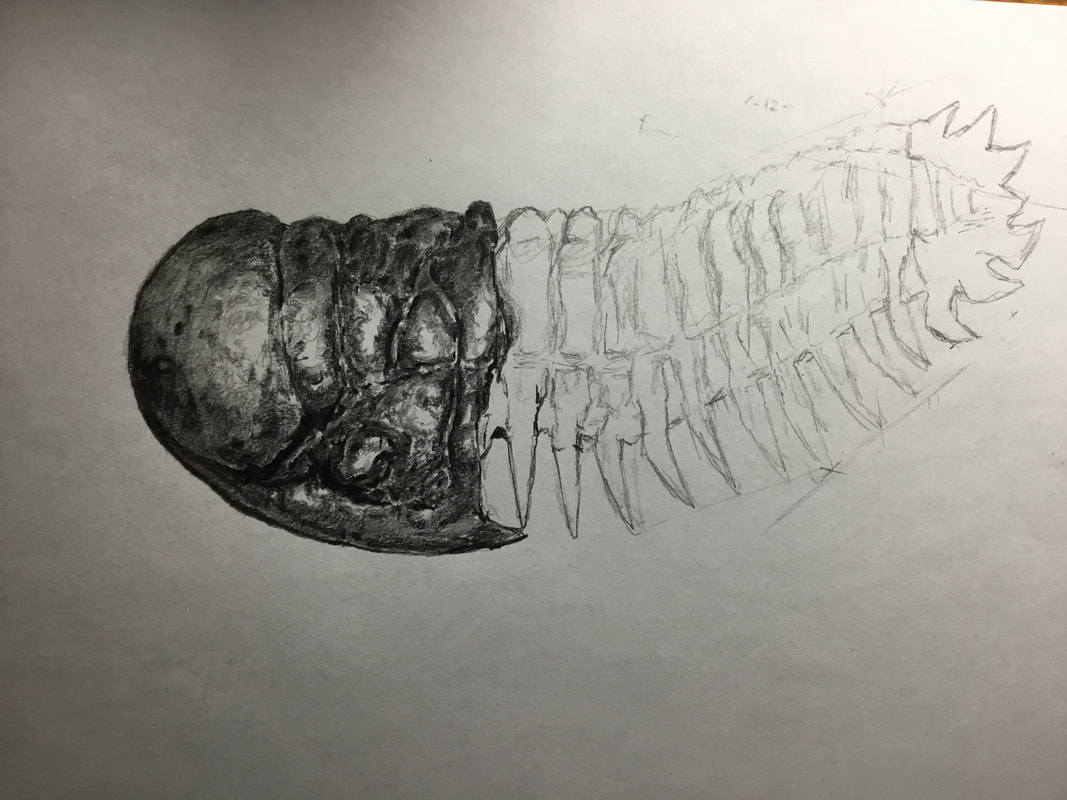
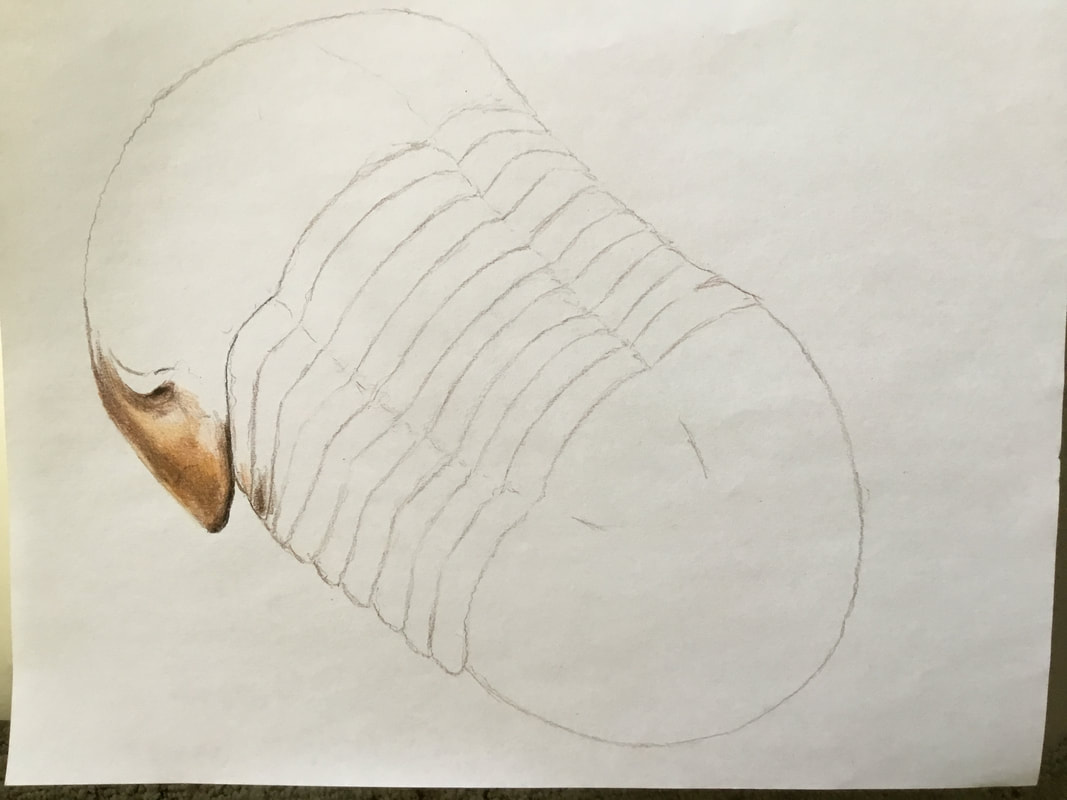
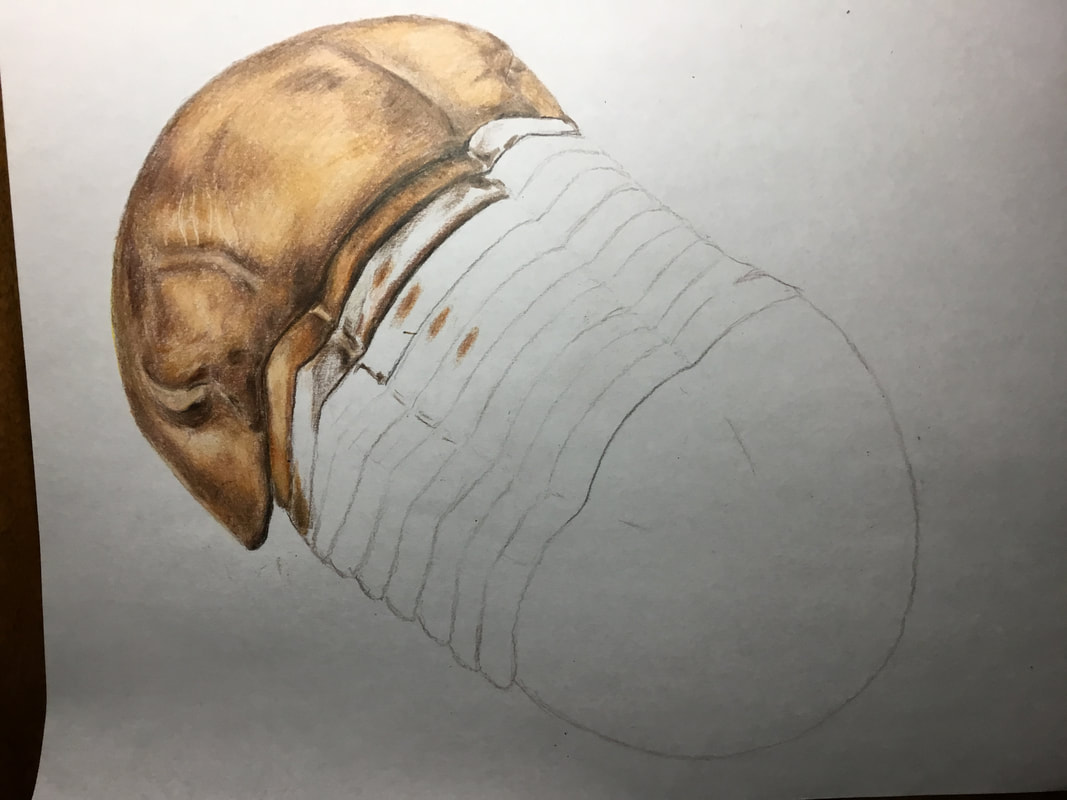
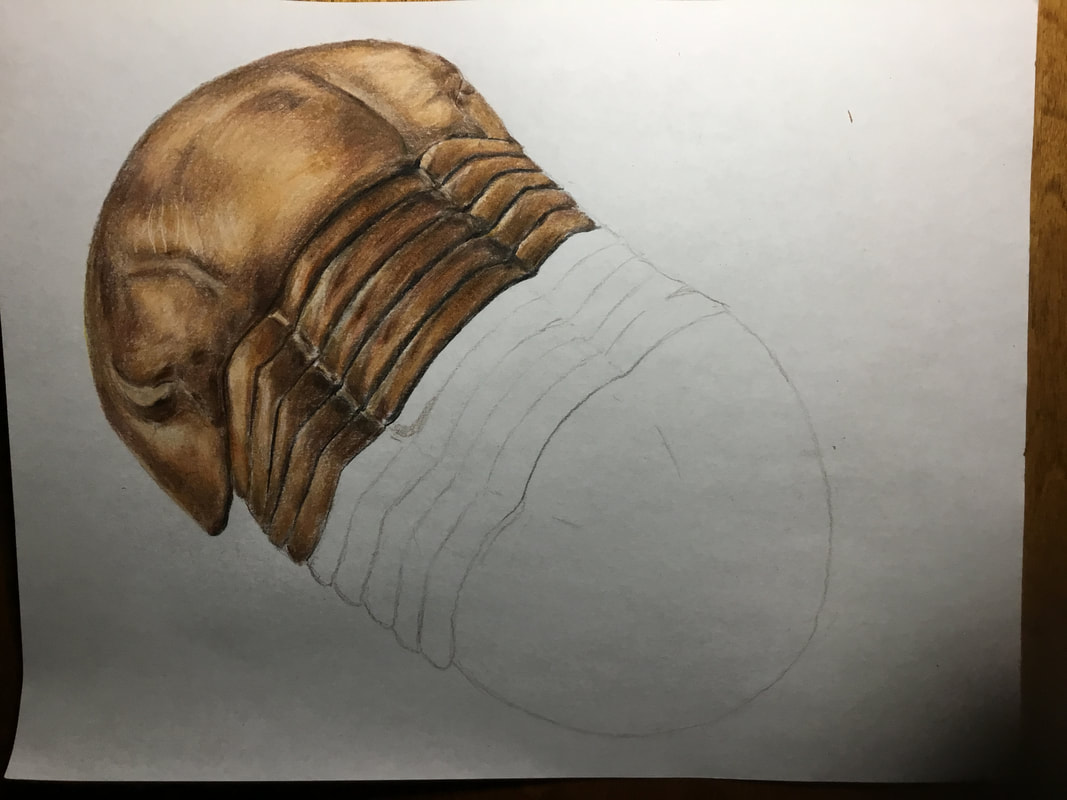
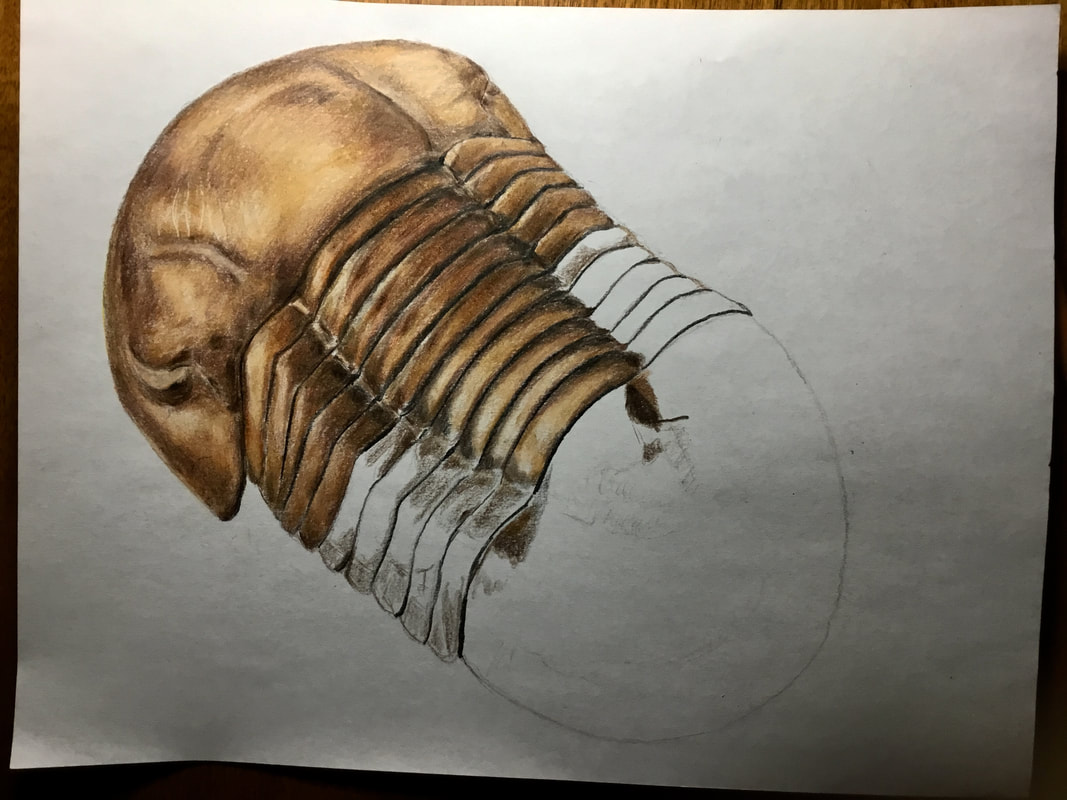
 I've also not been idle at home, fossil-wise. Although I don't have anything worth preparting at the moment, I've gone on a bit of a trilobite drawing tear. 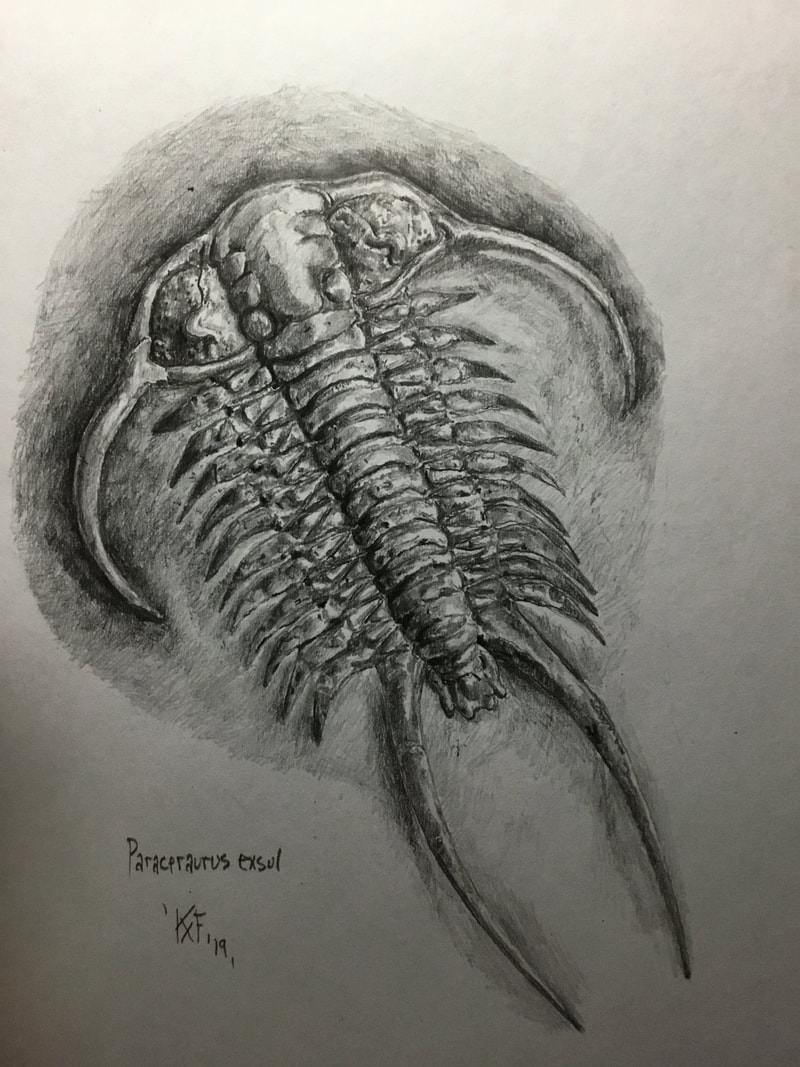 I also decided to try my hand at drawing one in colour. Keep in mind that I haven't done any coloured pencil work in over two decades. 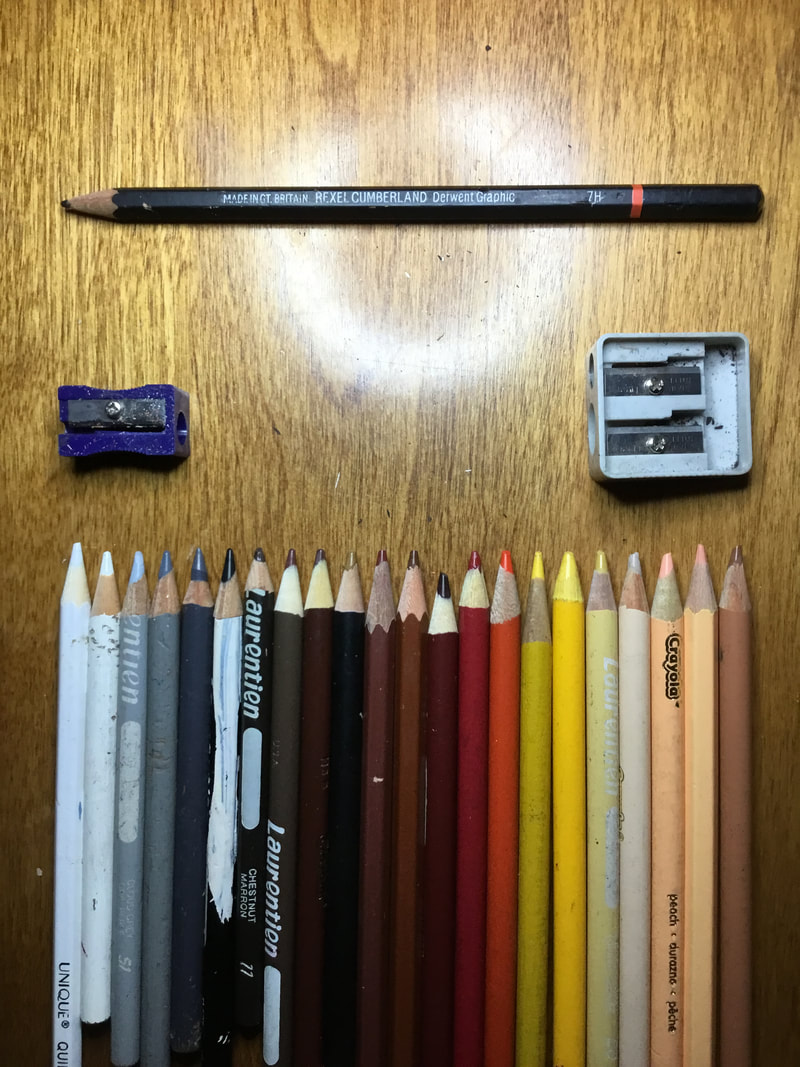 After colour-matching, this is the palette of pencils I've decided on. I first outline the drawing using a faint pencil (7H), and then go about the work. I can't seem to get the same precise detail using coloured pencils as I do regular graphite ones, so this is almost looking realistic. Here are the stages leading to the final result:
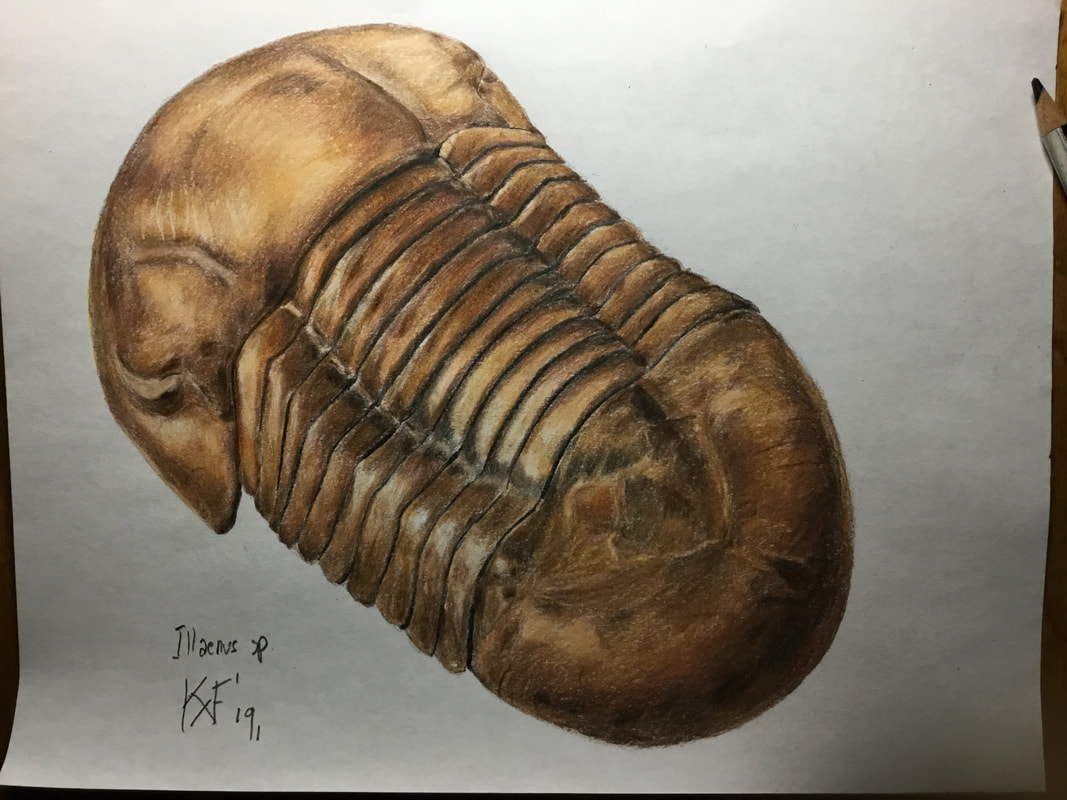 So, not terrible for my first colour drawing in an eon.
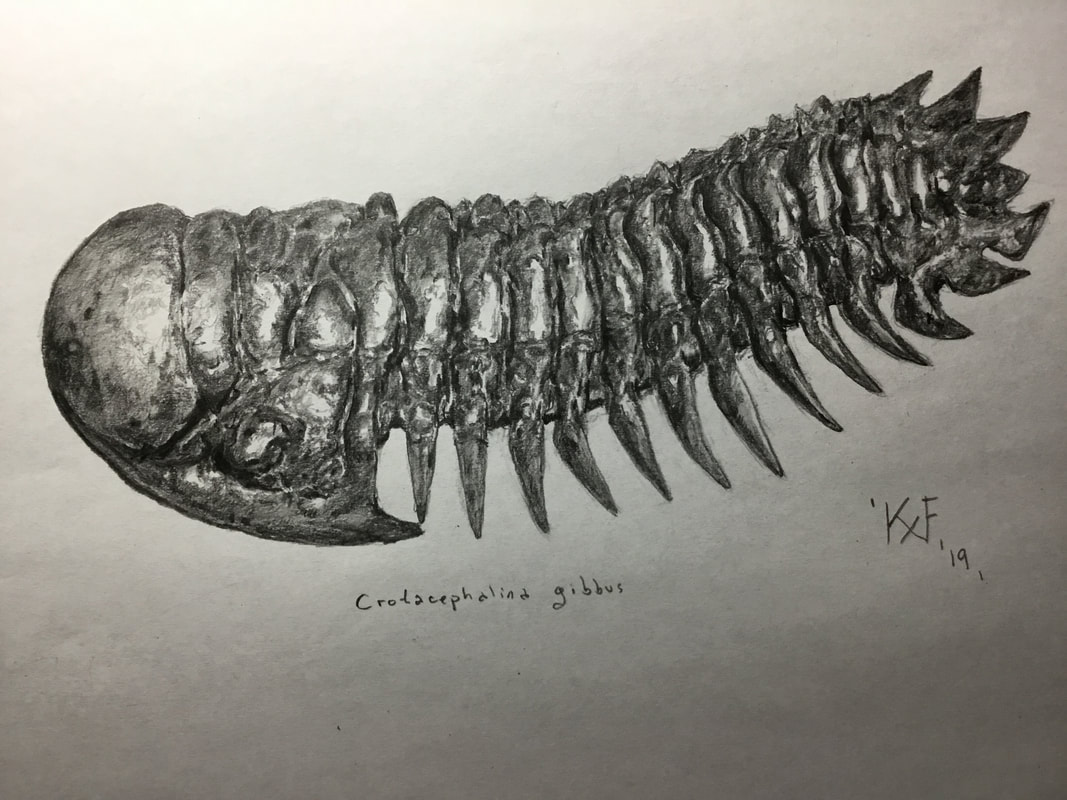
In related fossil news, I bit the bullet to upgrade my preparation tools. By the coming Monday, I'll be welcoming a ME-9100 and a Paleo Aro scribe, both with 2" styluses. The ME-9100 is the workhorse for bulk matrix removal, and it will really cut down on time as I used an Aro clone to do that, which was like trying to file down a mountain with a bread knife. Also, the Aro clone was giving me a bit of grief during my last prep as the tip is too wide and blunt for the precision work I need it to do on more calcitic matrix that fuses to the shell (and hence the Paleo Aro). It will also mean increasing my compressor capacity by retiring the 3 gallon in favour of a 20 gallon unit. Let's just say that preparation is not a cheap hobby, and these tools are pricey. But, if one is going to do quality work, it pays to have quality tools. Until next time... This was posted as part of an ongoing thread on The Fossil Forum. I am putting it here for those who are not members of the Forum. - I thought I'd show the steps in how I go about drawing trilobites. I usually begin by sketching one of my bugs from different angles, and experimenting with lighting. Once I hit upon the angle and lighting I like, I get to it. Here is the simple setup at the dining room table: adjustable neck lamp, the subject, magnifier, an array of pencils, tunes, and water. At this stage, I've already gone about four hours. 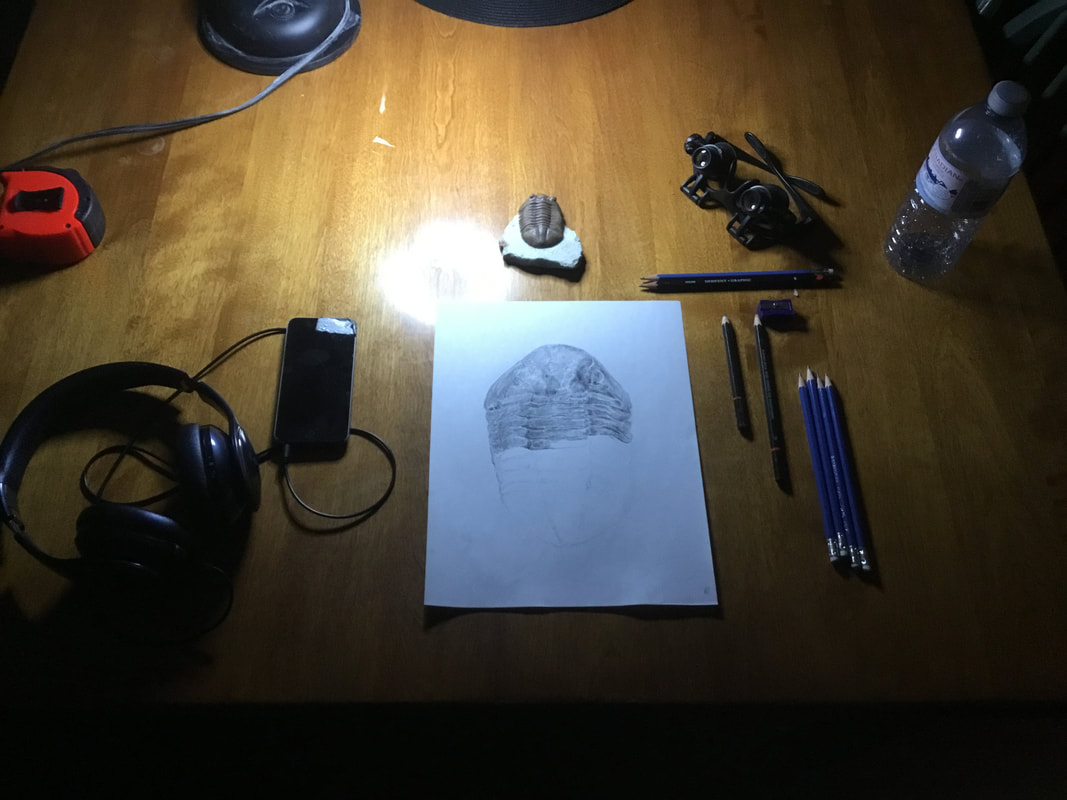 I spend a ratio of 4::1 in terms of putting my eyes on the subject and putting the pencil on the paper. Each area and segment must be treated as unique to ensure some relative degree of realism; to draw what one thinks is there is liable to produce a result that looks... not so real. At the same time, it is important to stop often to check against the entire drawing lest the myopic focus of a slight deviation result in some wide variance later. Using the magnifier, I can check in on the finest details of each crack and bit of microsculpture. I lay down very faint guidelines once I have the proper scale down. In this instance, the trilobite is not very big, but I want it to fill the page. The pencils are all sharpened at different lengths, which only vary so minutely (and why I use so many at a time). I lay down the more detailed work as I go, working top to bottom so my hand doesn't smudge it. I use erasers very sparingly, so I need to get it right the first time. No matter how careful I am to remove eraser rubbings, it can make fainter penciling too dark if the pencil tip is going over microscopic grit. 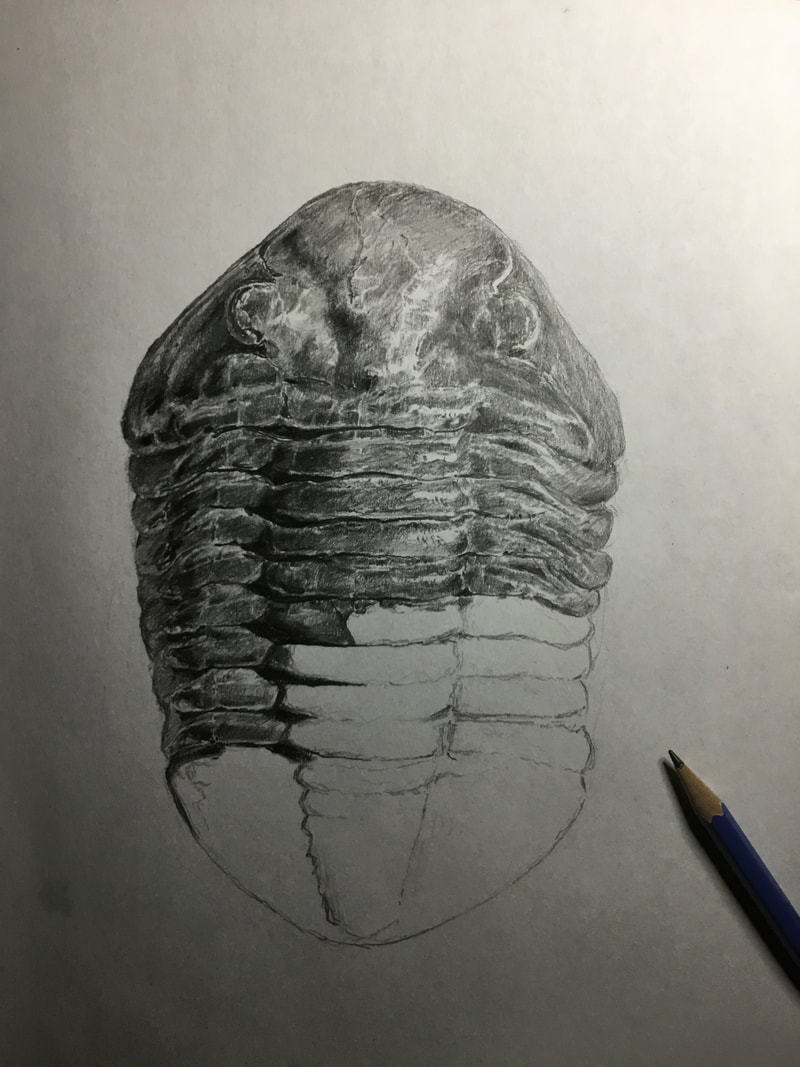 Once the rougher detailing is done, I spend an hour fine tuning and checking against the subject. Another hour or so is spent blending. I don't like the smudging technique to burnish as it is much harder to control, and the result looks a bit, well, smudged. Instead, I use a harder graphite (H to 7H) to try my best to remove or mask more obvious pencil strokes, while also working in the fainter areas and incident lighting. I then use a softer graphite (3B-5B) to darken the shadows a bit, and blend it in with a basic HB. In this drawing, I've put in all the cracks, mottled areas, and imperfections. This one was in the process of a moult, and so you can make out the little gap from the cranidium and the cheeks, as well as the slight separation between the two last pleurae on the bottom right. After carefully removing any remaining guide lines with an eraser tip, at 8.5 hours it is complete. 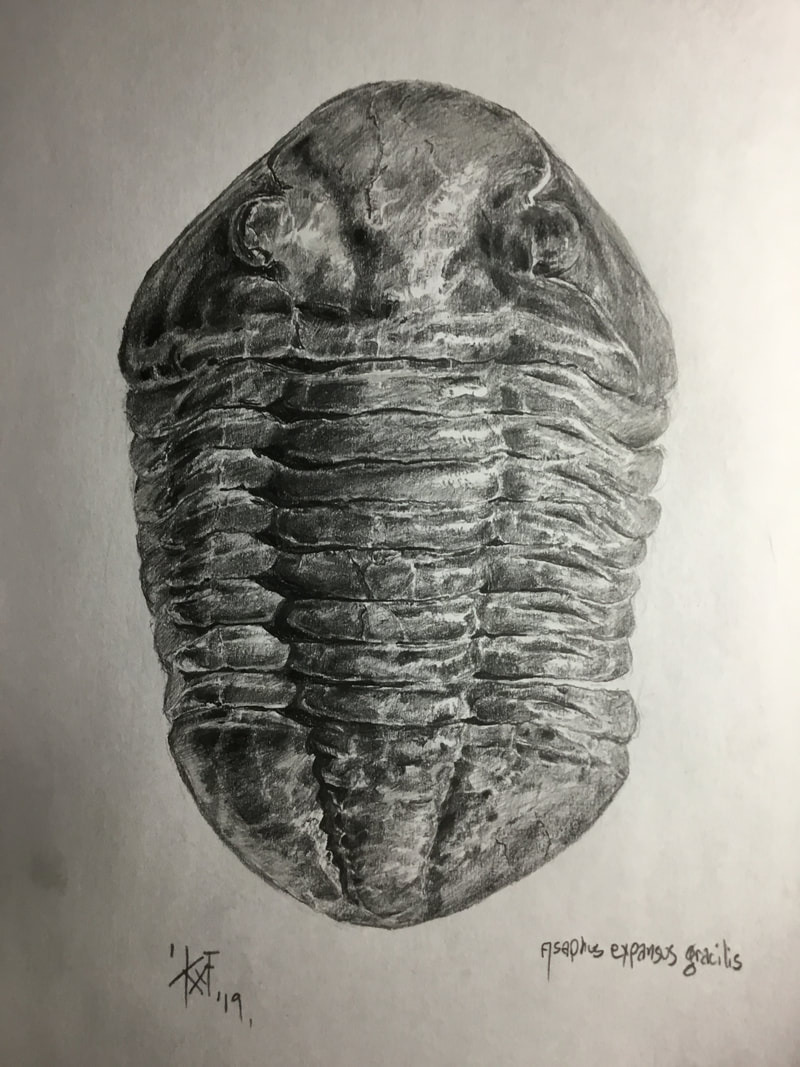 Today is my birthday as I flip the number over to 42 (insert Douglas Adams references at will). But the main event will be this weekend when I go on my first significant fossil dig of the year. Two days of site preparation and eventual excavation to get it up and running for the 2019 season. So just two minor updates: a drawing and a new trilobite. 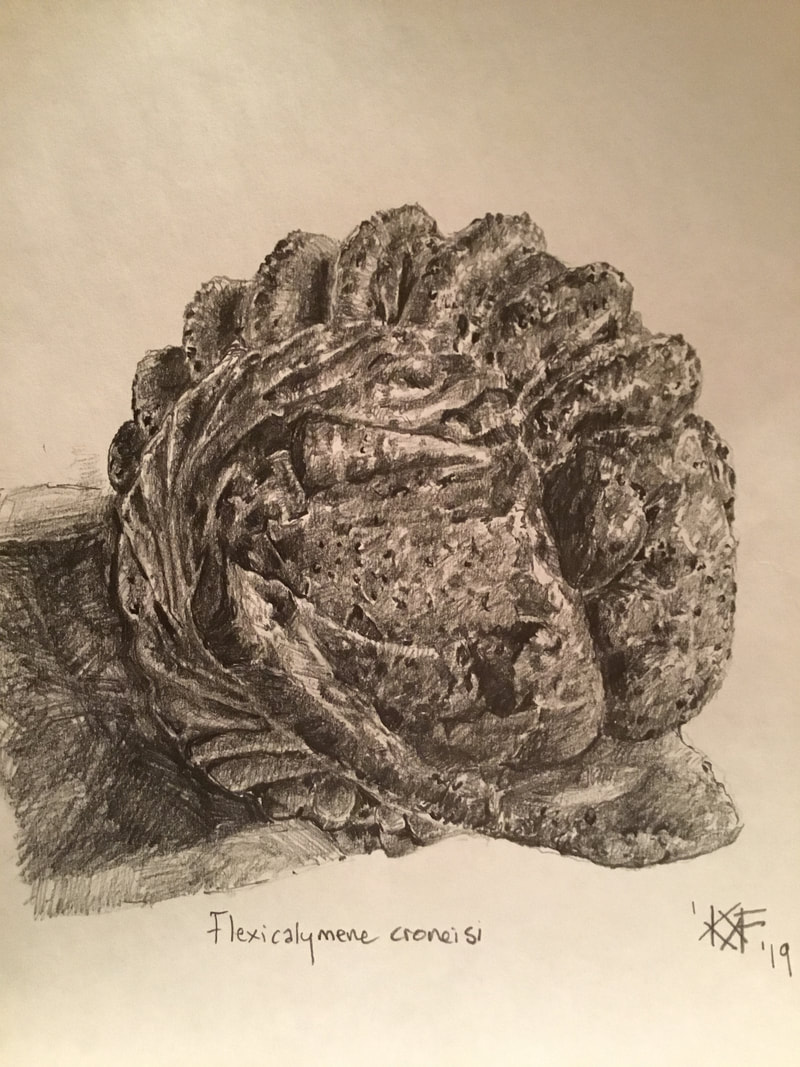 Deb had found this small roller at Bowmanville in October, and I prepped it in January. 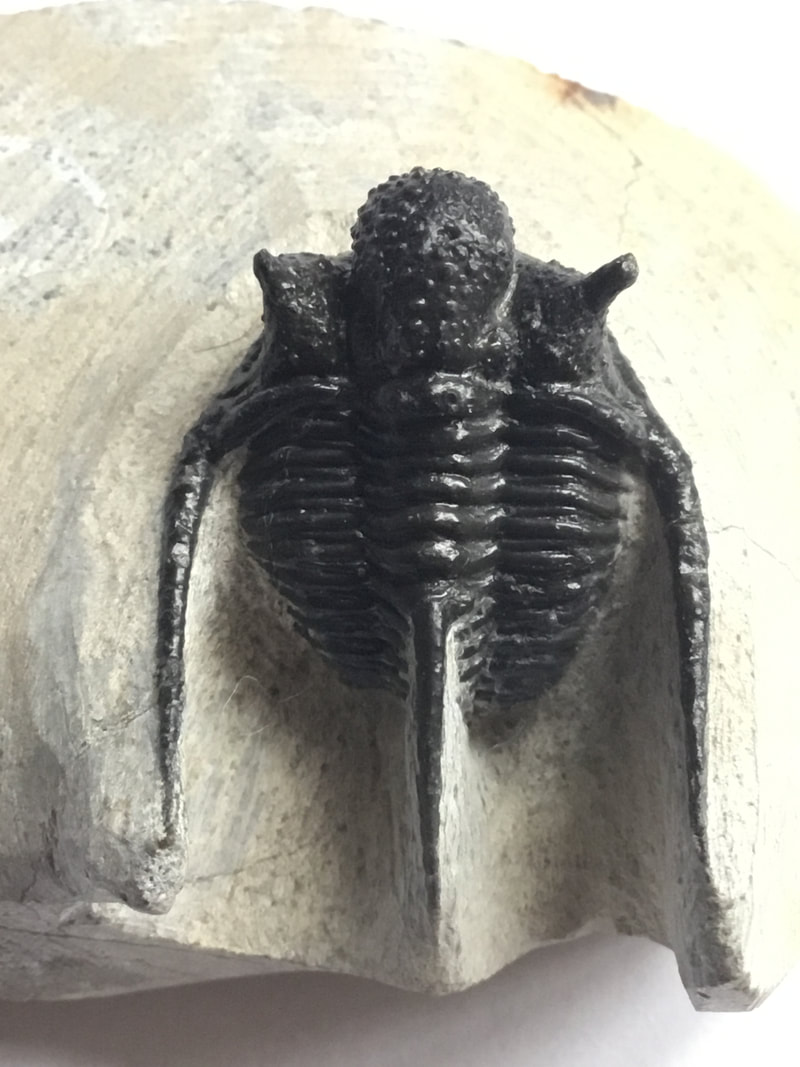 Cyphaspis boutscharafinense with good tuberculate glabella and decent spines. 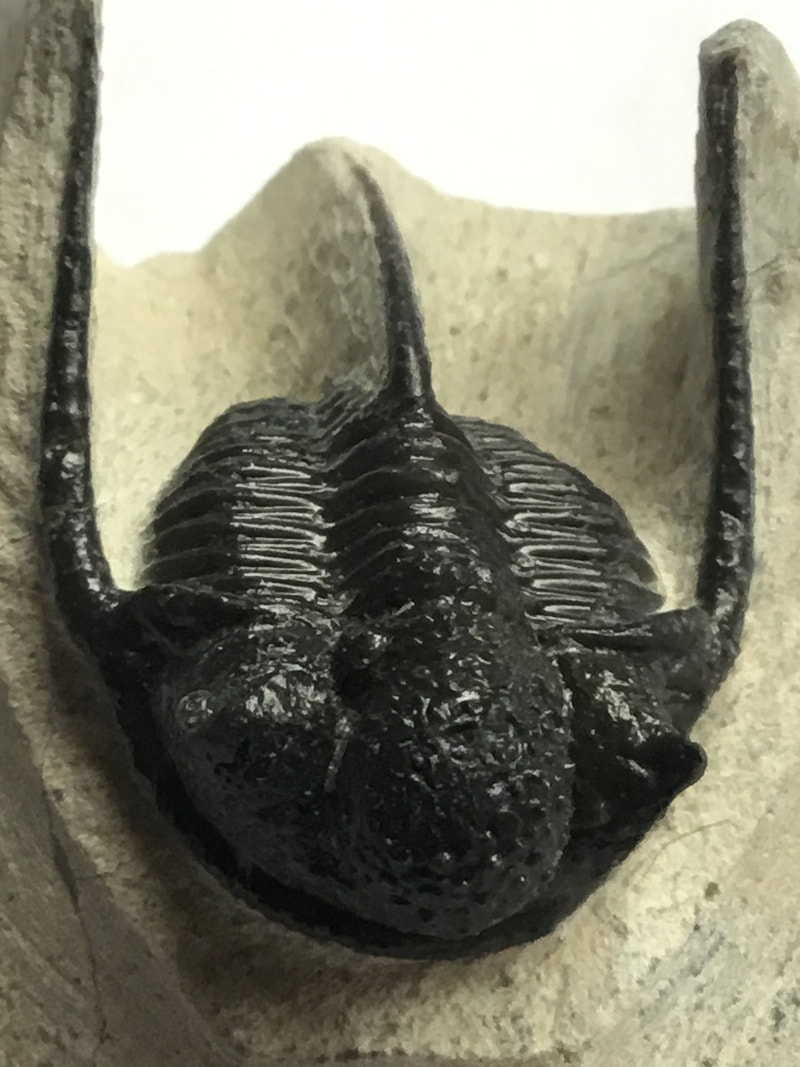 And that's it until I get back from the two day dig.
|
Kane Faucher
Archives
February 2024
|


 RSS Feed