|
So began my three day, three quarry adventure. On the first leg of the trip was a visit to my usual haunt, Arkona, but this time it would involve some great visiting friends and fossil comrades (Malcolm, Dave from Philadelphia, and Joe K.). Dave was more keen on plumping up his brachiopod supply, and was eager to get collecting in the south pit. Dave is no slouch on the trilobite front, though... He has gorgeous specimens that I would certainly like to have in my collection. Malcolm made the long drive to my place and arrived around 7:30 am, and off we went to Arkona to meet up with Dave. But before we left, Malcolm showed me a Moroccan trilobite he had prepared for Dave: 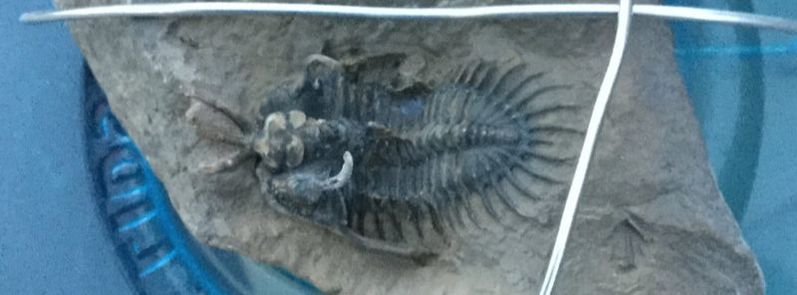 Definitely big props to Malcolm's prep skills. This one has spines coming out in 3D, including a crazy trident protruding from the glabella. Just wow. 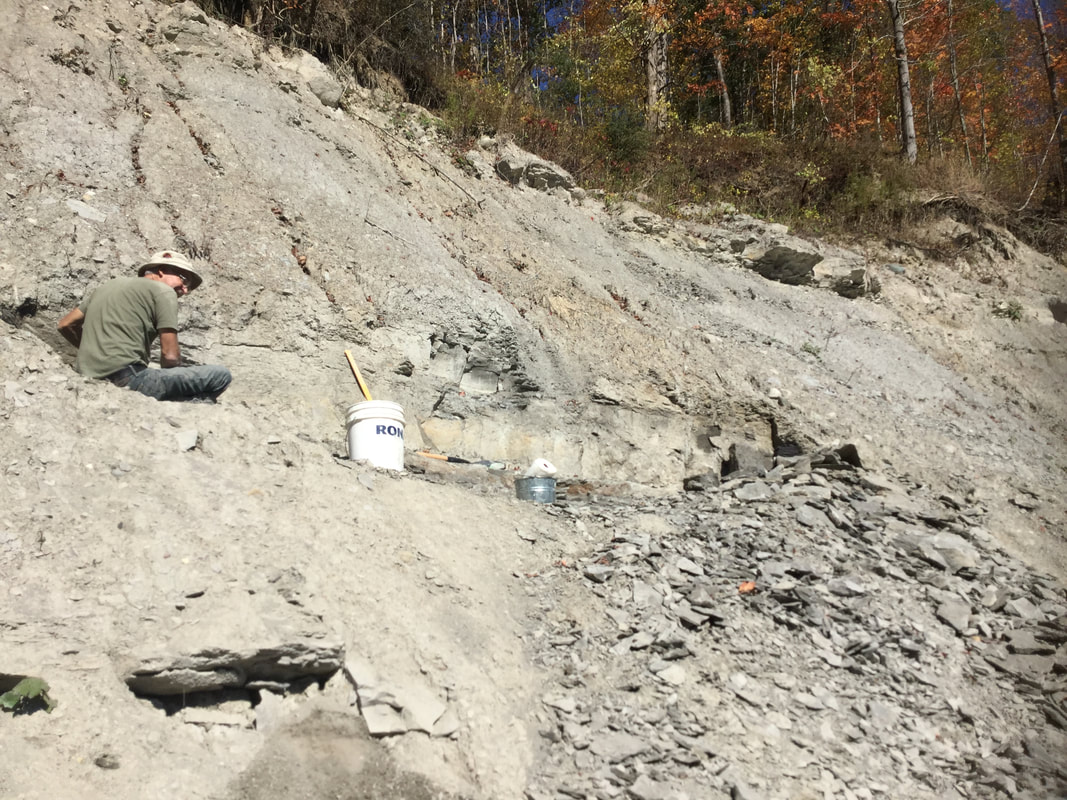 This picture was taken halfway through the day. While Dave was off in the south pit, Malcolm and I didn't really budge from our bench in the Widder. Malcolm was heading west, and I was heading east. We moved a heck of a lot of shale. I do not look forward to what will have to happen next once we run out of the left and right areas as that will mean cutting into the cliff, and that will mean chopping out a lot of overburden. I was already having to approach the Greenops-rich layer from the top, cutting out 4-6 feet of shale that only contains bits and brachs. But the search was a success in many ways. I came away with three Greenops, and Malcolm with two. That's pretty stellar results when finding one full specimen is a trip-maker. 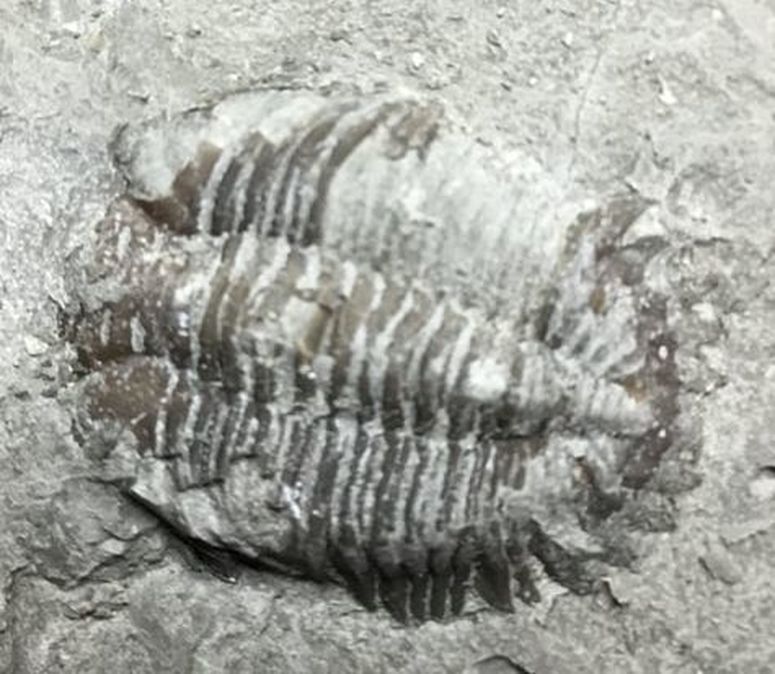 This one is a bit of a bummer given that some parts have flaked off. Still, not a bad piece that I can gift or trade.  I have a habit of picking up nautiloids from the Widder given how nicely they can pyritize. I did find a Tornoceras uniangulare, as can be found in this layer, but it is so pitted and in such bad shape that I'm not going to bother posting a picture of it here. But the real trip-maker for me was a plate with two Greenops. It also had impressions of other full ones. This must have been quite the death assemblage, and it is a little disappointing that only two survived. But here is how I found it:  Nervous as I was in attempting to prep what would be a $1,000 plate, I just need to make the attempt. 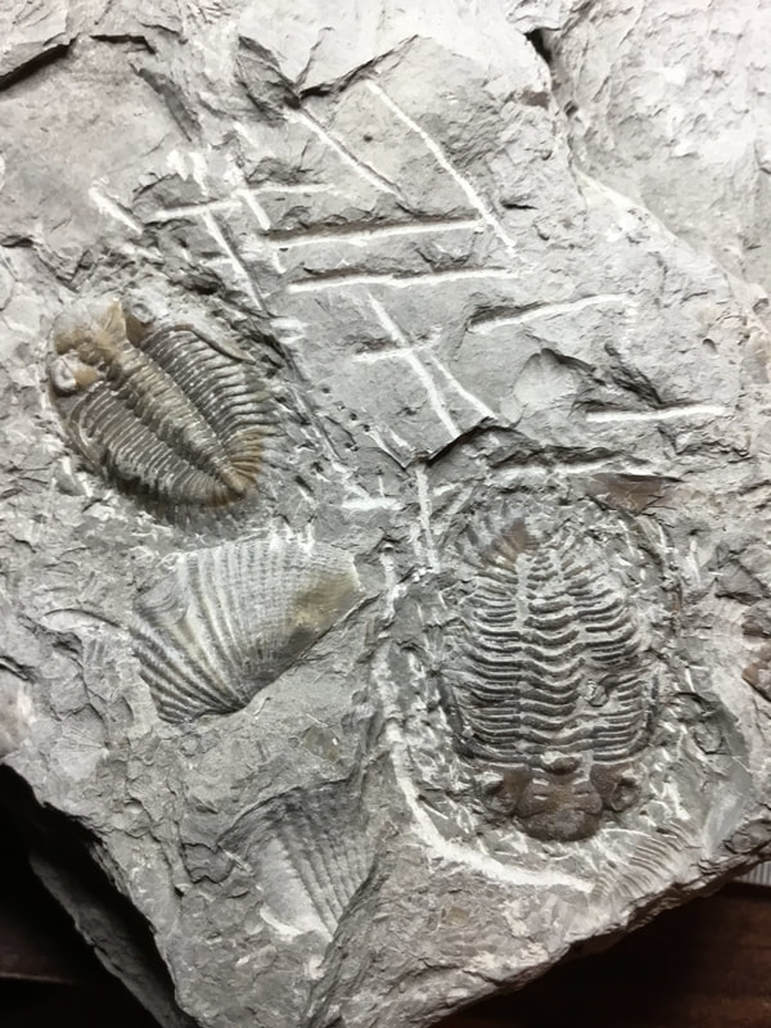 After about an hour using the Dremel to carefully remove some bulk matrix, and a sewing needle to work carefully around the specimen to reveal more of it. 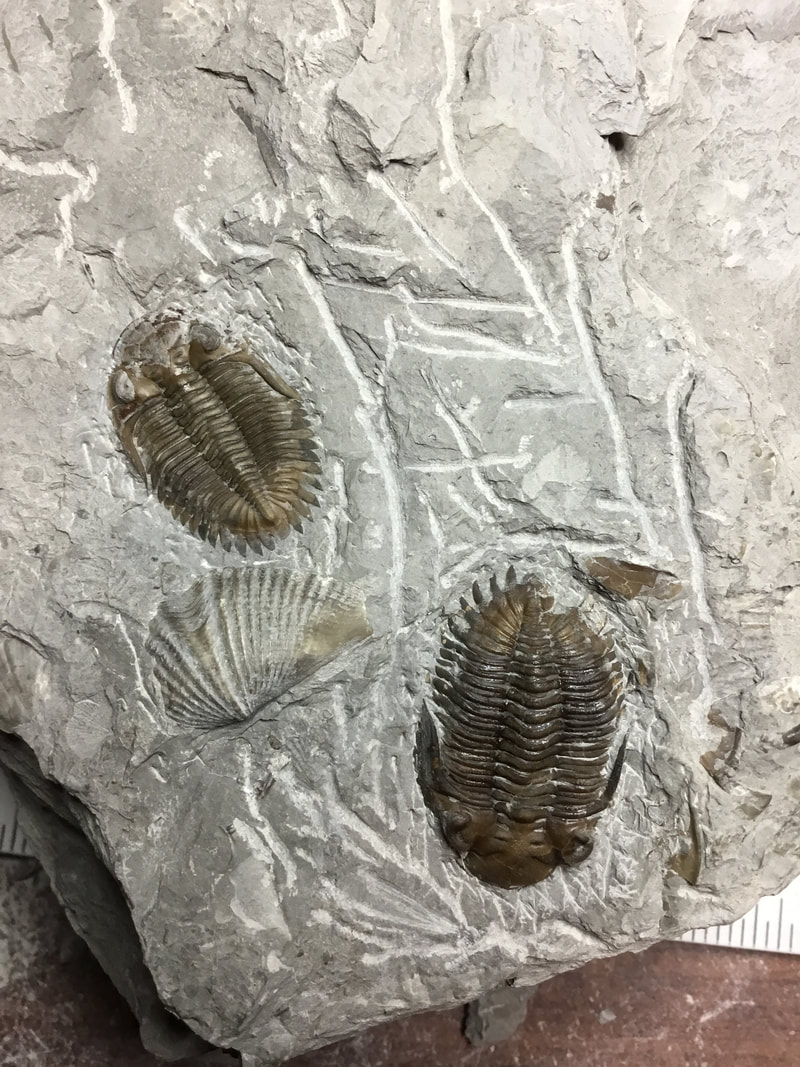 And this after another hour using more sewing needle and the Paasche air eraser using baking soda at 25-30 PSI. Not perfect as this pair has a few problems, but not a bad first try on a very tricky piece! I might do some fine touches on it later.
In all, a good first leg of the trip, and great to meet up again with Malcolm, and meet both Dave and Joe for the first time after only knowing them via the Fossil Forum. I simply have too much work at the moment to dig into all those Penn Dixie finds, but I did manage to play with one roller yesterday morning.
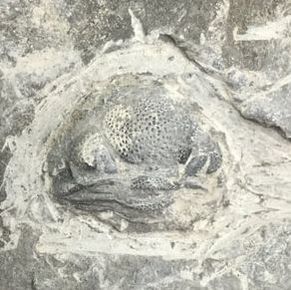
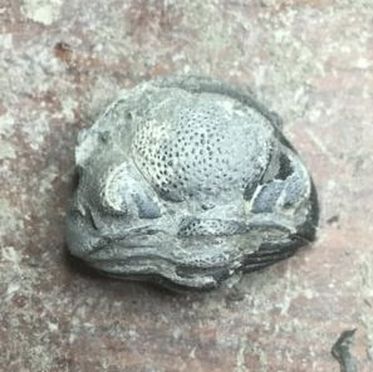
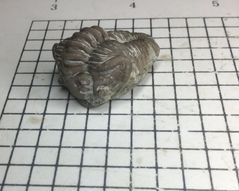
On the far left, this is how I found it, barely peeking through the shale. I had a feeling it was complete, so I put it in the bucket. The next image is what it looks like after a bit of work with the Dremel and dental picks. On the far right is after using a small flathead lens screwdriver. The purpose here is to eventually free it from the matrix, but trenching around it is a good idea to avoid accidentally causing a crack to run through the specimen.
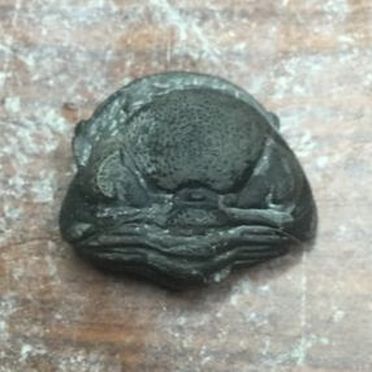
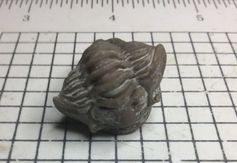
Using sturdy tongue and groove pliers, I was able to clip off the matrix to free the bug. Not a bad looking one, although it is more crushed than enrolled. There's also a tricky bit of "underbite" where the pygidium protrudes farther than the cephalon. On the right is what it looks like after some sewing needles and 20 minutes of air abrasion at 40 PSI using baking soda. It still has some stubborn matrix to remove, but that may have to wait until I can get my hands on some dolomite as blasting media. Still, not a bad job compared to what it initially looked like!
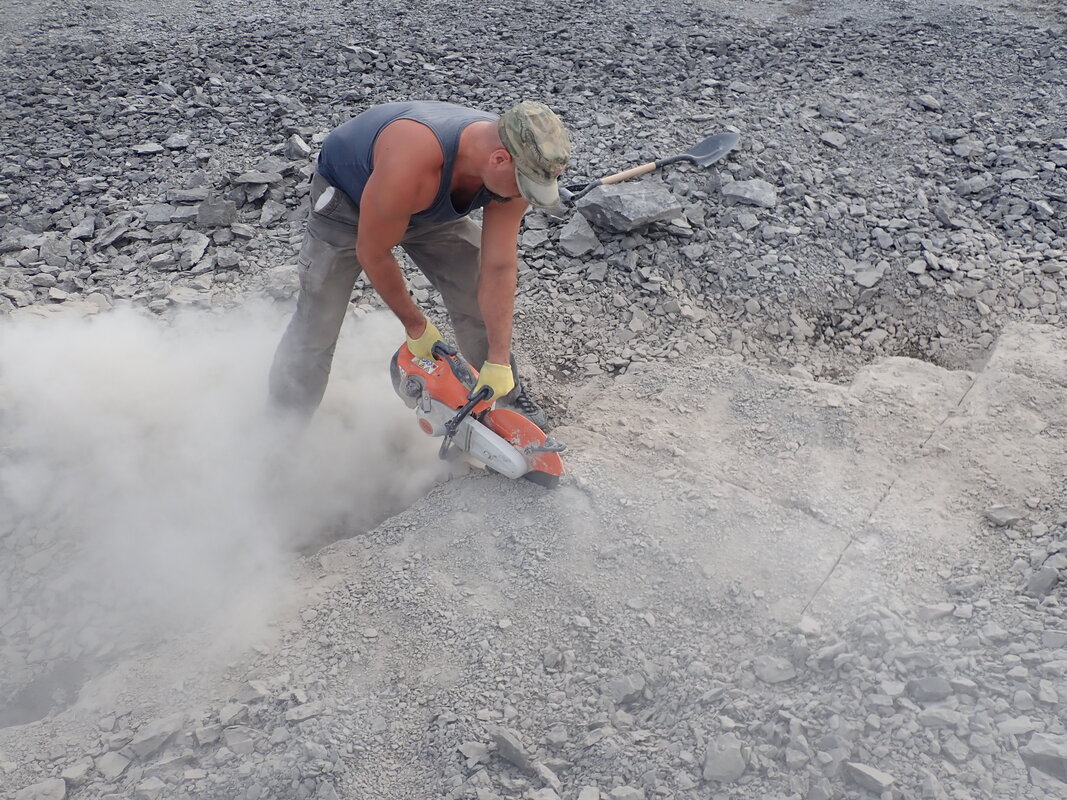
My new Paasche AECR arrived a few days ago, and I just got an air compressor last night, so it is time to dig into preparation! 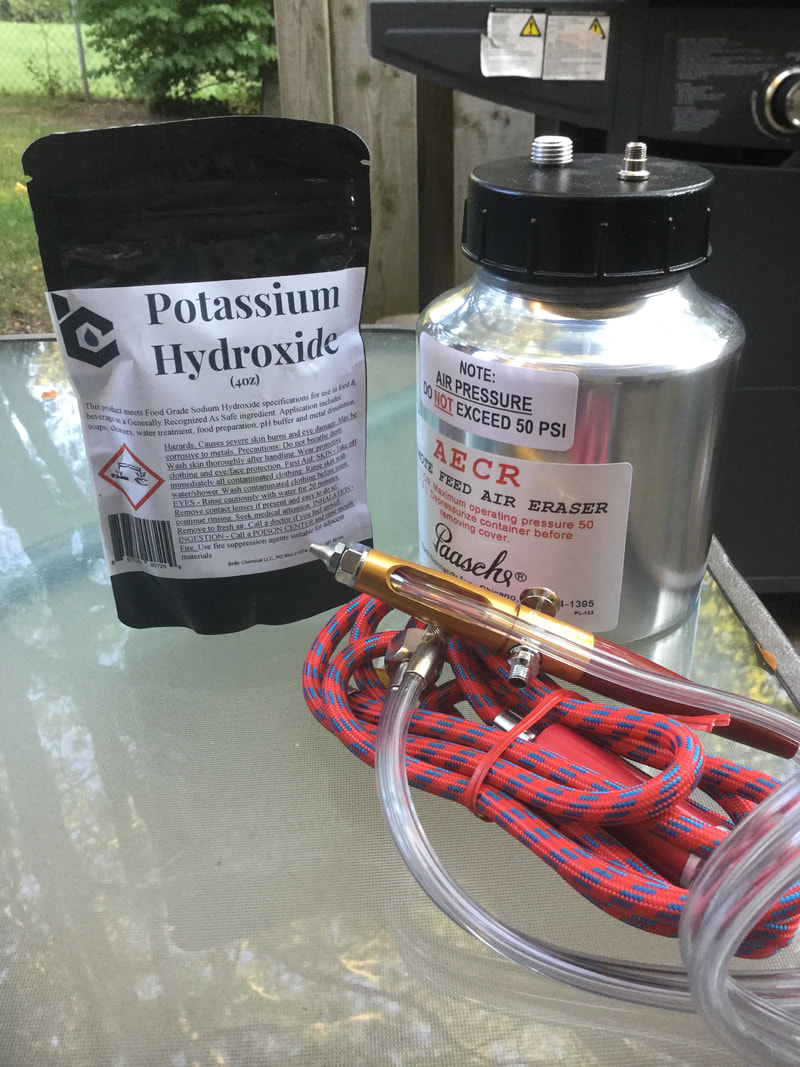 On the left is a 4 ounce bag of potassium hydroxide (KOH), 90% pure. It is a strong alkaline used as an ingredient for making soap. It reacts quickly to moisture in the air, so precautions are necessary in handling it. This is part of the "passive prep" approach: place a few flakes of the KOH on a fossil you want to remove matrix from, check in once every hour, and leave it for 4-8 hours before rinsing it off and repeating as necessary. I've done a preliminary soak but didn't see any real difference, so I'll have to try again. On the right is the air eraser with built-in moisture trap. 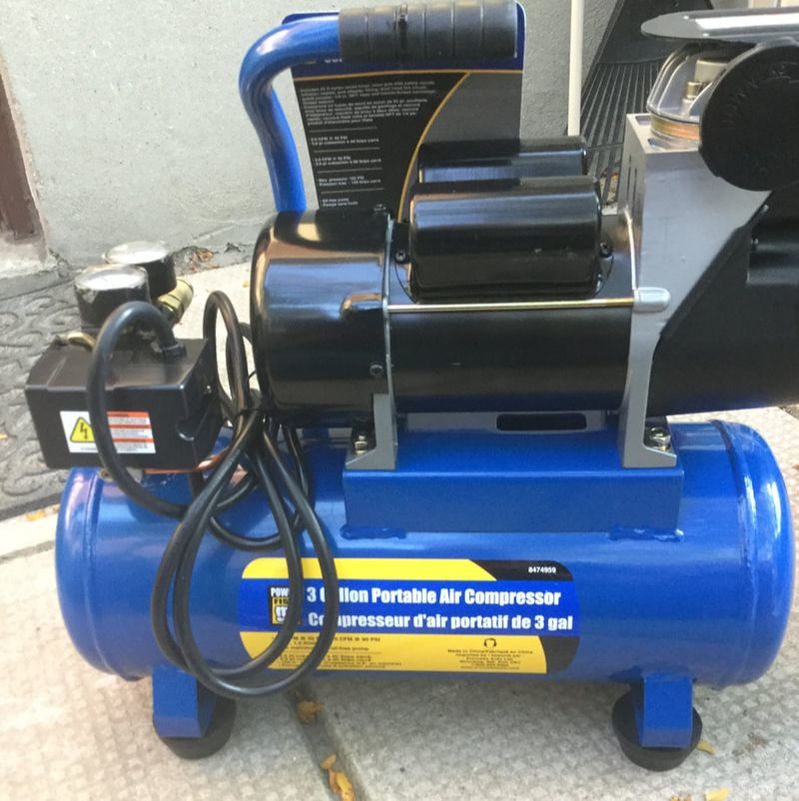 A 3 gallon air compressor purchased from Princess Auto, right out of the box. It is safety rated up to 150 PSI, but the air eraser only operates between 0-55 PSI. This compressor comes with a pressure regulator. It is a bit loud, and it cycles very often due to such a small air tank, but I wanted to make sure I'd be keen on preparation before shelling out over 500 bucks or more for a serious air compressor. I attached all the hoses and teflon-taped each connector to stop up any air leaks. 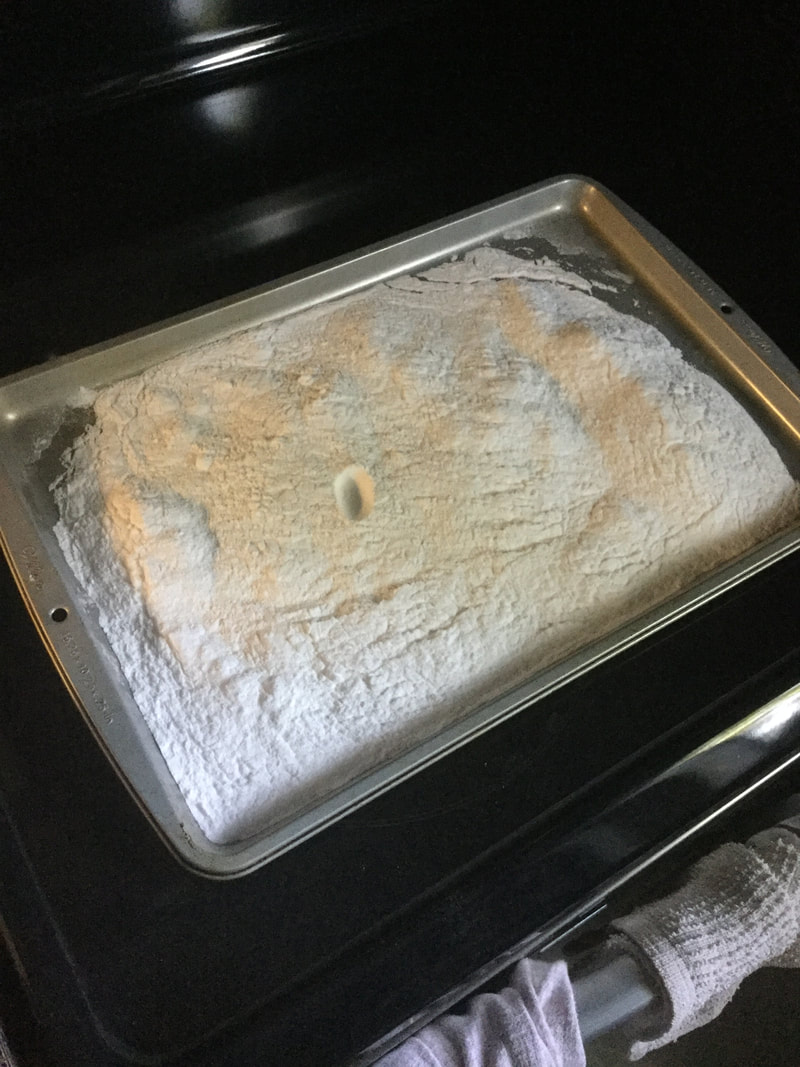 With the hoses all connected and ready, time to bake up some blast medium. I am using plain old baking soda, which should be fine for the kind of shale matrix I usually deal with. I spread this on the cookie sheet, bake at about 250 F for 20 minutes, let cool, and transfer it immediately into an air tight container. As baking soda takes moisture from the air, the baking process gets rid of the moisture, since any of that will cause clumping and clog the air eraser. So I'm ready to roll, but let's take stock of our safety equipment first. When using any blasting equipment where there will be fine particles, you certainly don't want to be breathing them in. As someone who is an ex-smoker, I'm pretty keen on keeping my lungs clean! I use a N95 dust mask, and have an additional high-grade respirator. I use full safety goggles and long thick rubber welding gloves as you don't want to accidentally abrade your hands. I'm doing my test run outdoors in the backyard. This stuff produces a lot of dust. When colder temperatures forces me back indoors, I will be building a sealed blast cabinet, and attaching a dust collection system like a shop vac.
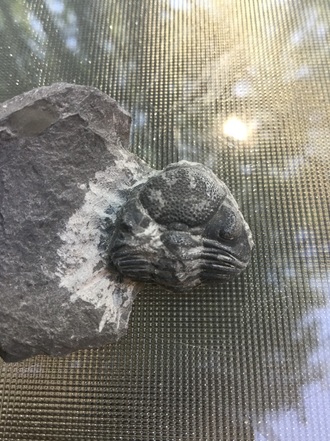
Time for a test run! It took me a few hours of fiddling around to get this thing to work, and I'm still having problems ensuring good air flow and the right amount of medium (if it picks it out of the canister at all). Pictured above is a before and after on a partial Greenops widderensis. I'm beginning my prep on junky pieces first to learn how to use this tool. No sense going right for the prize specimens and risking ruining them. As you can see, after about 5 minutes of abrasion, it has done an ok job removing excess matrix in the nooks and crannies, as well as matrix around the bug. Much finer, detail work may require affixing modified dispensers of about 18 or 20 gauge. 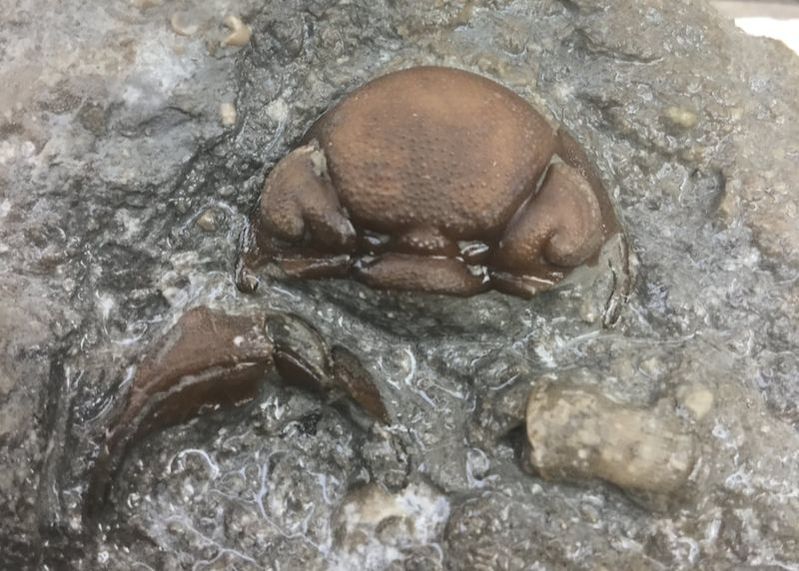 My next victim was this Eldredgeops rana cephalon from Arkona. Not too shabby. It can be slow going, so patience is required. 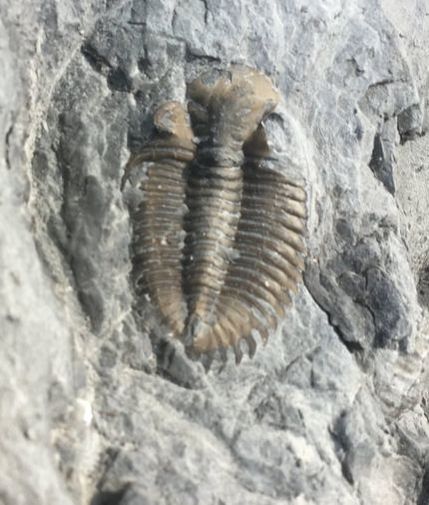 Another partial Greenops practice dummy. I love how it brings out the chocolate brown and gets rid of the dusty grey.
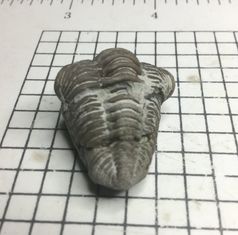
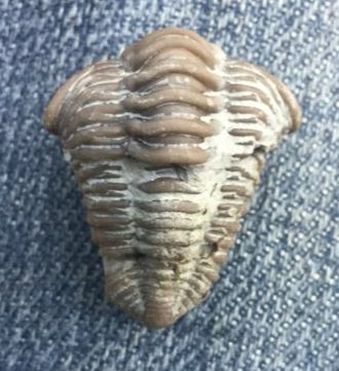
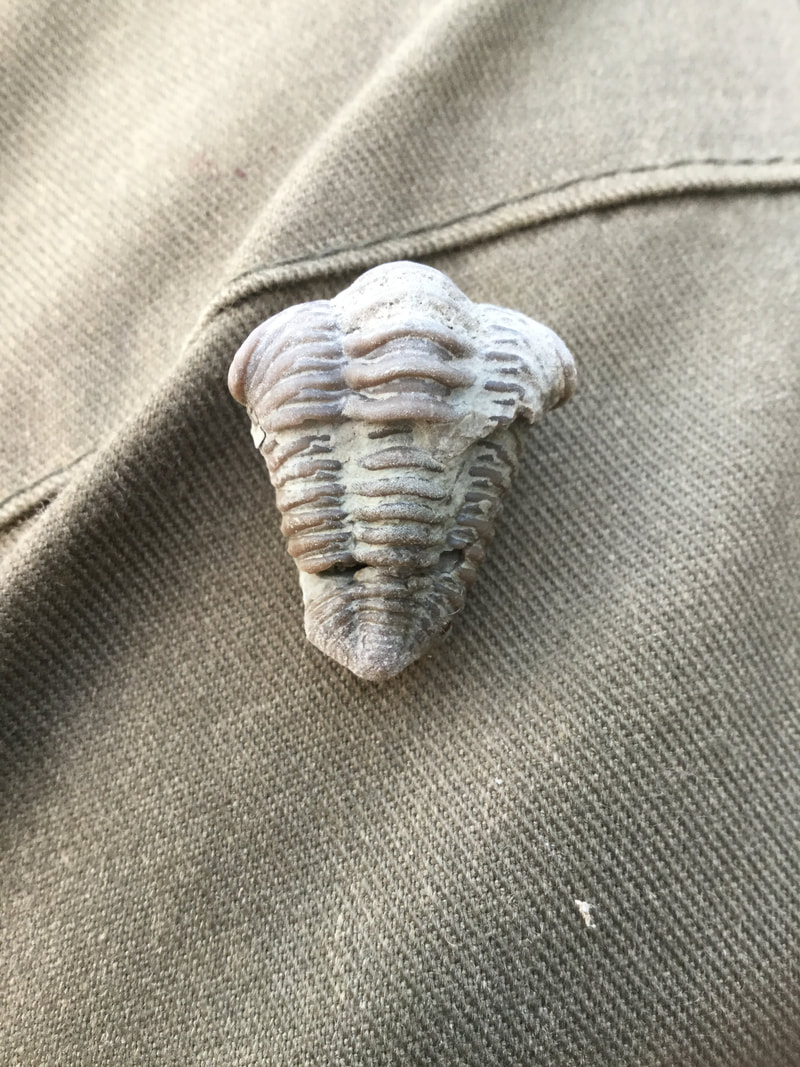
This is a semi-prone Flexicalymene senaria I picked up in Brechin, Ontario. This one is not only going to need a lot more work, but perhaps a stronger blasting medium than baking soda, such as dolomite given that the matrix is tougher than Widder or Penn Dixie shale. Still, a lot more detail is visible now compared to when I found it!
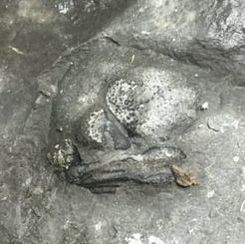
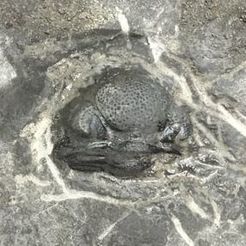
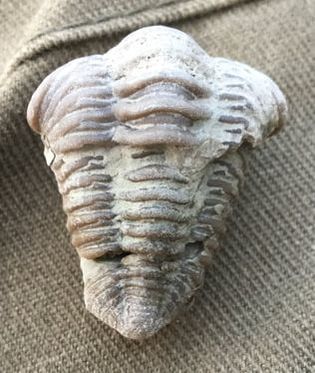
And just a quick before and after pic. The first is when I found it in the field, and the second after a bit of prep.
I did try out a few other specimens not pictured here. It seems to do a pretty good job on some brachiopods. I still have a great deal to learn about how to properly use this tool, and will be asking advice of prep experts, and practicing. Stay tuned: my next anticipated trip will be a return to Penn Dixie in October. Day 1 of 3: Craigleith AreaDeb was on vacation time, and so apart from a few beach days and staycation relaxation, we spent three days on the road. Our first stop was Craigleith near Collingwood, and we took the stunningly scenic route through Grey Highlands. The Craigleith area is filled with Whitby Formation shale overlying the Lindsay Formation limestone. You cannot legally collect from the provincial park, but there are a few very tiny spots left outside of the park where one can split a few shales to find a lot of Pseudogygites moults. 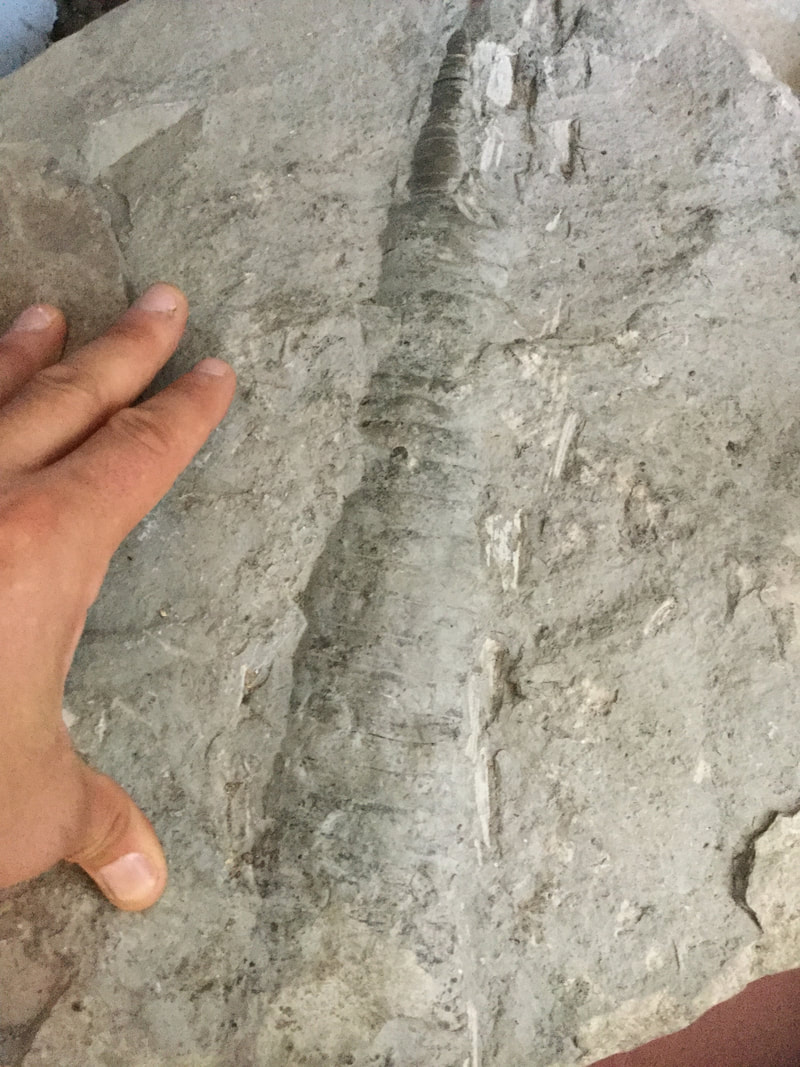 At the park itself, there is a display area of fossils. Pictured above is a fairly large orthocone nautiloid - they got pretty big in the Ordovician. 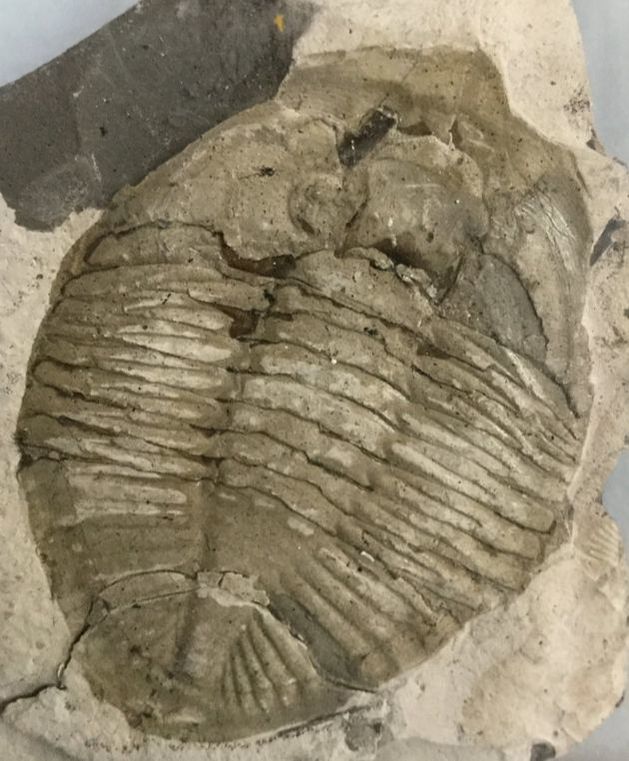 A complete Pseudogygites latimarginatus. Full ones are exceptionally hard to find as it is more common to encounter enormous hash plates filled with moults.  A conularid. 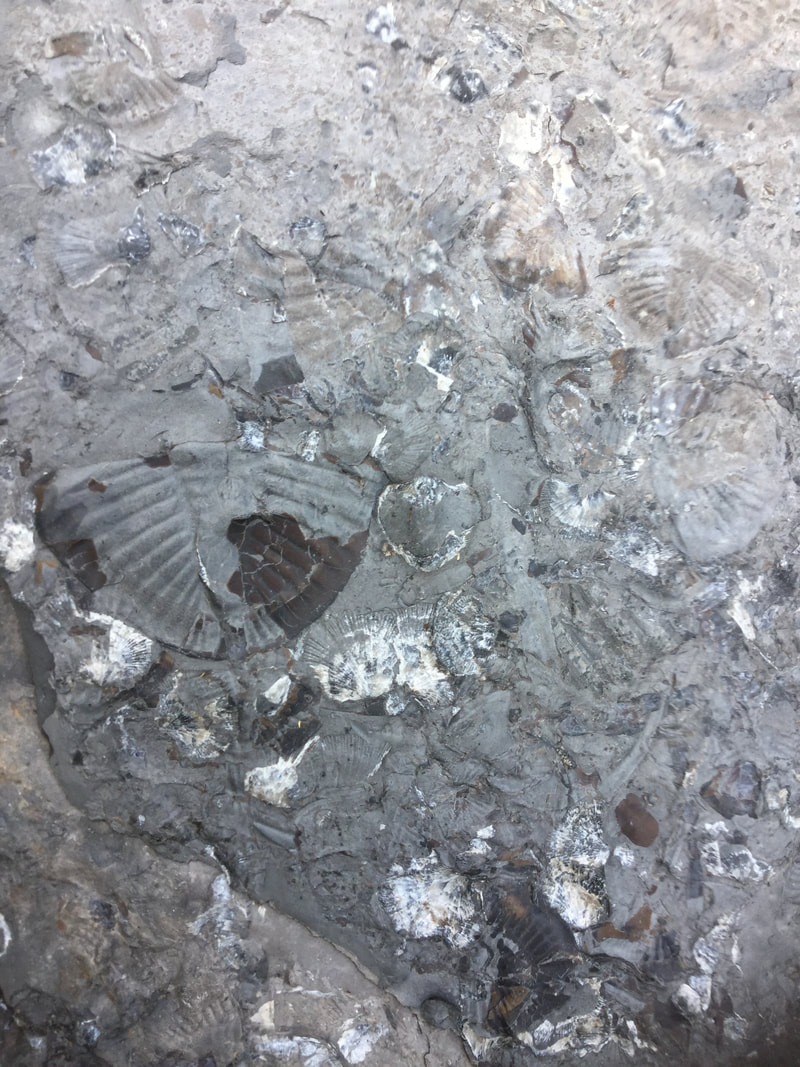 A fairly representative hash plate of Pseudogygites latimarginatus trilobites and brachiopods. Pieces from over a dozen in this shot alone. 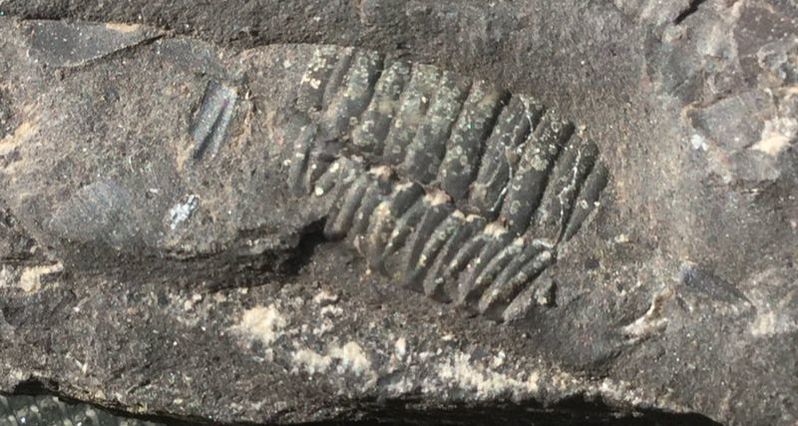 Another representative species of trilobite in the Whitby Formation is Triarthrus. I might be able to free up some of the overlying matrix on this one. It is partially pyritized, although it is tough to make out in this photo. 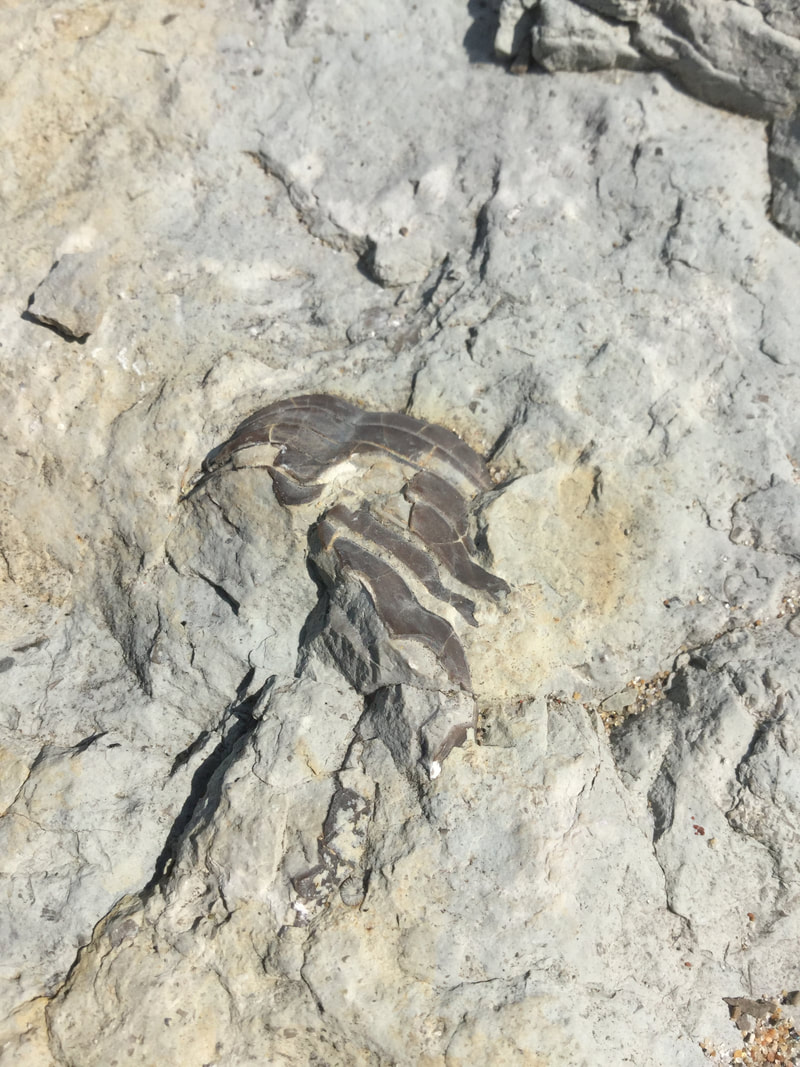 The pleura of an Isotelus sp. in the Lindsay Formation. 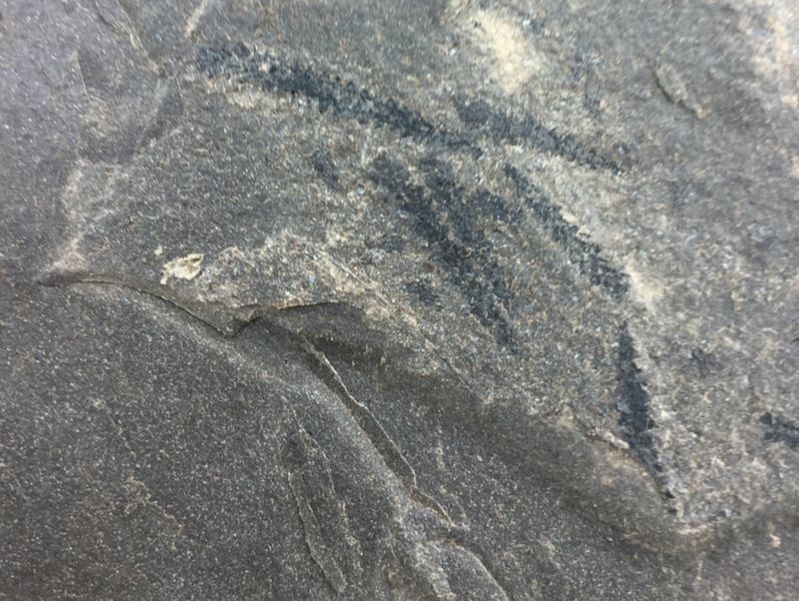 These small, feathery creatures are also common in this shale. These are graptolites. 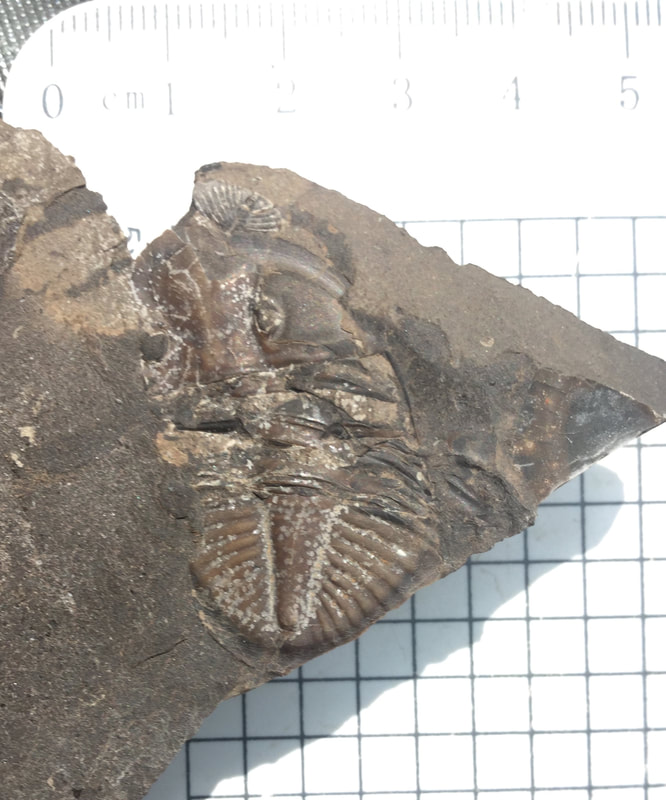 This is indeed a complete Pseudogygites latimarginatus. A bit crushed and torn, but all the pieces seem to be there. Nice! Day 2 of 3: Oro-Medonte to Gamebridge and beavertonAfter staying in Oro-Medonte / horseshoe valley, we made our way to our B&B in preparation for the big quarry dig on the following day. Although not a fossil collecting day as much as simply a touring of small town Ontario, there were a few rocks around. Deb took lots of pictures of some living creatures like sand pipers, geese, monarch butterflies (so many!), and a cormorant. In Beaverton, we took a stroll along the pier where the sides were shored up by Verulam Formation riprap. 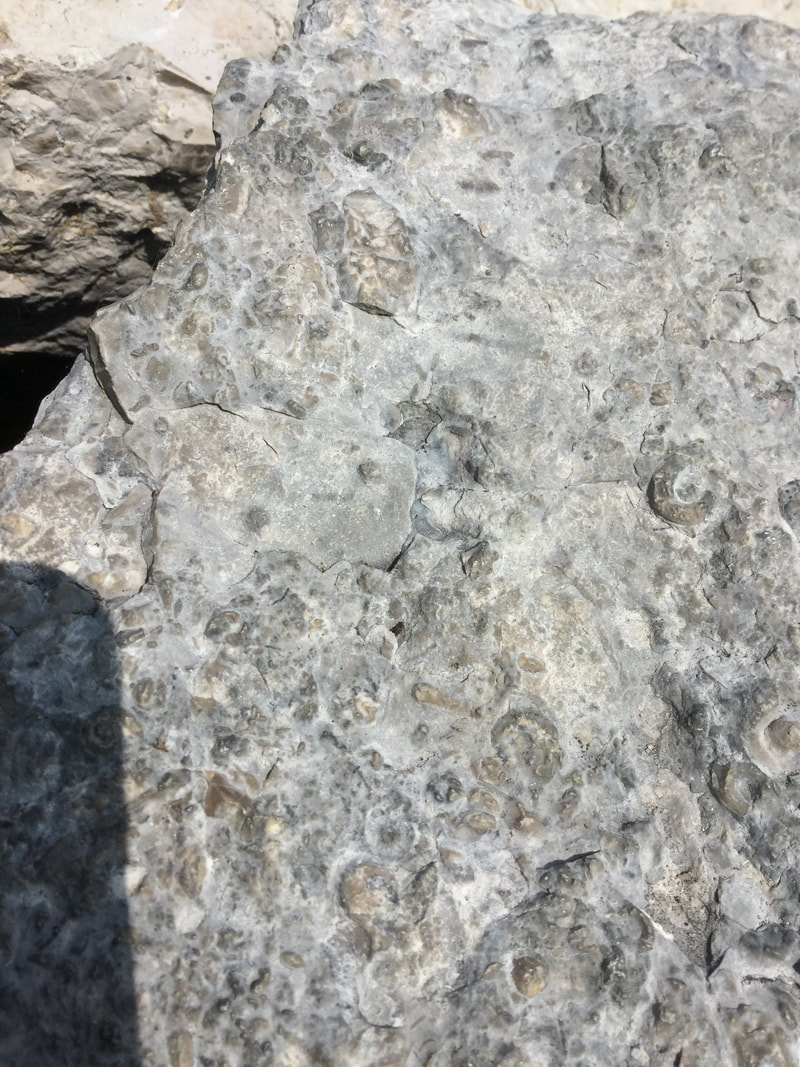 The Beaverton riprap: weathered gastropod hash. 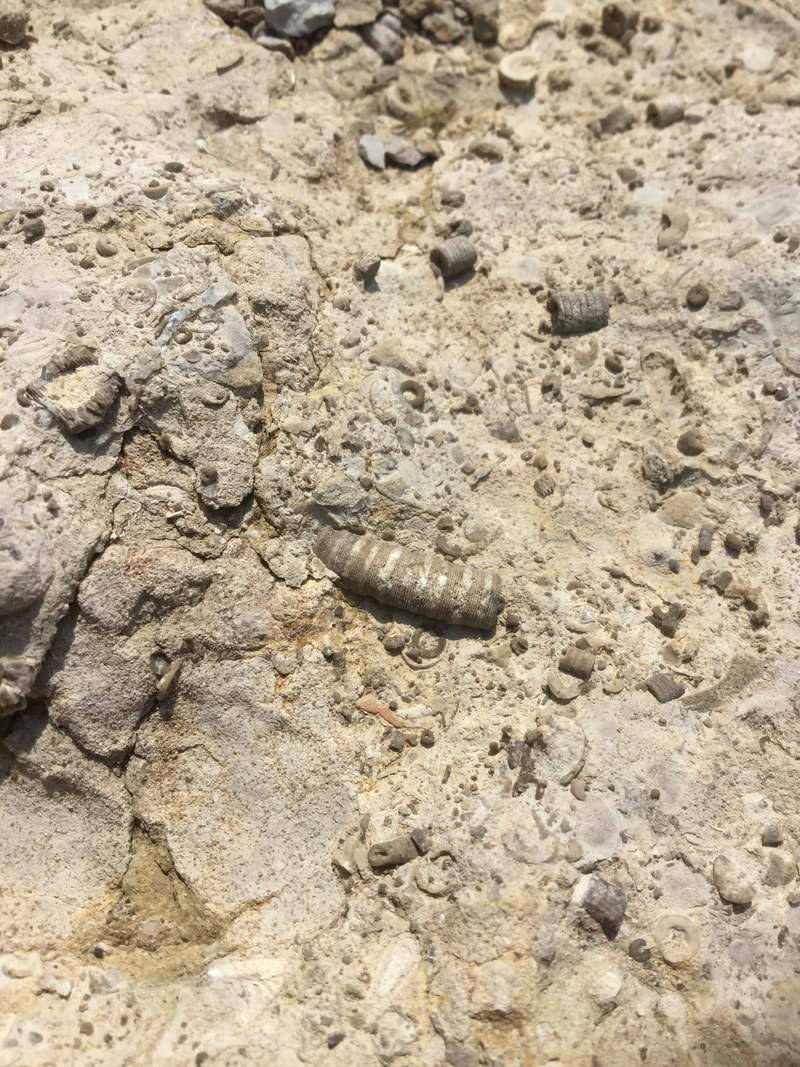 Crinoid hash plate as part of the landscaping toward the old mill park in Beaverton. 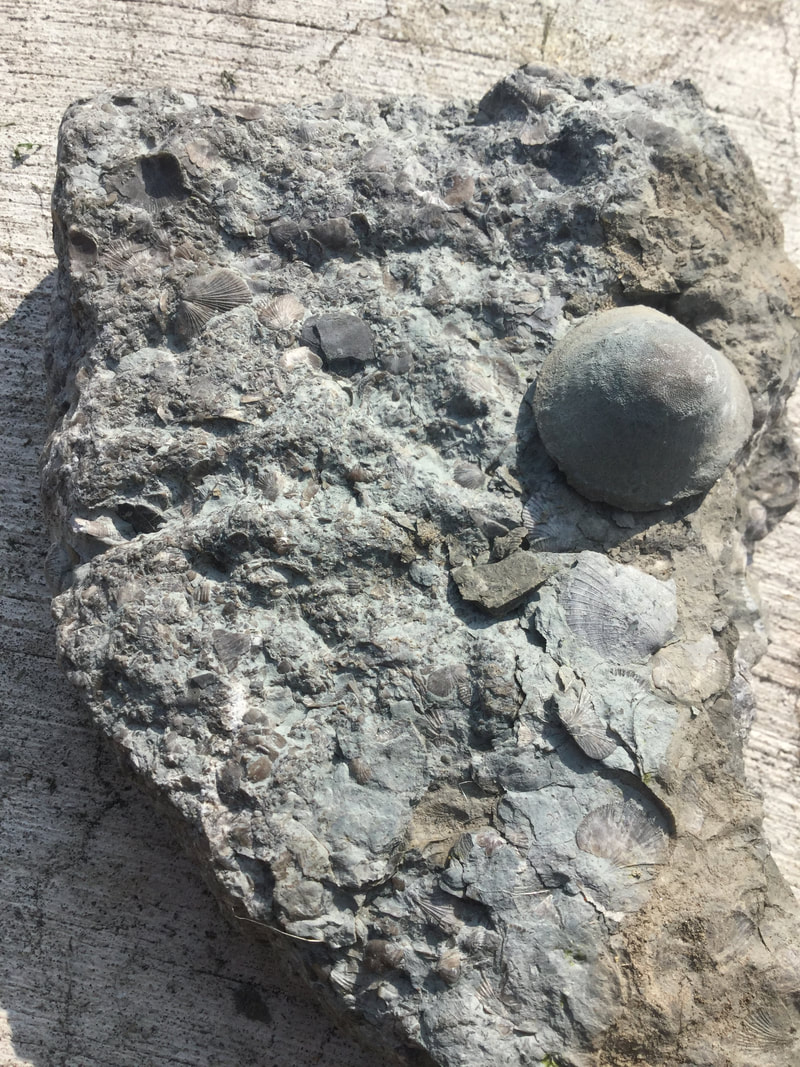 We took a walk to Gamebridge's locks system, and then upriver where there were pockets of Verulam limestone. Pictured here as an appetizer to the main event for the next day in the quarry is a brachiopod hash with a piece of Prasopora on the right. 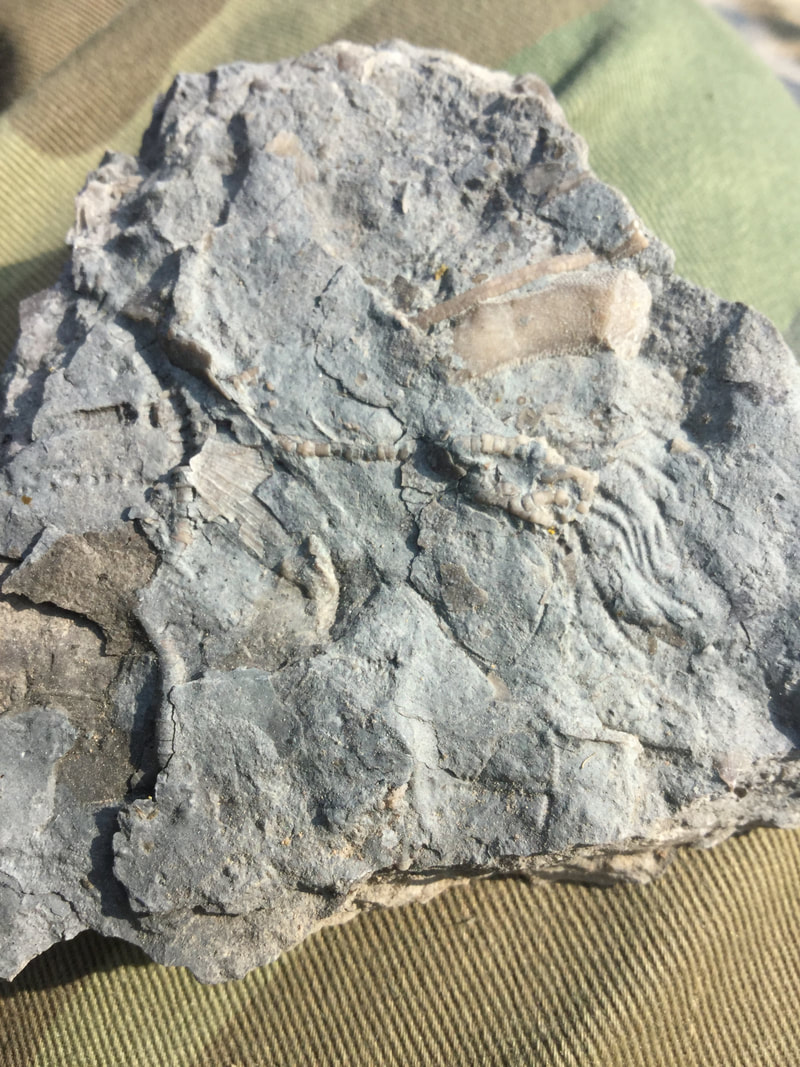 By the same river, a crinoid stalk terminating with half a calyx showing, plus the impression of arms flowing from it. A neat piece! 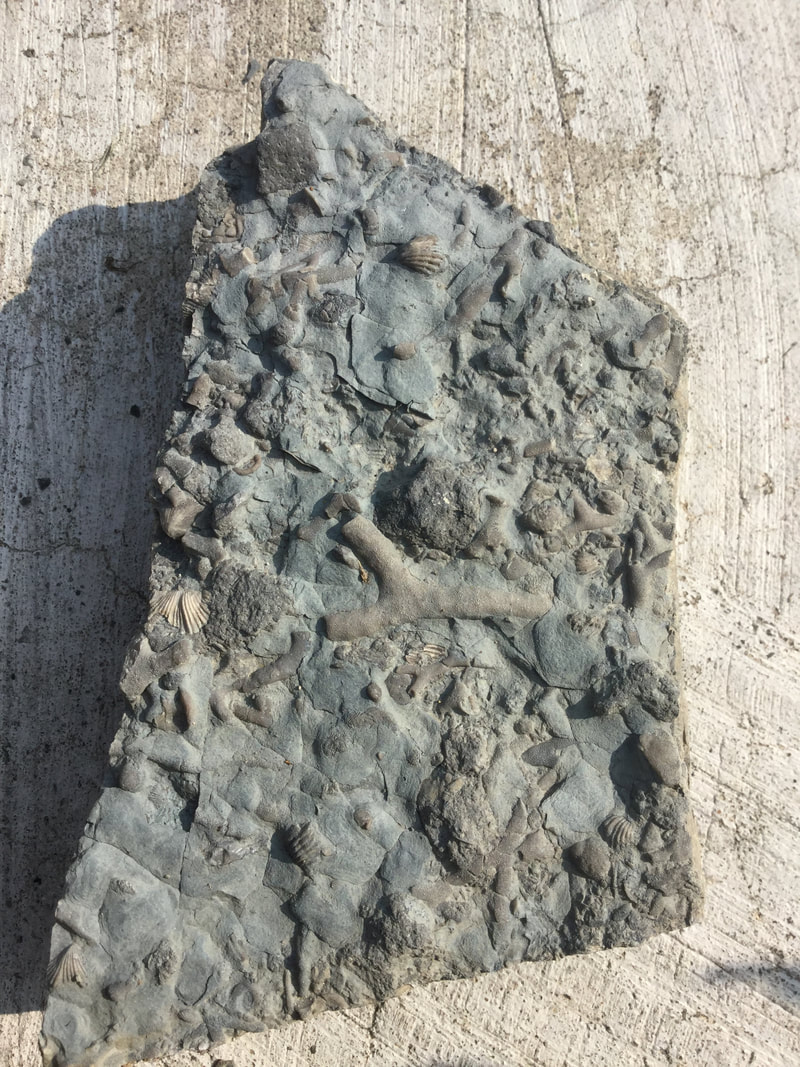 Last river piece: a hash of mostly brachiopods and bryozoans Day 3 of 3 (The Main Event)I was so excited to get into the quarry that I was up at 4 am and left the B&B at around 5:15 during nautical twilight to make the five minute walk to the quarry. I deposited the legal waiver forms, suited up with the hardhat and reflective vests, and poked around to look at the rocks the best I could until the sky lightened up a bit more. 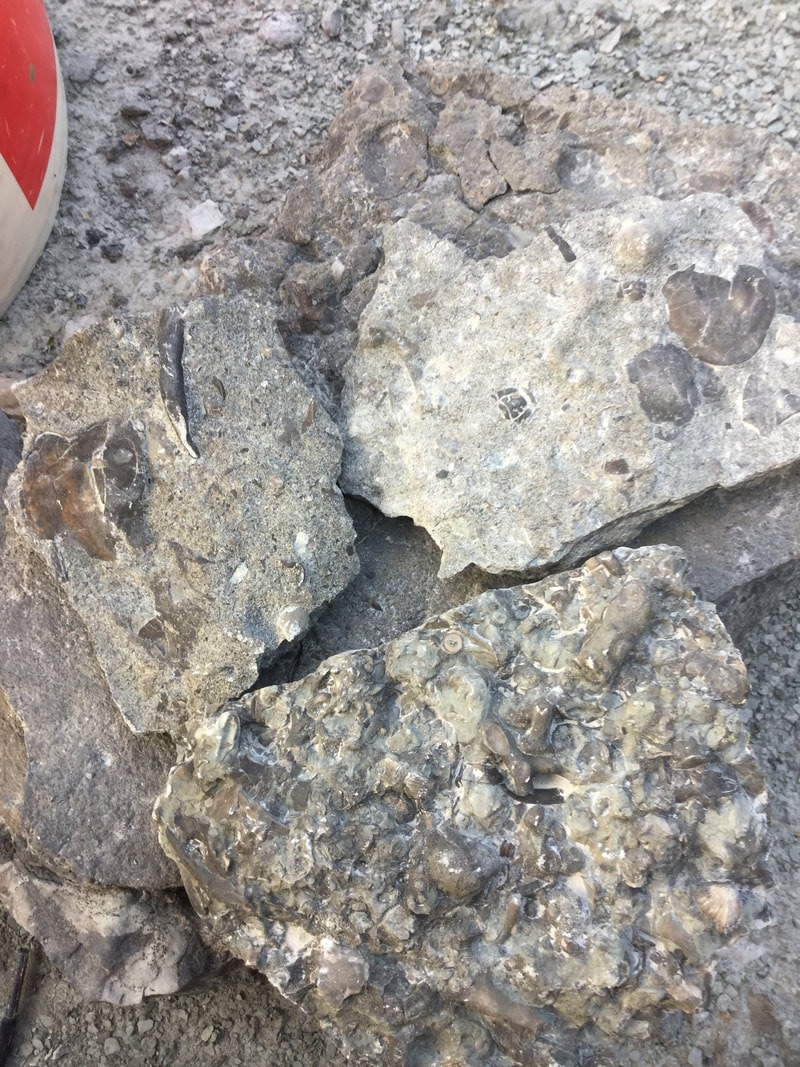 Those who have read my previous post on Brechin's JD Quarry (here) already know the place is incredibly vast and overwhelming. Top left: a large cephalon and genal spine of an Isotelus (fragments abound here, while full ones are very hard to come by). Top right: more Isotelus bits with a Flexicalymene senaria cranidium in the centre. Bottom: typical busy hash plate of assorted crinoids, trilo-pieces, bryozoans, and brachs.
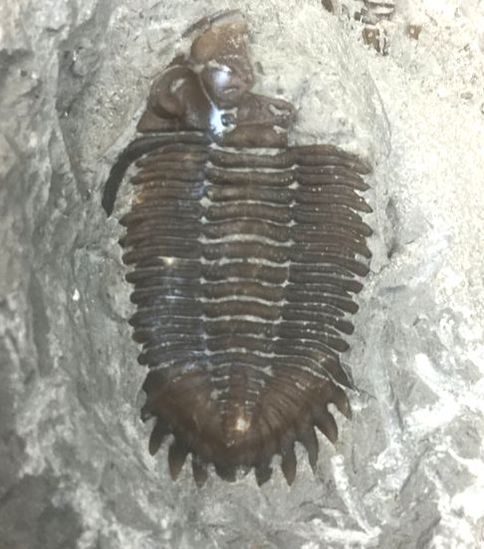
First blood is a prize find: a semi-prone Flexicalymene senaria in the scree at the top level of the quarry. I found it in two pieces and had to stabilize it with crazy glue. Unfortunately, the pin that functioned as the stopper for the nozzle had snapped off, so my glue bottle would be one use only. This piece is still, however, lovely and quite robust. Eventually, I was joined by Malcolm, Kevin B., and Jabali. We split some new blast piles, and also worked on the new area hauling out tons of rock where Malcolm had found some exceptionally rare cystoids. Sadly, it looked like what he had found the weekend before was an isolated death pool, but it felt good to move enormous slabs of Bobcaygeon Formation limestone. Just to give you a sense of how serious we can be, one piece we moved had to weigh over 700 lbs, and I ended up snapping a steel pry bar. Groar! I spent the rest of the day trying to cover ground, going through weathered piles of scree along the upper ledges and wandering the immensely mountainous crush piles. 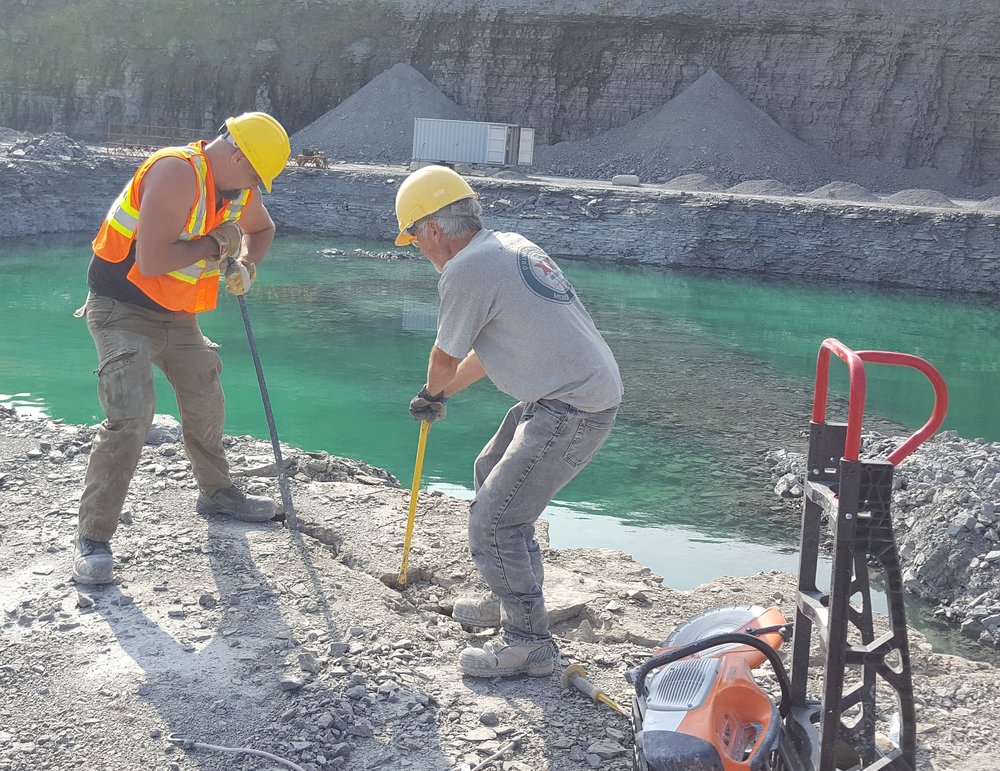 We don't screw around. Jabali snapped Malcolm and me trying to pry this big rock into the pond. We needed to remove from the top down by a good six feet to see if the cystoid layer was going to continue. 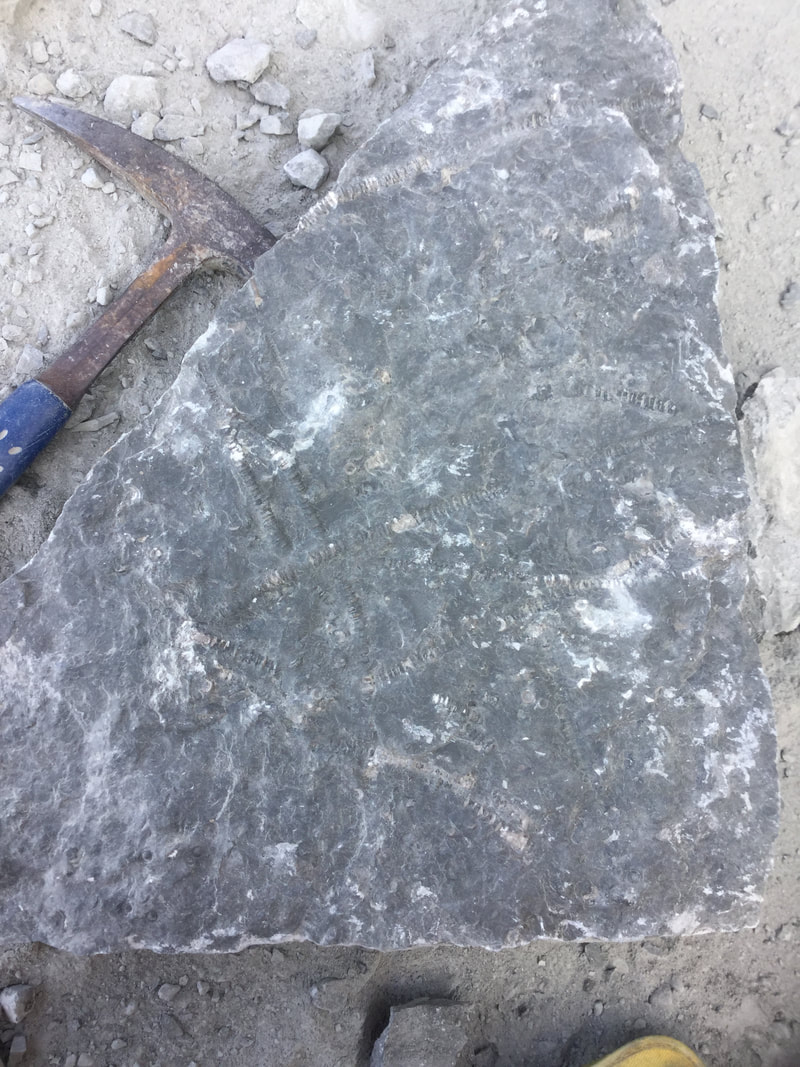 Bottom of the quarry, new blast pile. Crinoid stalks can run forever here. 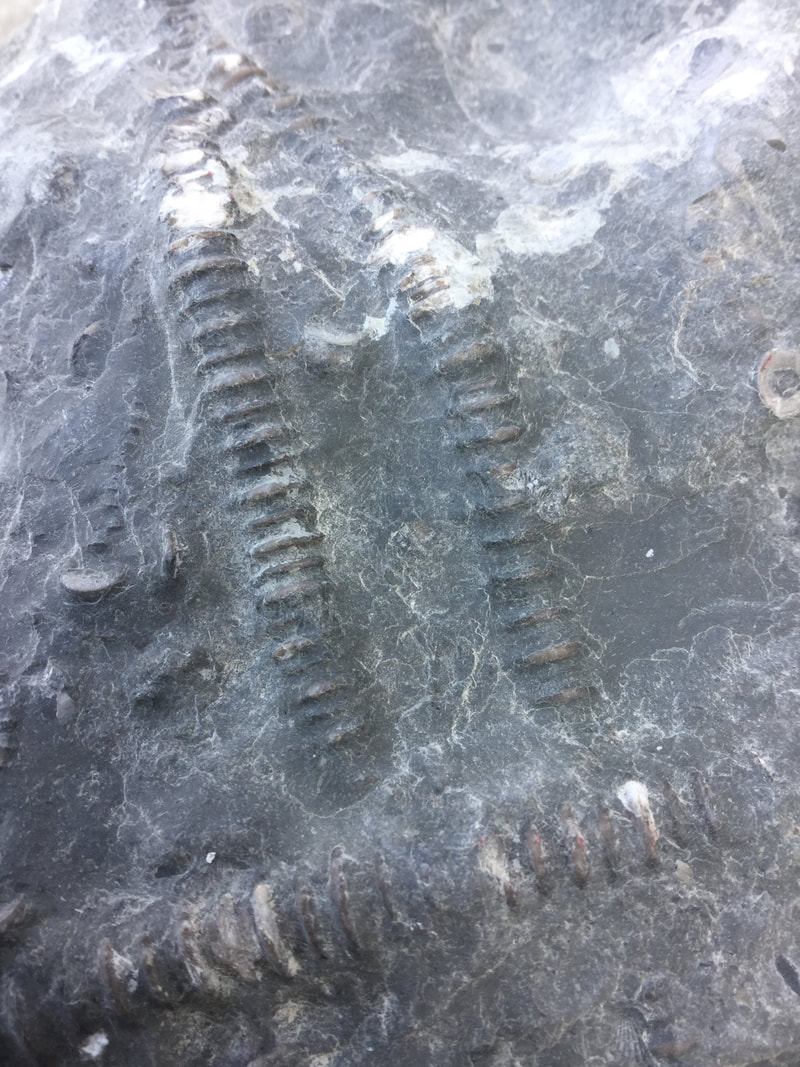 Close up of crinoid stalks. 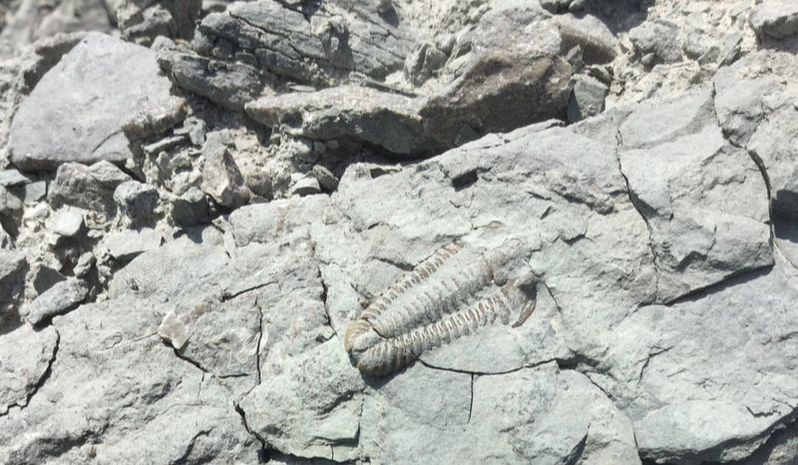 In situ photograph of a full prone trilobite, Flexicalymene sp. Sadly, as I didn't have any glue left, I wasn't able to stabilize it. The tail piece of this one is now missing. 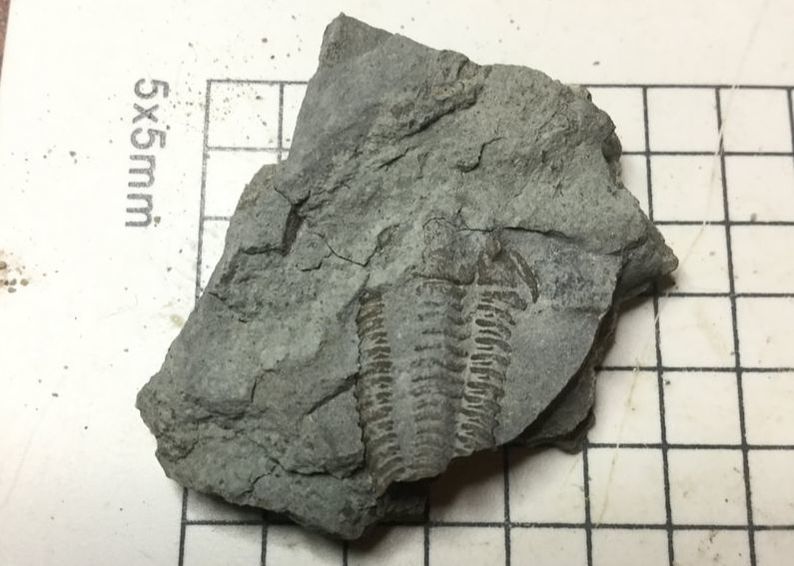 What survived transport. I might be able to very delicately tease out the left side. 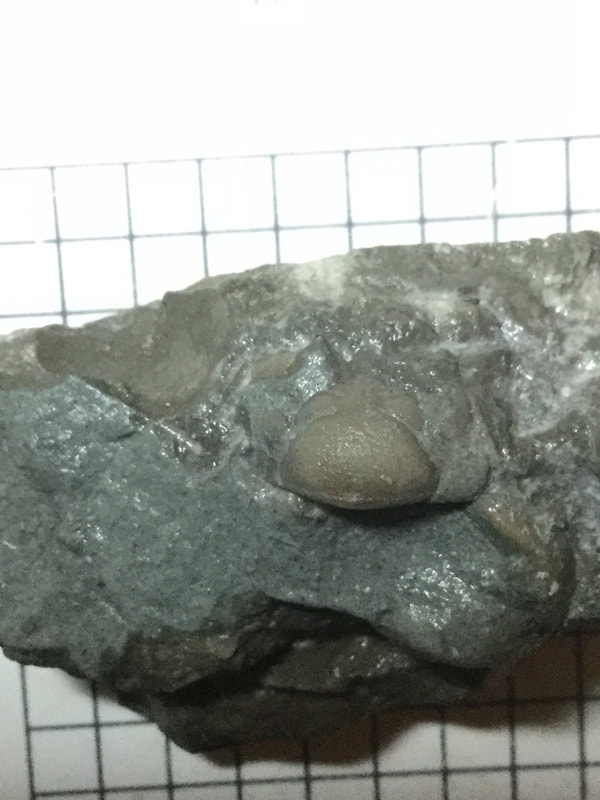 The pustular glabella is poking out at a vertical angle on this piece. Not sure yet what species this is, but will update when I find out. Update: it is looking like I have myself a Calyptaulax callicephalus. 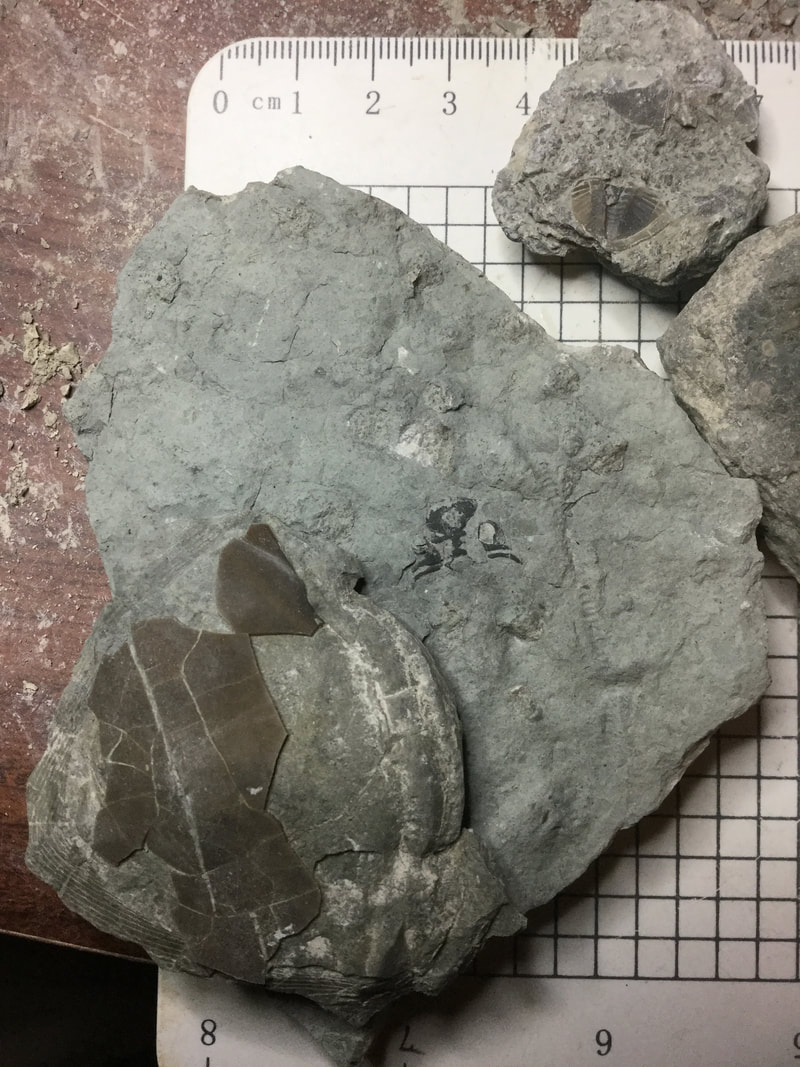 Trilo-pieces. Top right: impression of a pygidium with a margin (to be identified). Centre: Possible Flexicalymene cranidium (to be confirmed - actually no: see picture below). Bottom left: pygidium and some pleurae of an Isotelus. 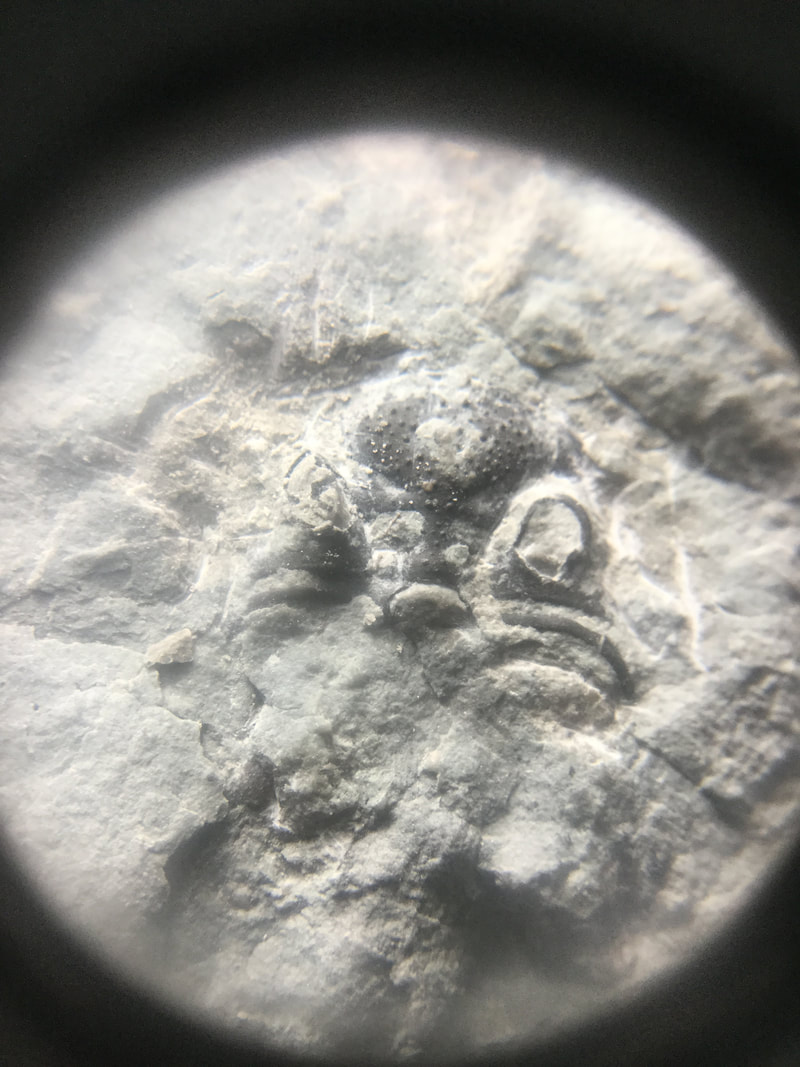 Well, what do you know? I get to add another species to my collection. Thanks to Don C. from the Forum in planting the bug in my ear that this might be an Achatella achates, an uncommon phacopid trilobite. I just picked off some of the matrix here to reveal the telltale diagnostic features of this species. 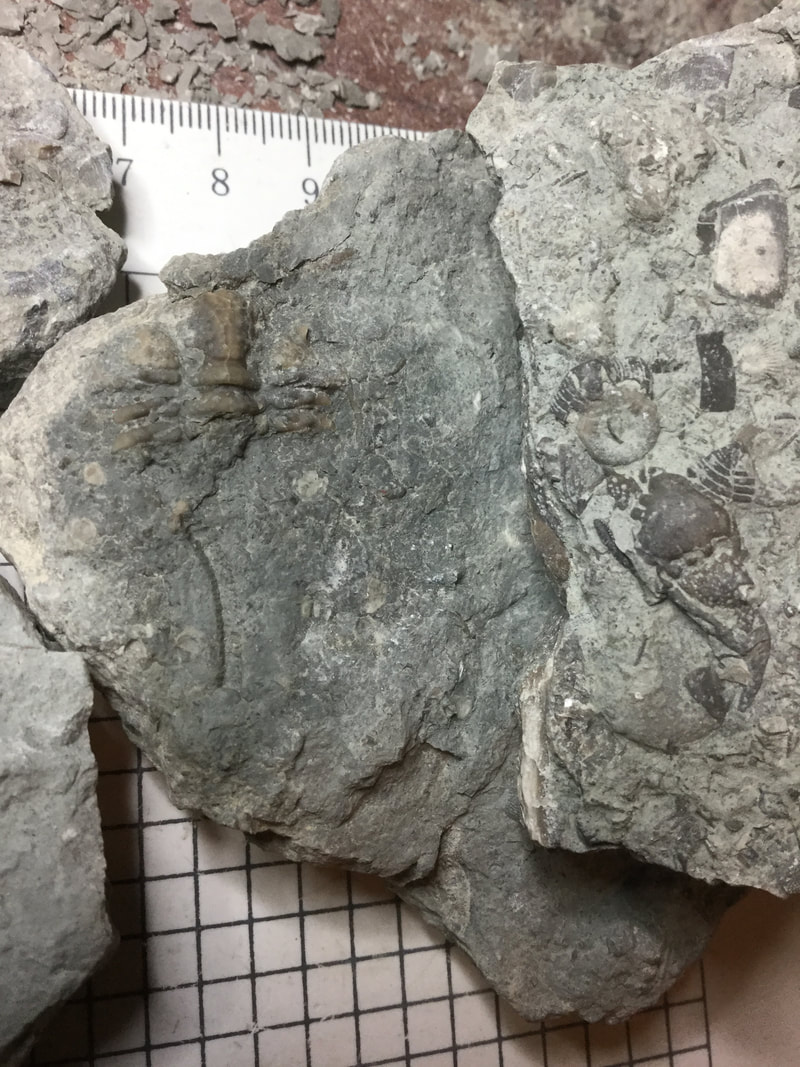 Both plates contain partial Ceraurus. 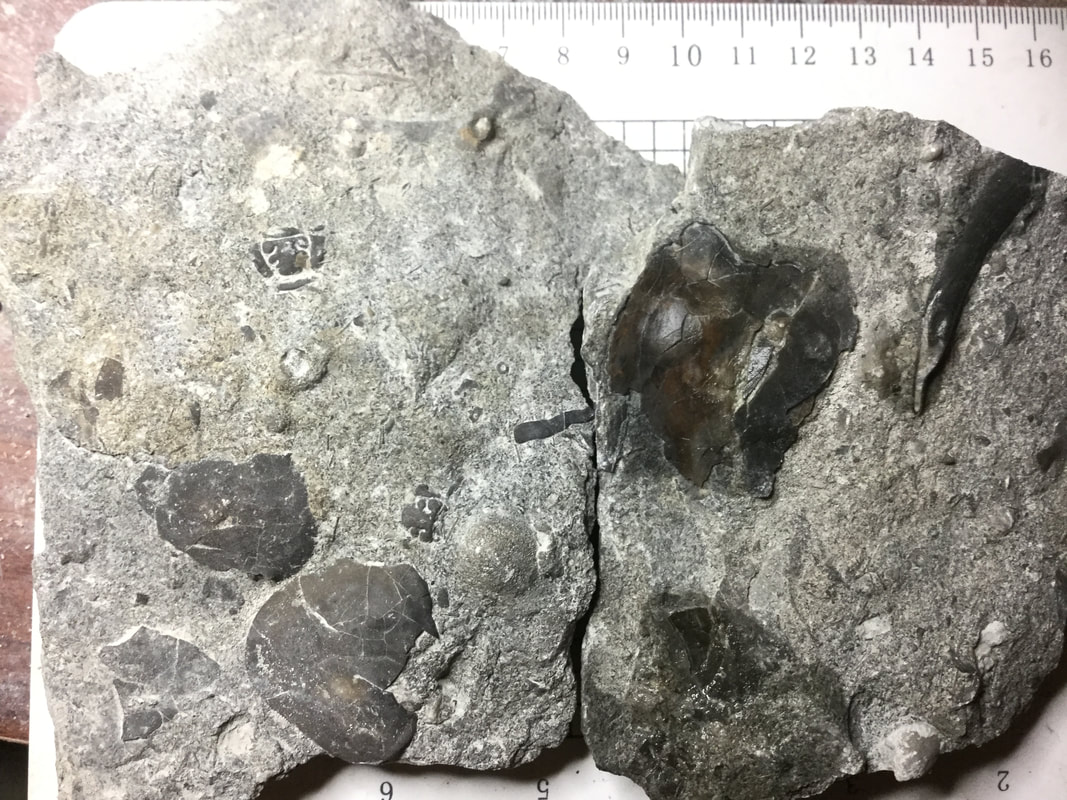 Assortment of trilobite pieces: Flexicalymene, Isotelus. 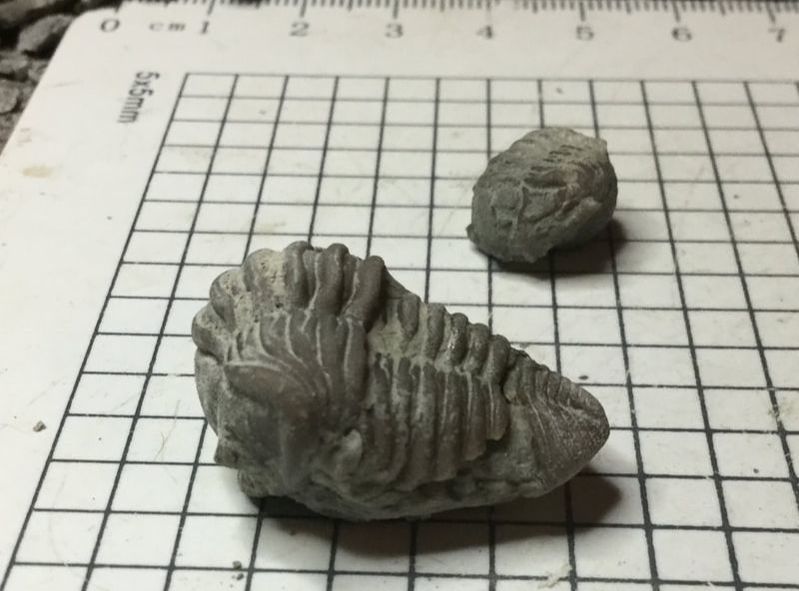 The big Flexicalymene found at the beginning of the dig is joined by a Flexi roller I found in the afternoon.  This one in need of identification. I have some ideas, but it's just guesswork at the moment. 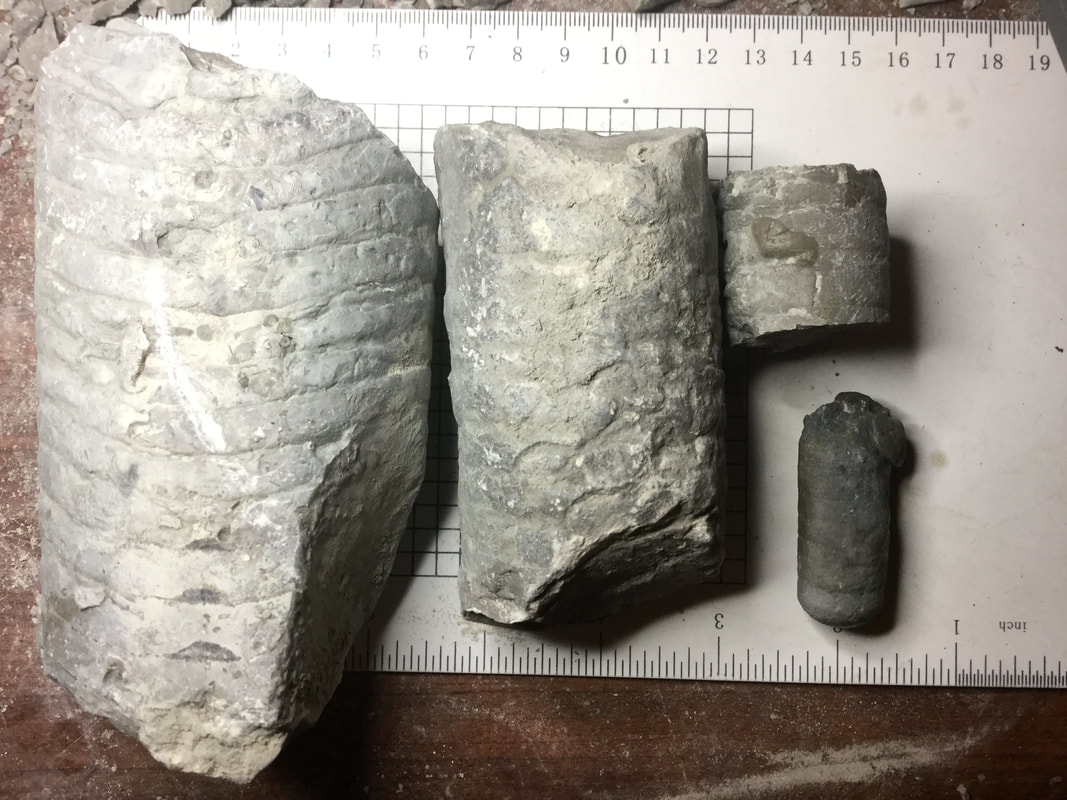 Some big honkin' pieces of orthocone nautiloid. The one on the lower right I make have to photograph independently as it is the very end of the taper, and with a brachiopod association. The middle one may be Geisonoceras. 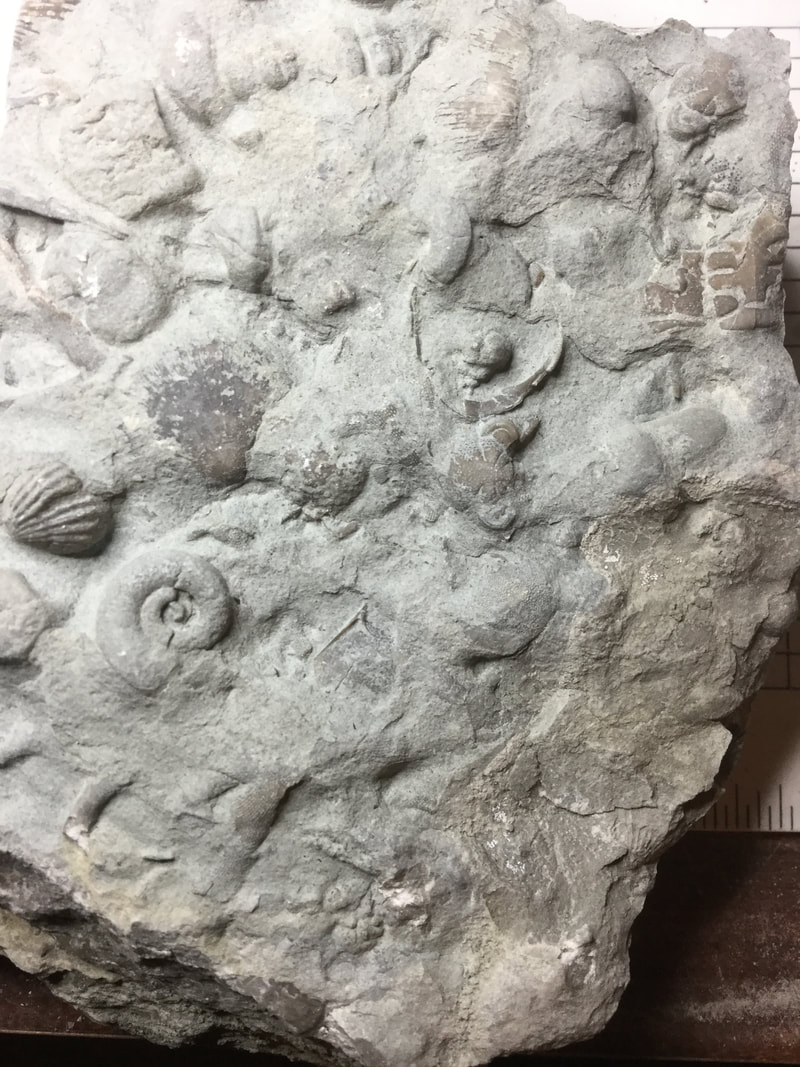 A hash plate with a gastropod on the left, and some trilobite pieces throughout. 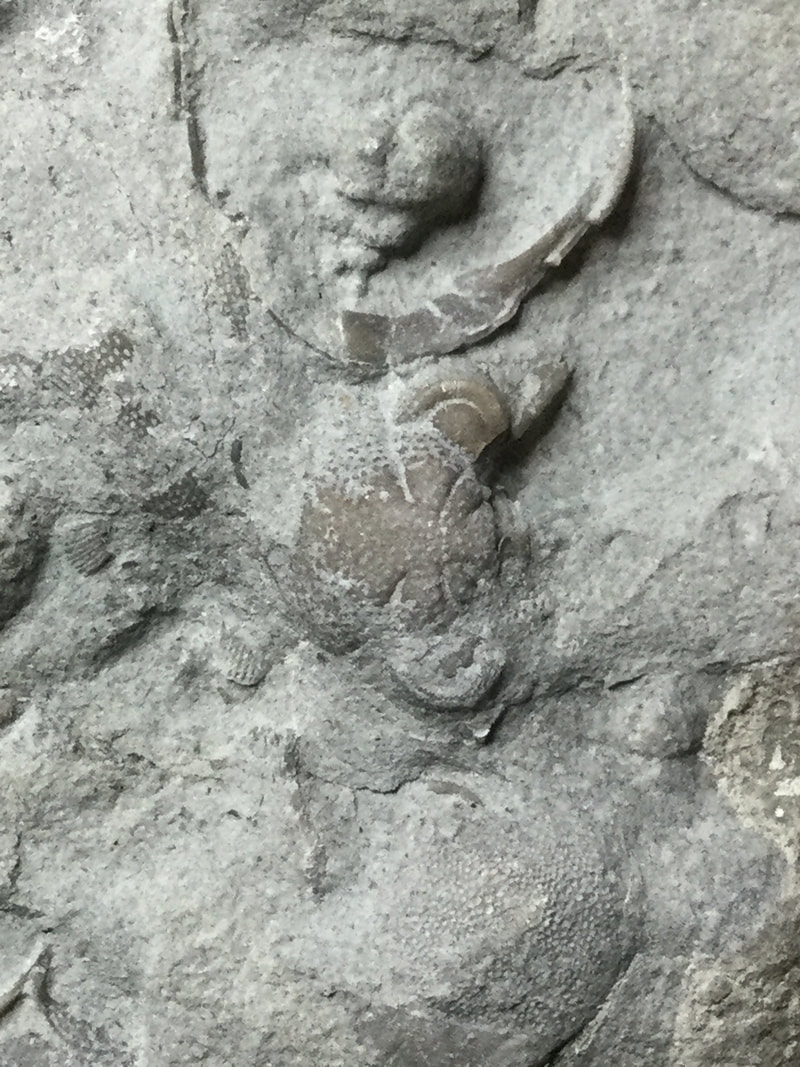 A close up of this hash. The cranidium belongs to Calyptaulax callicephalus. 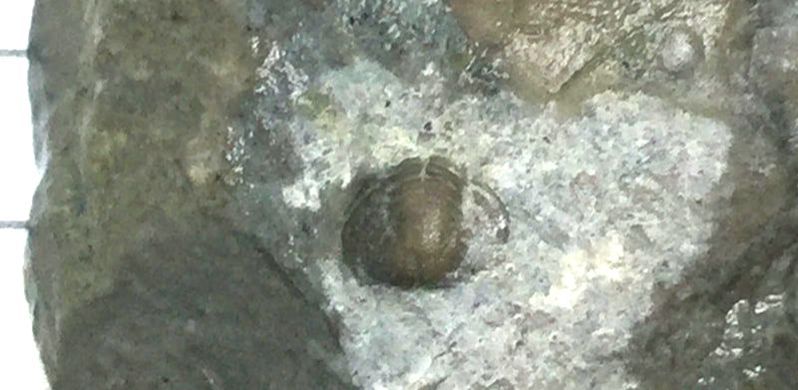 Deb found this tiny pygidium. Species needs identification! 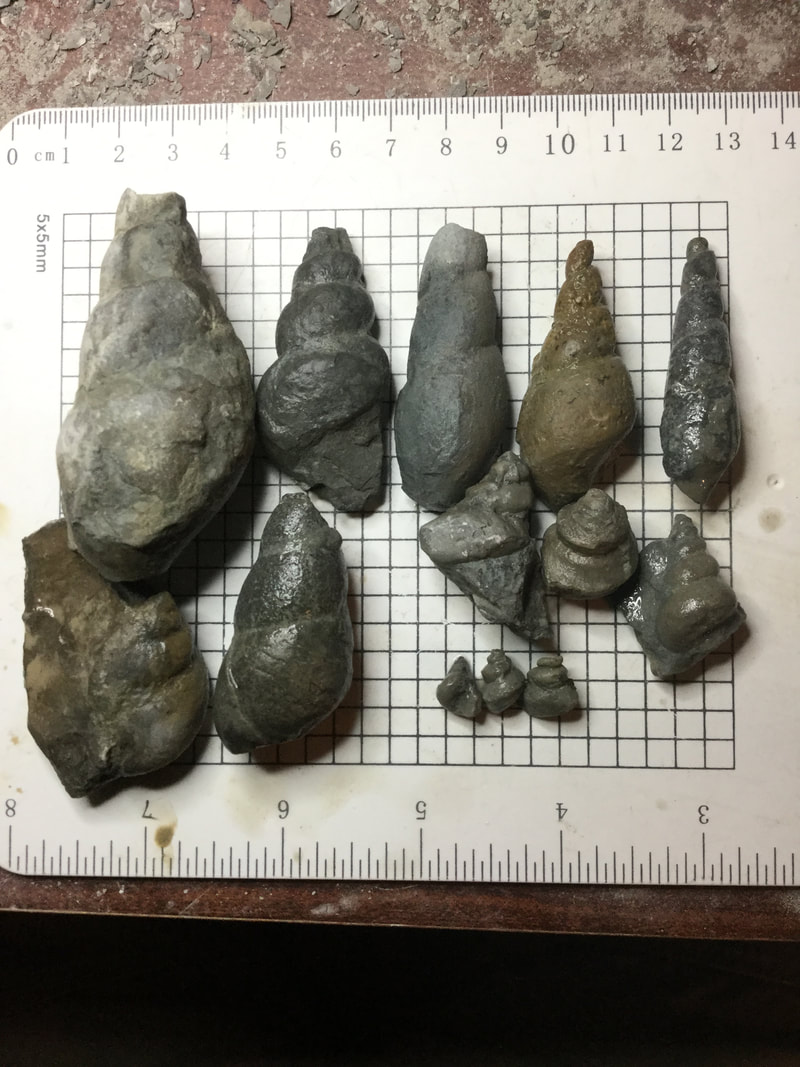 I love these high-spired gastropods! The majority of these are Fusispira sp., (and others like Hormotoma and possibly the thin one being Subulites) and the cluster on the lower right with the pinched spires is likely Lophospira sp. 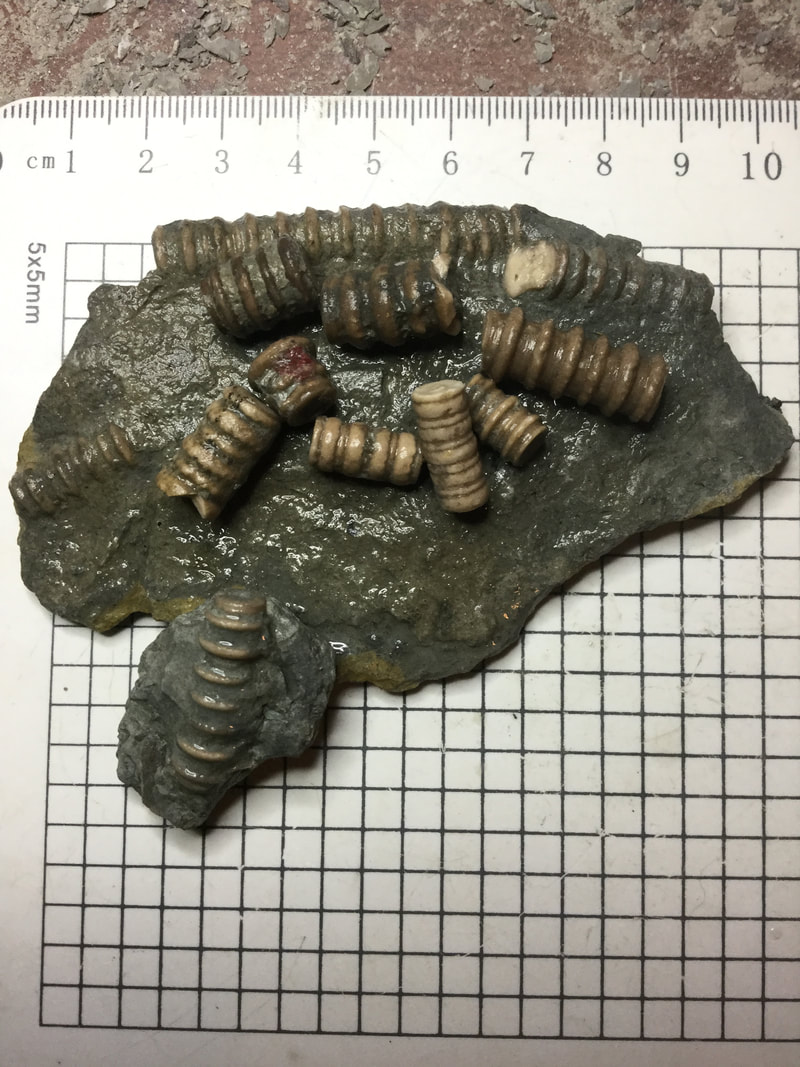 I can't help but to pick up crinoid pieces. 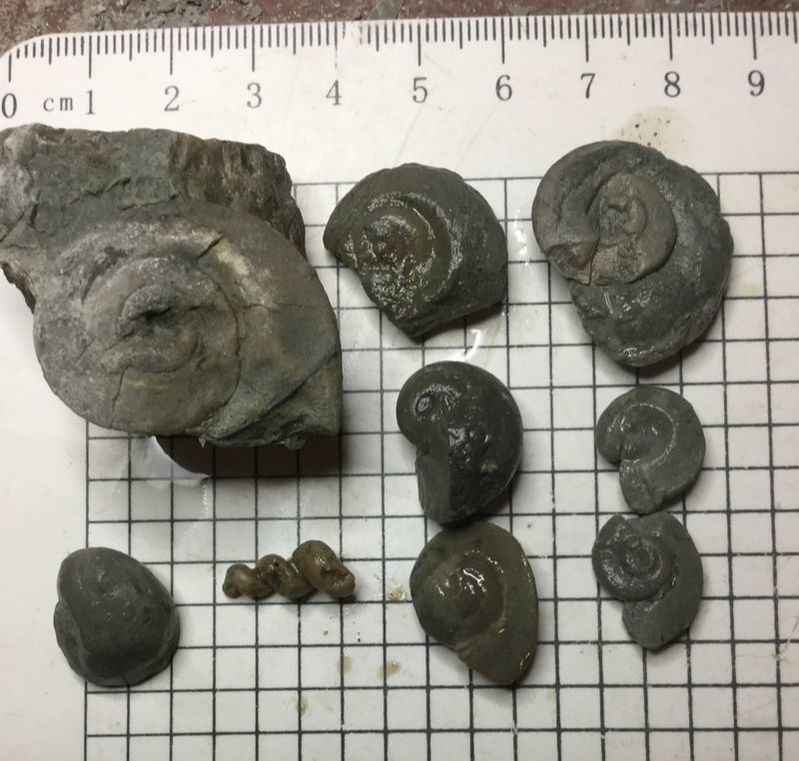 Low-spired gastropods that weather out of the matrix. The one exception is the corkscrew-shaped high-spired gastropod I missed when I took the initial "family photo" of high-spired gastros earlier. 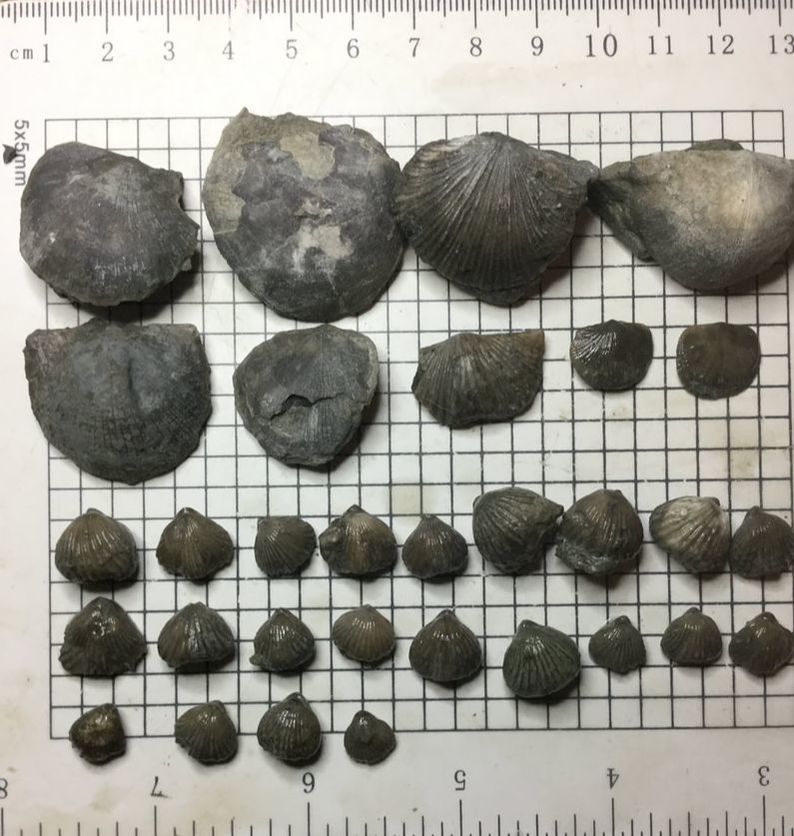 A collection of brachiopods. The bottom two levels are a very typical heart-shaped species - various types of Rhynchotrema. 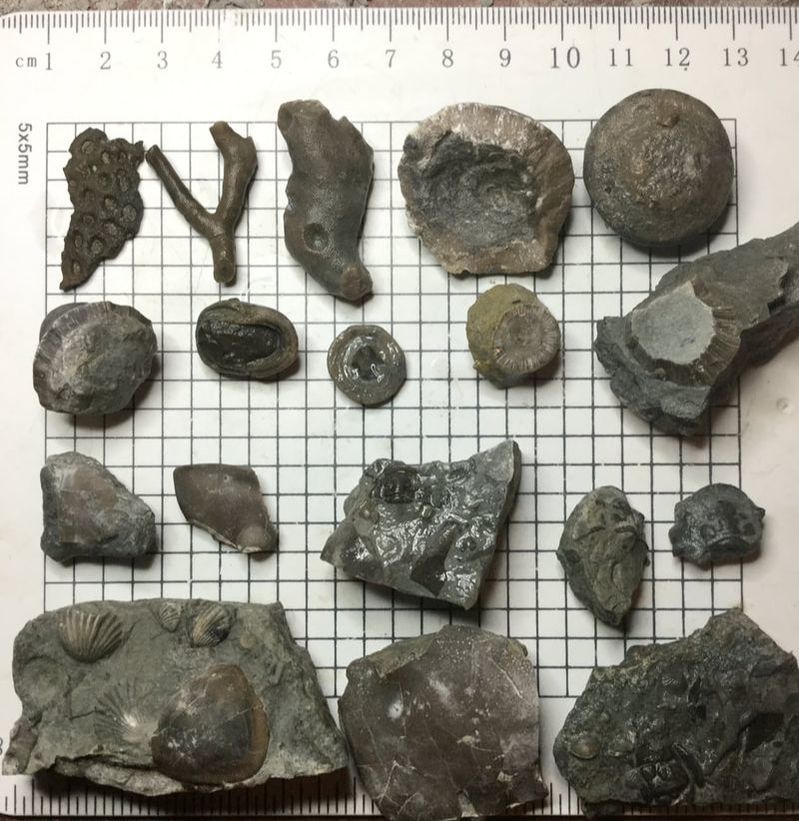 Odds and sods: top two rows are sponges and bryozoans. Bottom two rows are trilo-pieces. Bonus Round!Before Malcolm left for the day, he gifted Deb and me some fossils. The trilobites I had found and given to him for prep, and I now get to see them in all their expertly prepared glory - my thanks, Malcolm! 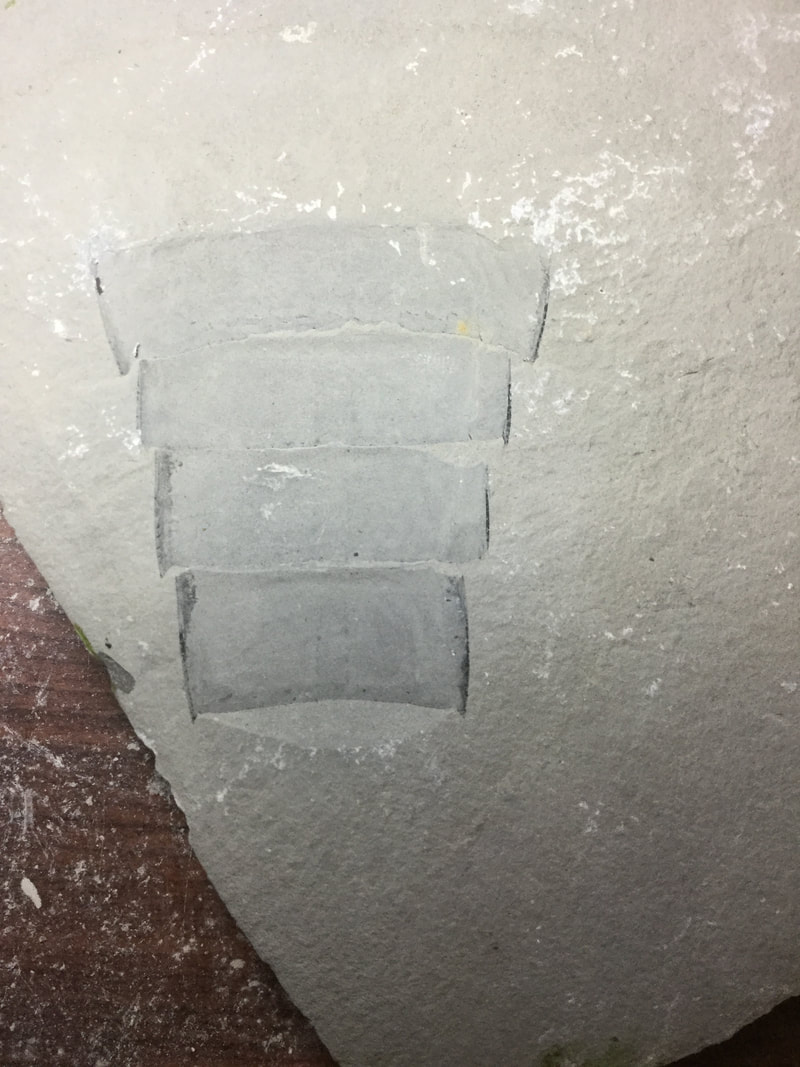 This is one of the many pieces Malcolm gave us: segments from a eurypterid (a sea scorpion from the Silurian). The are likely from the quarry in Fort Erie, and so are very hard to come by these days. 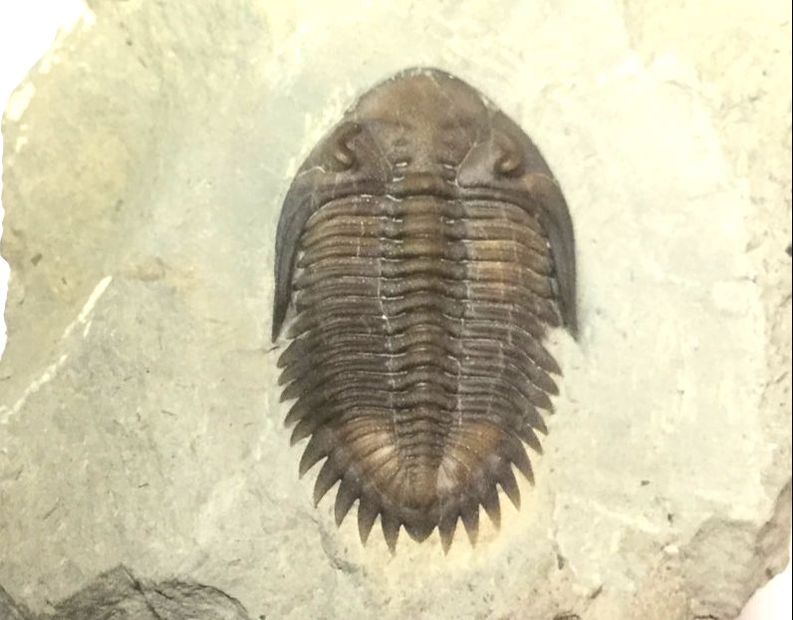 Readers of the blog will already be familiar with this Greenops widderensis. 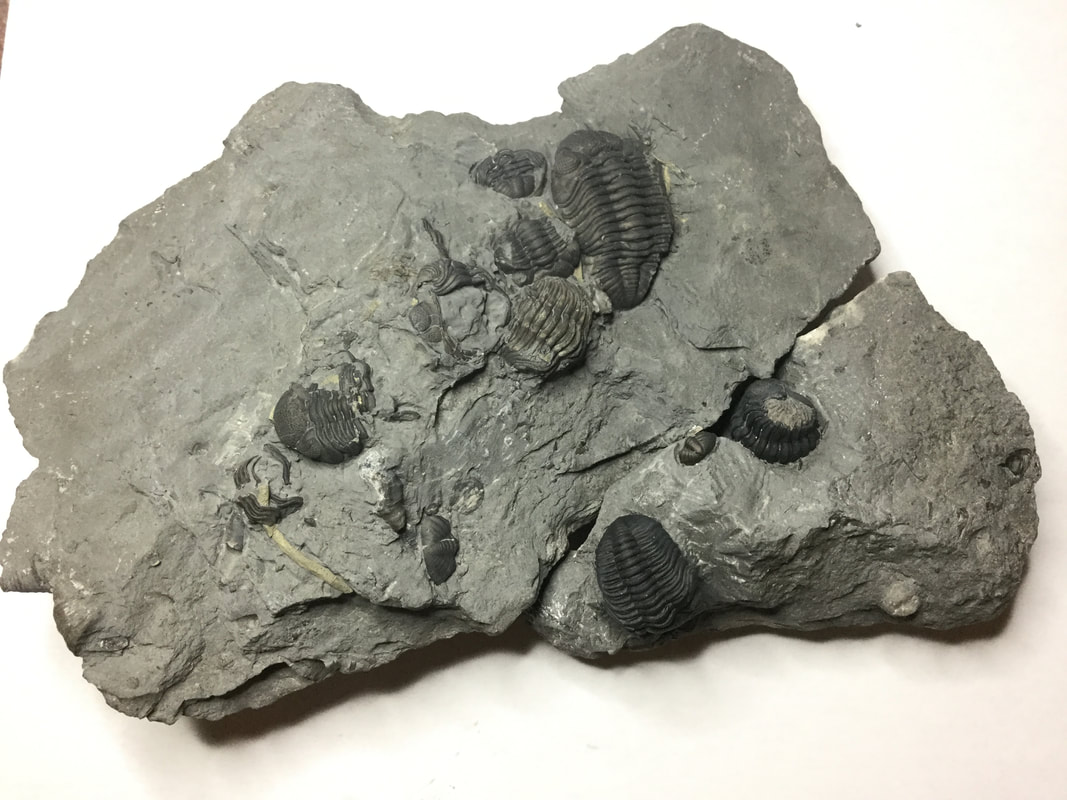 Some Eldredgeops rana I found at Penn Dixie, after Malcolm's masterly touch. The next three images are closeups to show the exquisite detail.  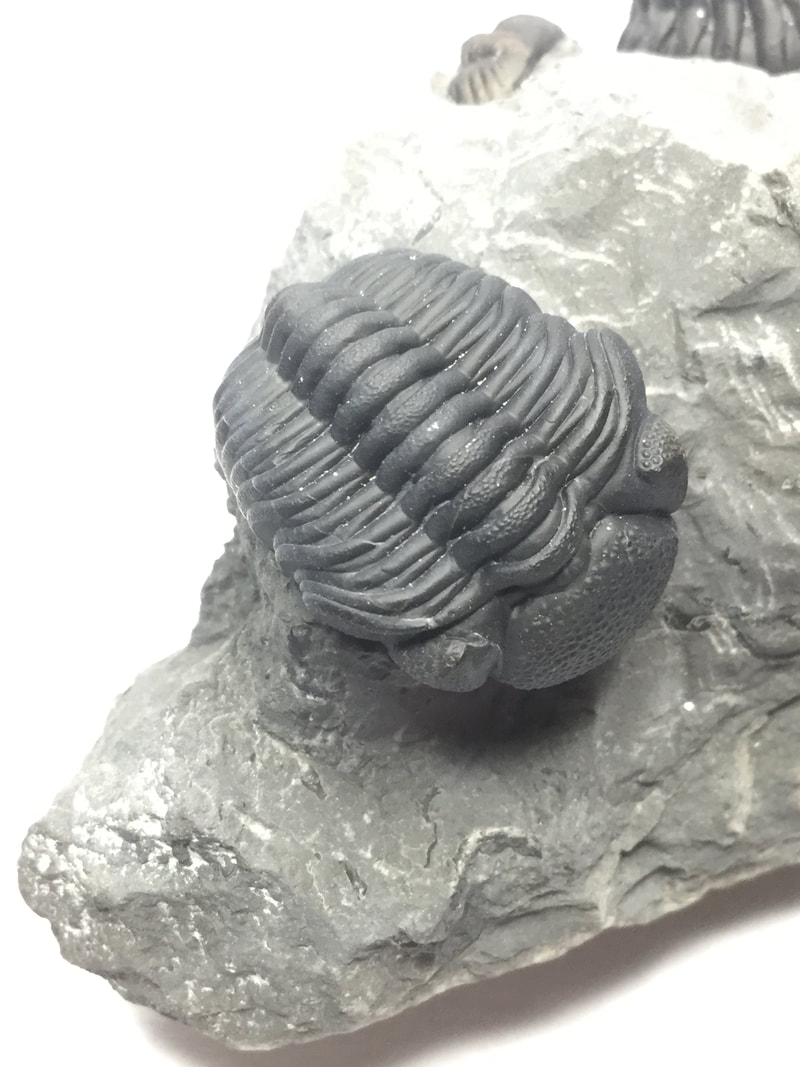 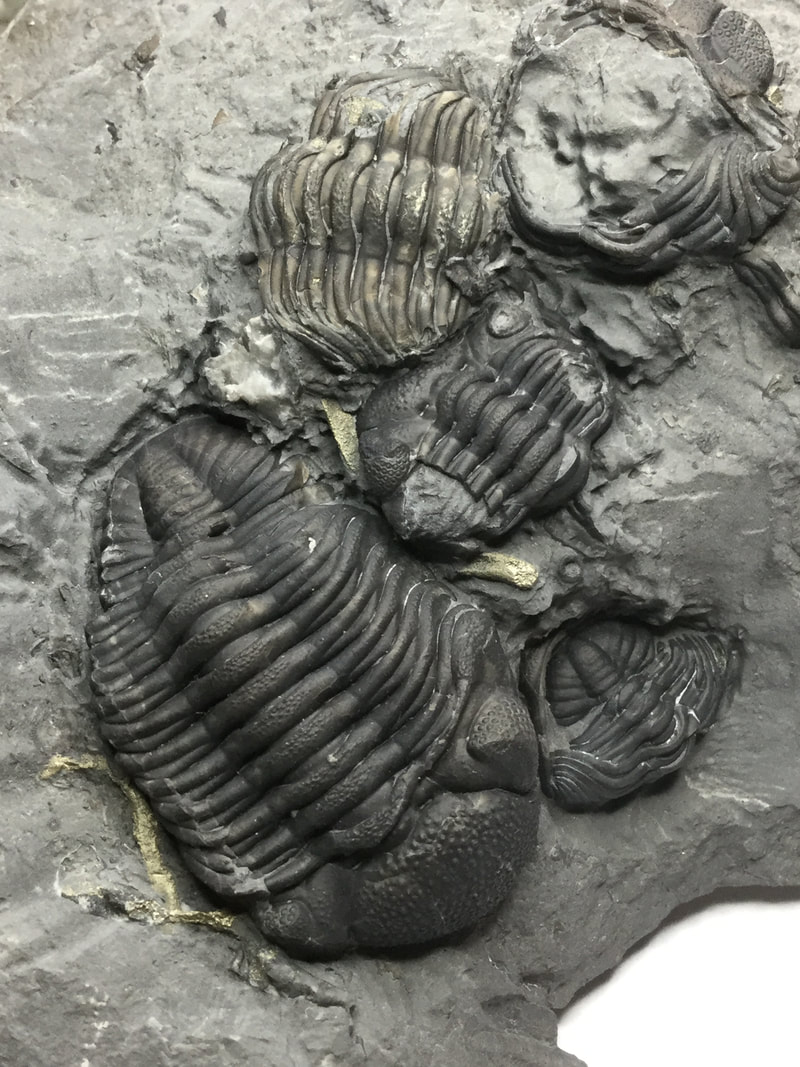 Simply wow.
Stay tuned: on Monday I am receiving a gift of fossils from fellow fossil collector Jason Rice, from Utah! 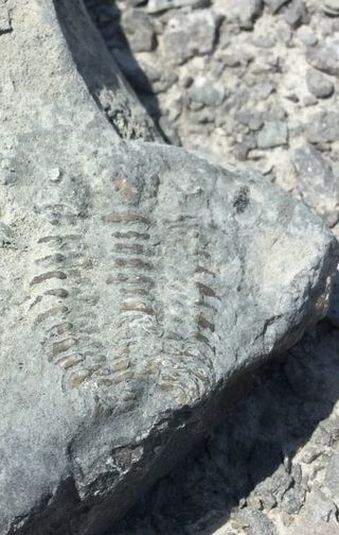 I just wanted to provide another update on Malcolm's continued and excellent progress on some of the stuff I handed over to his care. You might recall that I found a Ceraurus during my first trip to Brechin. It was pretty submerged in the matrix, but I've read that this is ideal since it hasn't had much exposure to weathering. So the picture on the left is how I found it. Obviously, it is missing a bit of its tail piece here and is pretty encrusted in matrix. A few days ago, Malcolm posted some pictures of what he was able to salvage from this one. Take a look at the results below. Absolutely fantastic. This bug's a bit beat up and missing the tail, but in all a good and nearly complete specimen made all the better by Malcolm's preparation. 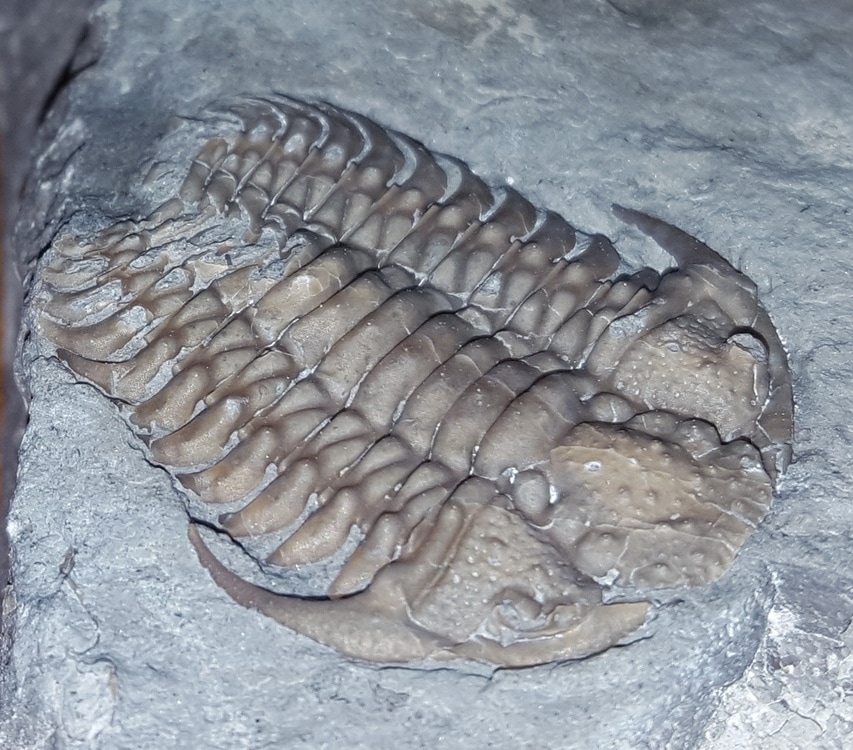 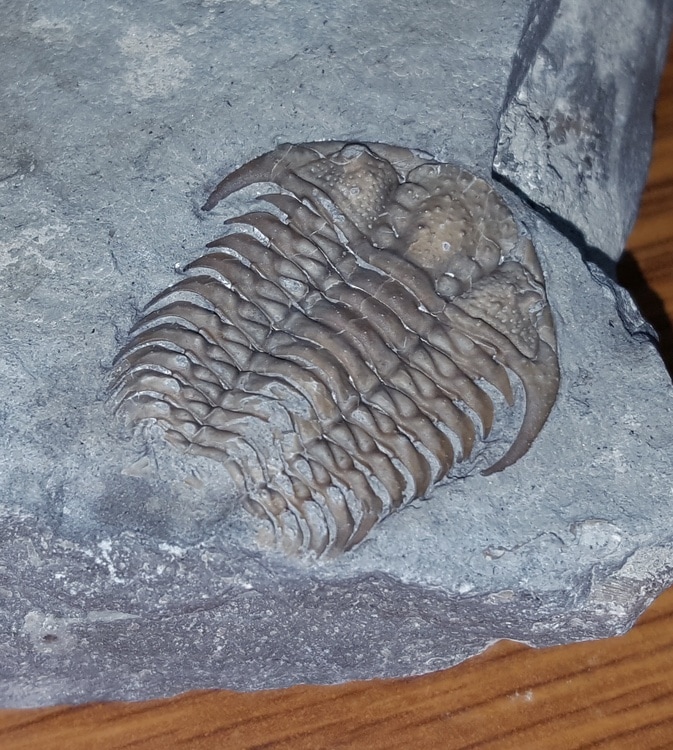 Anyhow, a brief post. I'll likely be posting another next week when I hunt Arkona with Roger.
UPDATE (Aug 30, 2017): This specimen is now featured on Mineralienatlas Lexicon) As a supplement to my recent trip to Brechin, Ontario, Malcolm Thornley offered to prep out a complete Greenops widderensis I found last year. The frustrating thing about these trilobites in Arkona is that they tend to be very fragile and flaky, and most times you find just tail pieces or parts of the cephalon. They only very rarely come out nice and whole like this one. You can go through tons of rock for just one half-decent specimen. Before this received its masterful prep, I gave it a go using my primitive tools - a Dremel engraver and a sewing needle under a magnifying lens. Here is what I ended up with - as far as I would dare with such a specimen: 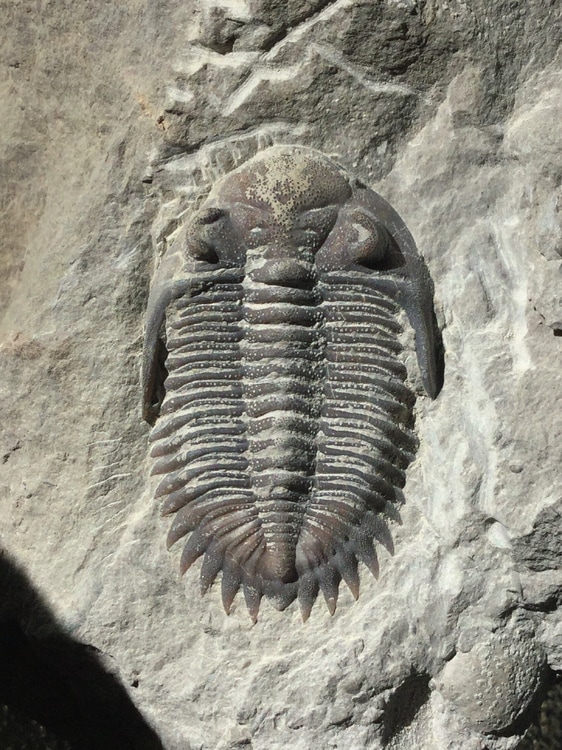 Ok, so not bad - but far from museum quality. For that, you need the right tools and the expert touch only a seasoned prep-artist can provide. Malcolm spent a good amount of time with this one, using a Comco abrasion unit at 7 PSI, with dolomite as the abrasion substance through a 320 mesh screen. He worked out all the scuff marks of my Dremel and removed some of the excess matrix. Using a .015 nozzle, Malcolm prepped this using his Nikon scope at a magnification of 14x. Here are some images he provided of the process: 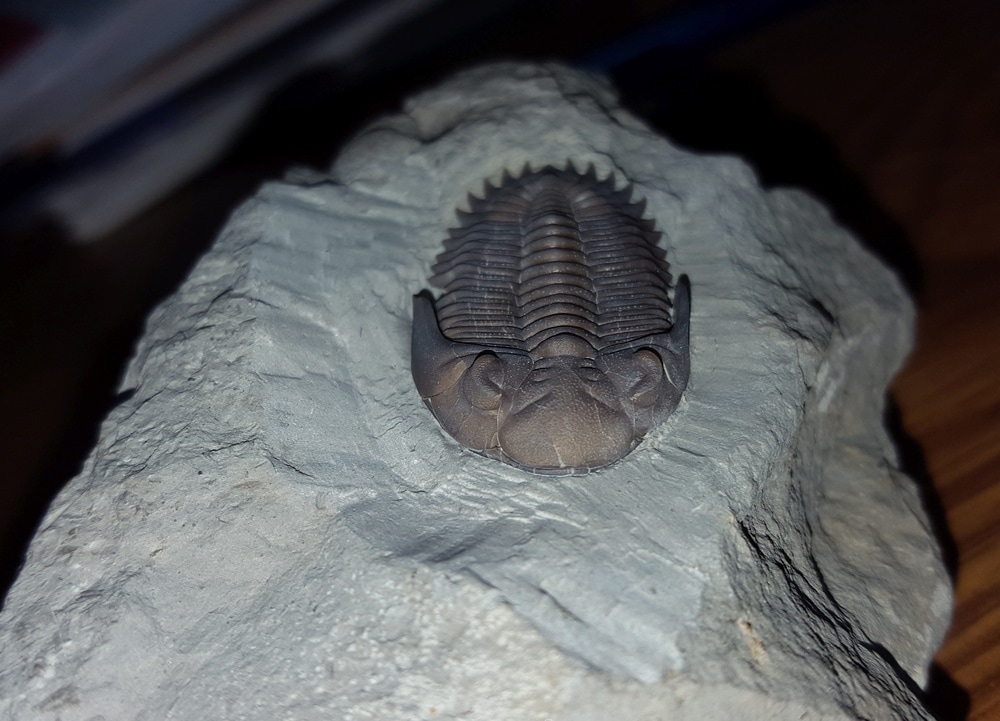 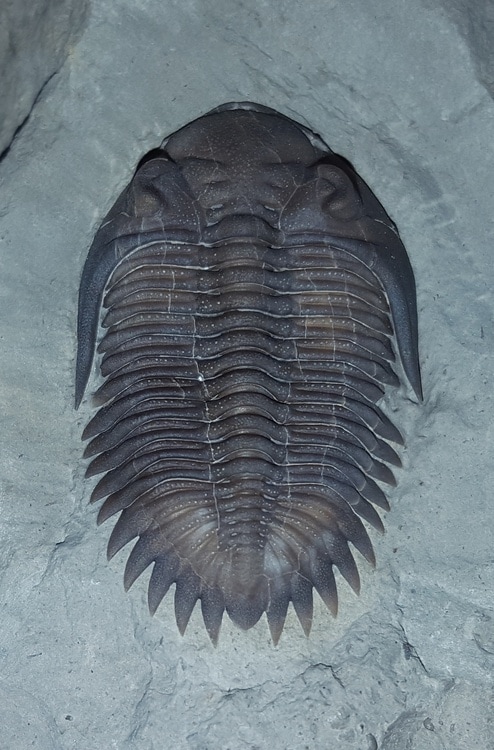 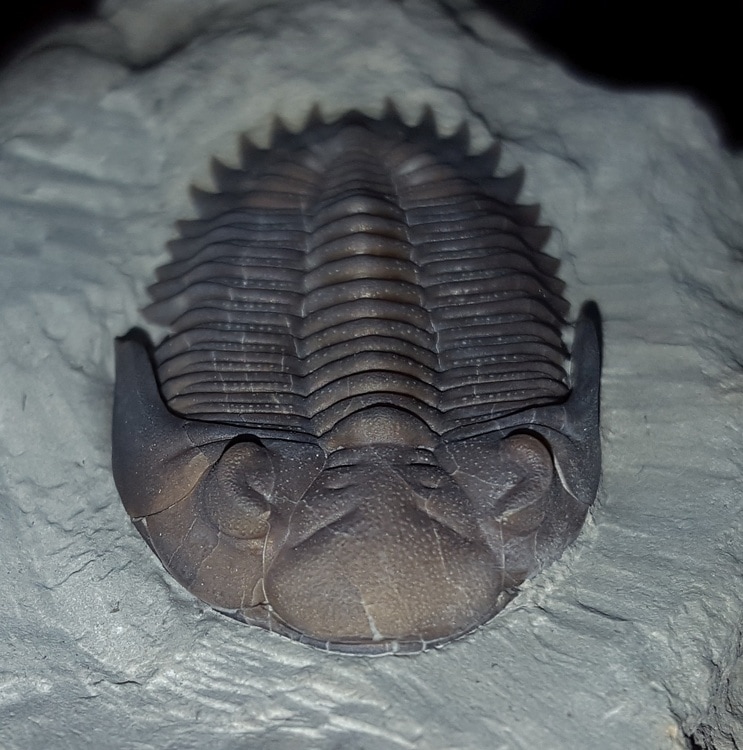 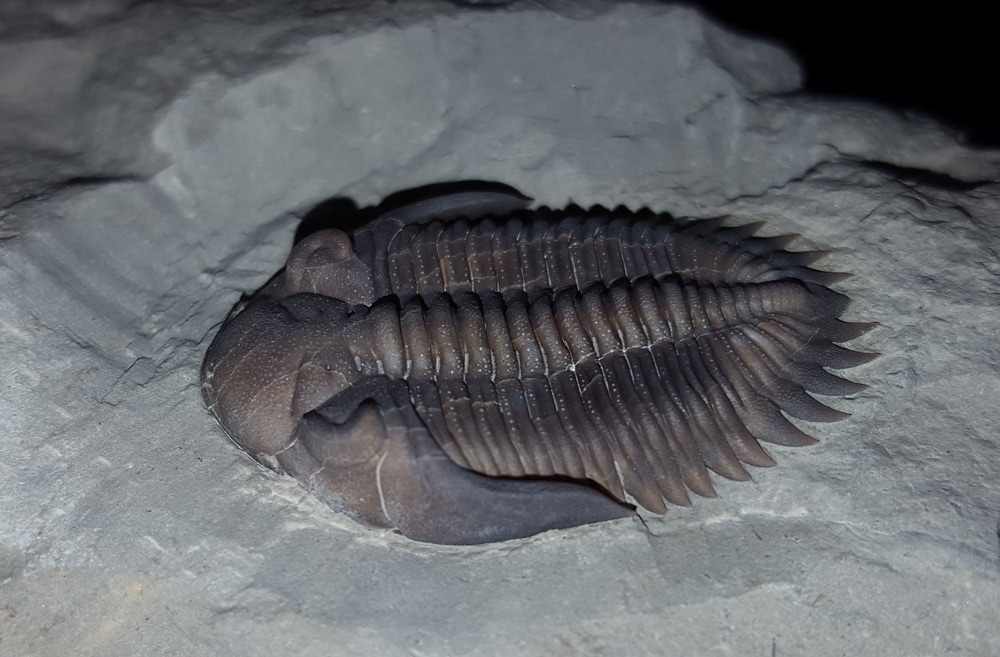 And finally, below, is the finished masterpiece. He used a .010 nozzle, as small as they may come, to get out the grit between all the nooks and crannies. As Malcolm told me, there were no restorations or use of consolidants. The only imperfection is a bit of damage to the pleura on the mid-right side, but beyond that an exquisitely preserved - and now masterfully prepared museum quality trilobite! I am certainly in awe of his skill. 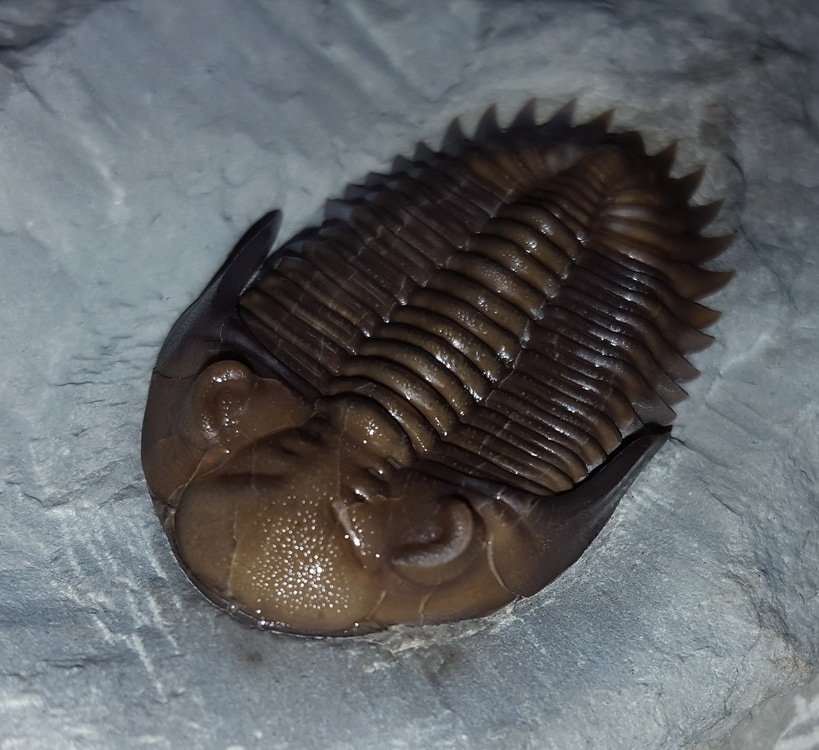 !!
And, just to compare, the top image beside where this bug was before prep, and halfway through the process, just to show the big difference a good prep can make
Now with a whole new batch of trilobites from Penn Dixie (see my blog post on that experience here), it is time to learn how to prep. This will be my first time attempting this. Practicing on less valuable finds is a must at first. I don't have the space to go the full air compressor / vacuum system, so it will just have to be dental picks and a Dremel engraver with a lot of attachments. But here is the work so far. Here's part of the workspace, nice and outdoors - but it is still important to observer safety (so a dust mask to block out all that very fine rock dust, and eye protection is a must). 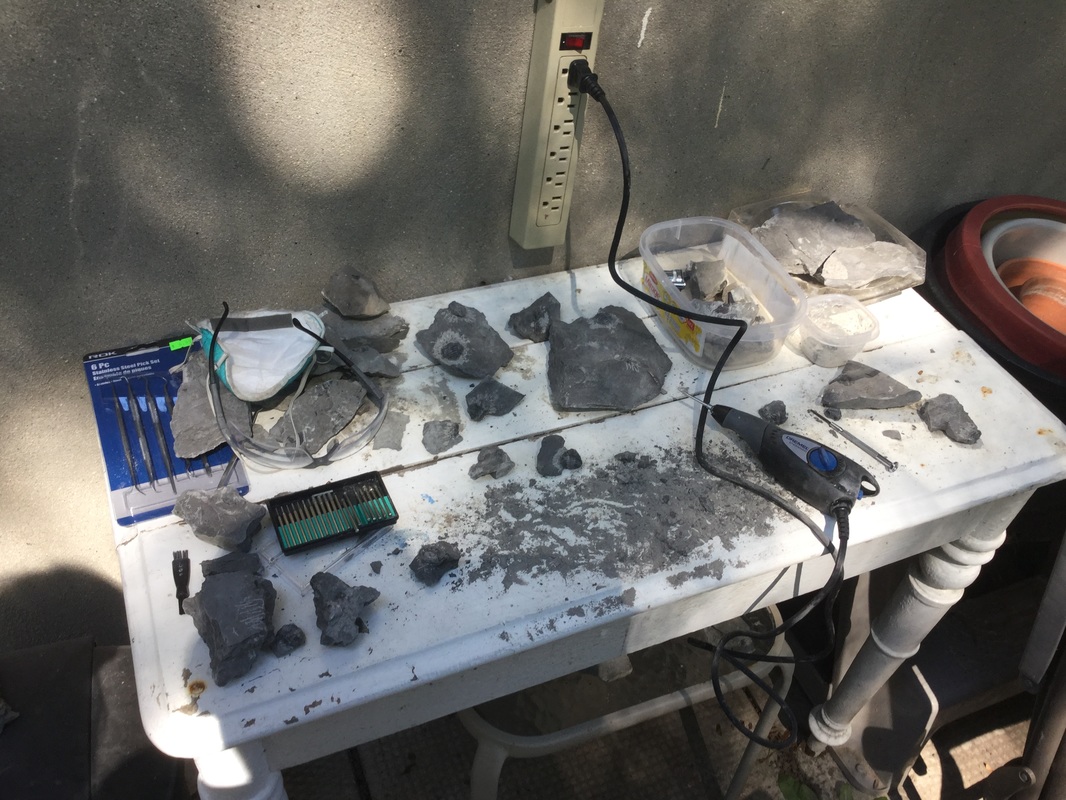 Some of the steps in the prep: from initial state, matrix removal, more matrix removal and oil application for testing. There is more to be done to buff out the scratch lines and uncover a bit more of the specimen on the left. 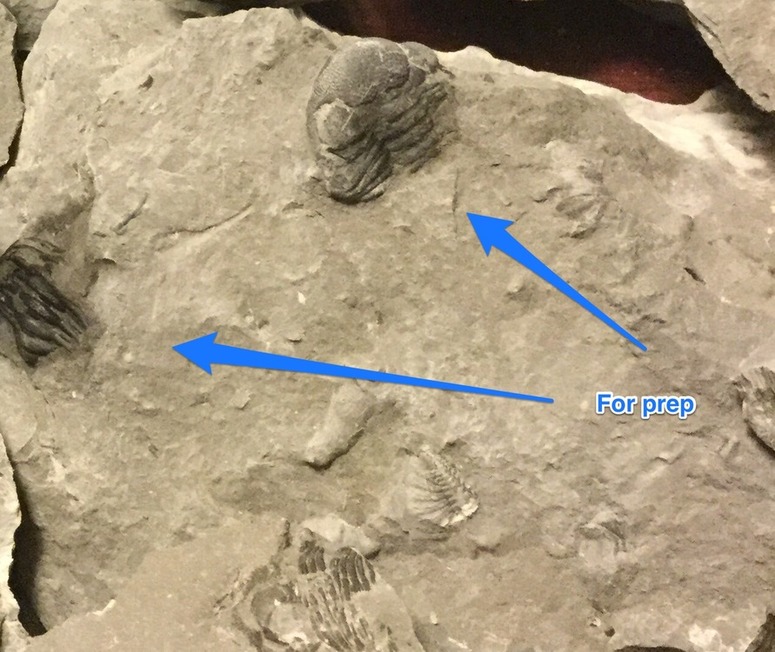
This one below began with a lot of matrix, which I kept removing, leaving this one thumb-holder tag. On the right-hand side, the almost complete roller - just need to get the dental picks into the pleura to scratch off some tenacious matrix bits.
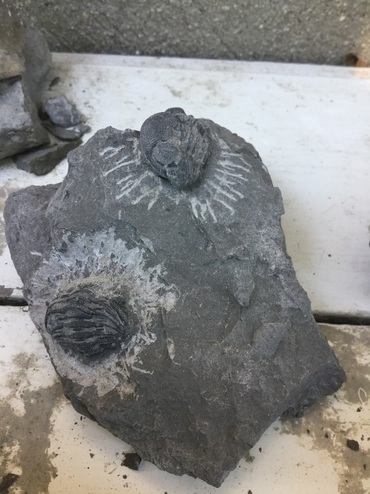
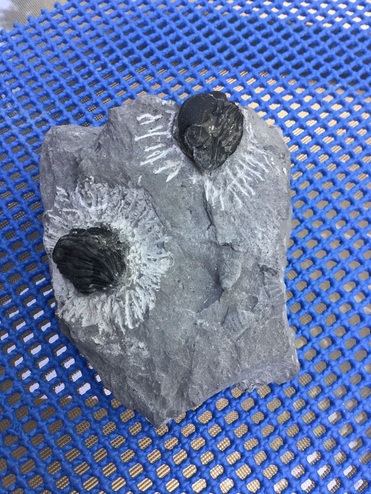
While removing matrix with a hammer and pin, you'll sometimes discover some surprises...
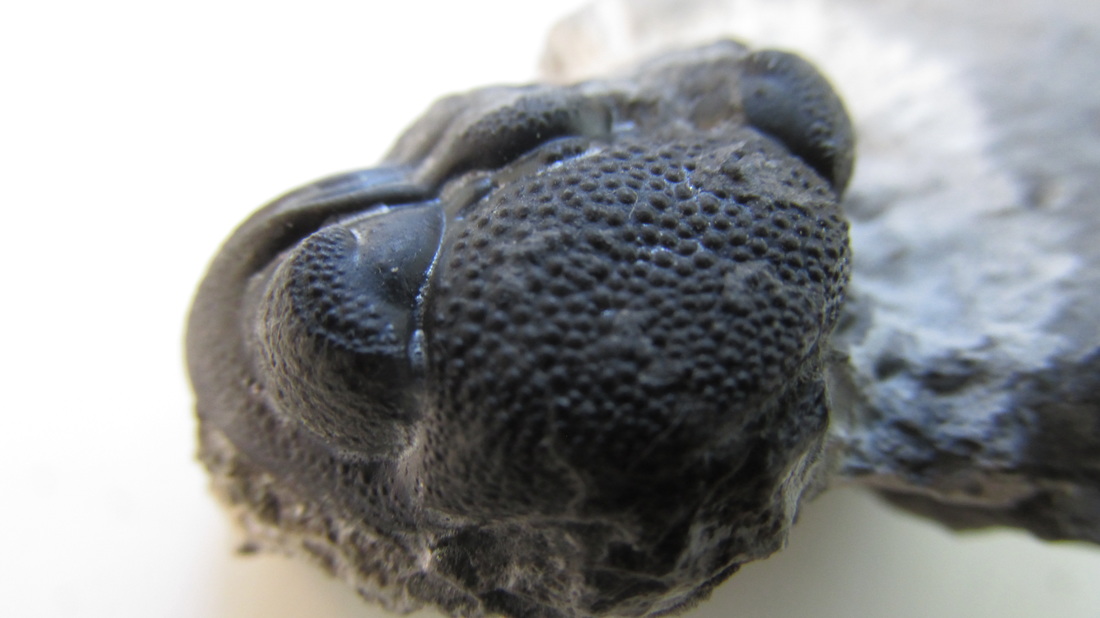
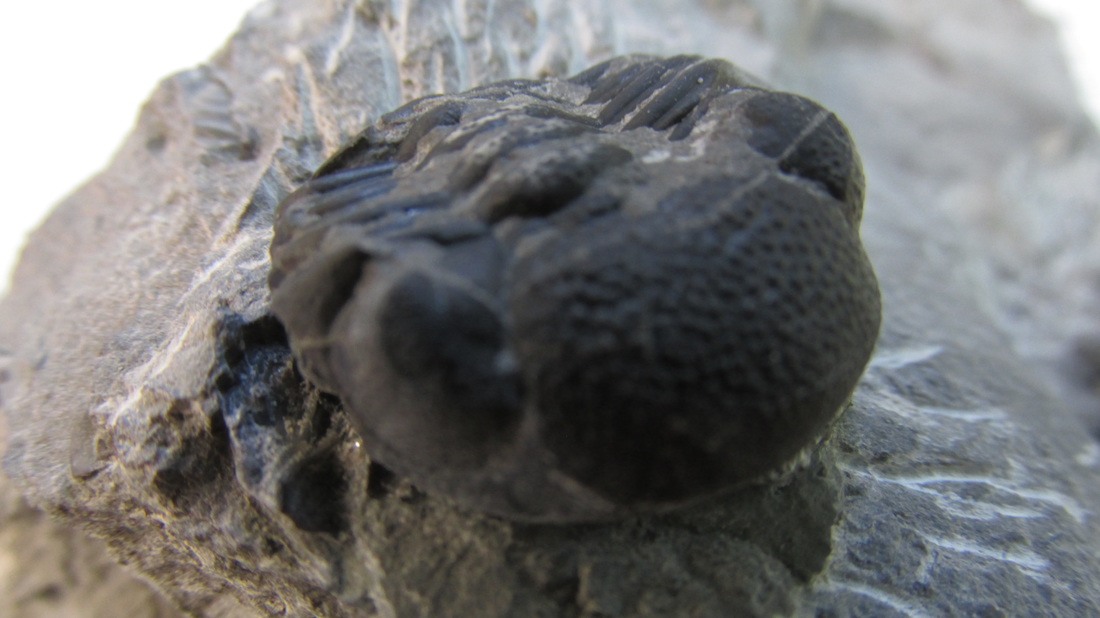
This is just interesting, although specimens are incomplete, yet we have two cephalon moults, in a kind of mirror positioning. Note the detail on the lenses of the schizochroal eye in the bottom one. It is said that such advanced eyes are possibly evidence that these benthic creatures were not scavengers, but active predators. As trilobites continued to develop in an environment with increasing numbers of predators (and the size thereof), they lost such advanced ocular features and most likely became scavengers again. As another possible proof of a predatory lifestyle, the hypostome (conterminant as opposed to natant) on this species (Eldredgeops rana) was far more developed and anchored to the anterior cephalon - a feature most commonly found in such animals as ticks - and their large "noses" (glabella) were like "gastric mills" for digestion more suggestive of predatory lifestyle (see Fortey and Owens, 1999). Some were still particle feeders, but those would be the smaller ones; otherwise, they were equipped with the front-loaded gastric apparatus to consume and digest larger bits of prey.  This dirty little roller is going to need to be freed up a bit more before getting a cleaning. Their ability to enrol was a defensive feature not unique to this species, and can be seen in modern day examples such as sow/pill bugs. The cephalon would form a tight seal with the underside of the pygidium, allowing their tough carapaces to shield their soft underparts. 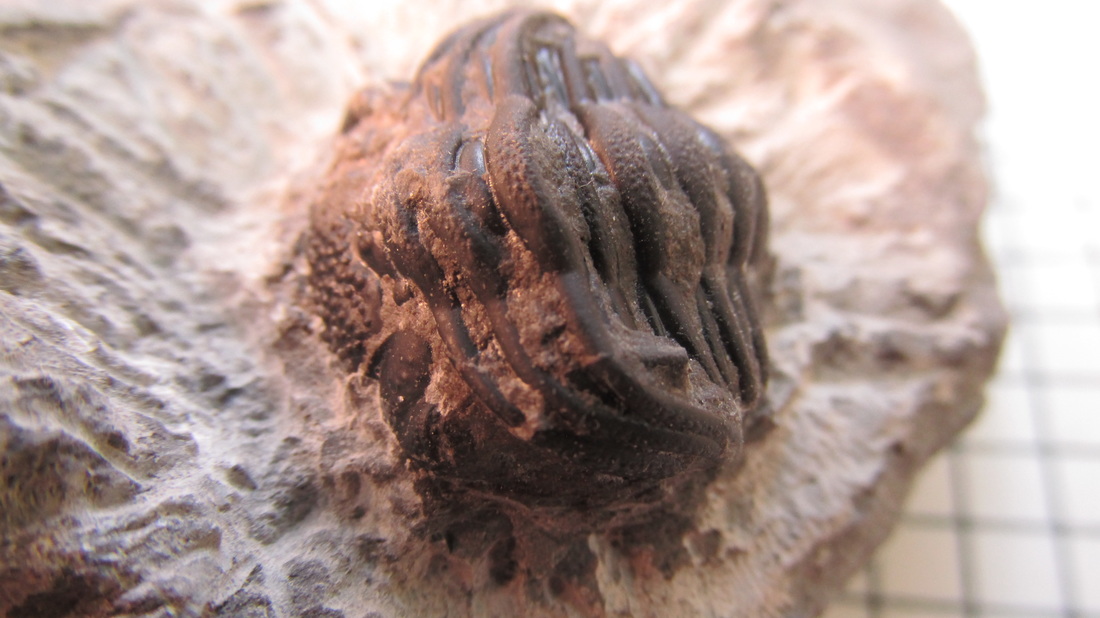 A complete surprise - a chunk I decided to split revealed a nice little assemblage 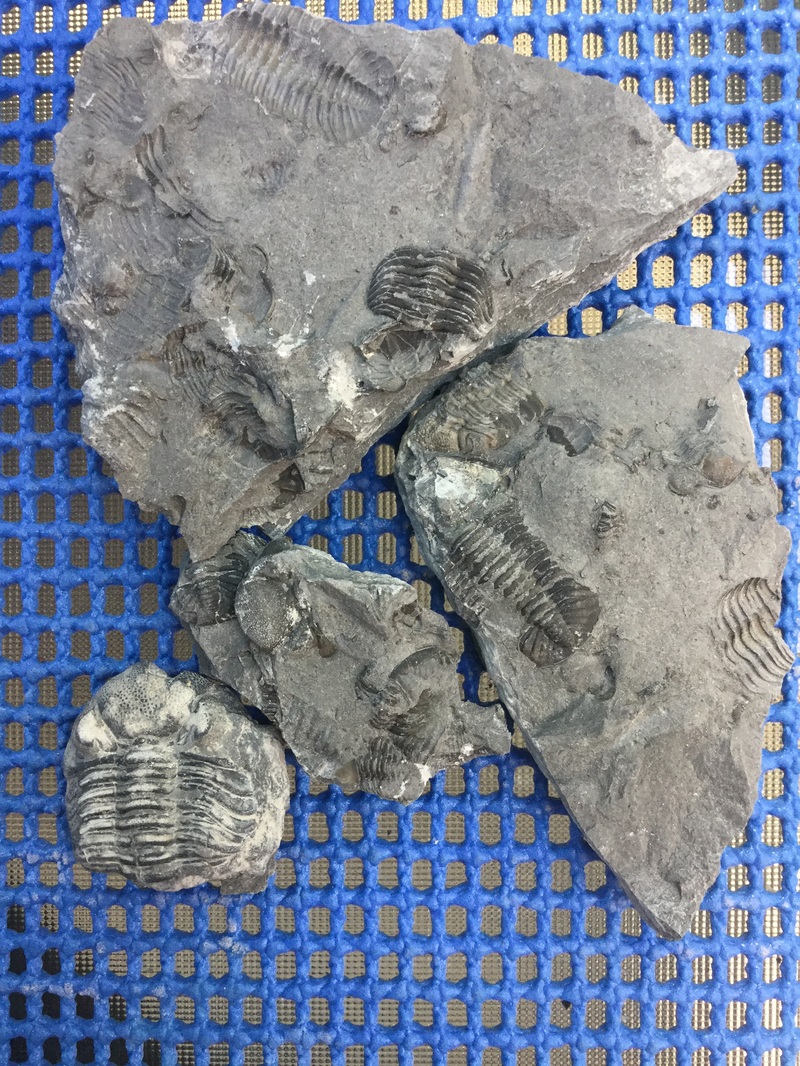 |
Kane Faucher
Archives
February 2024
|


 RSS Feed