|
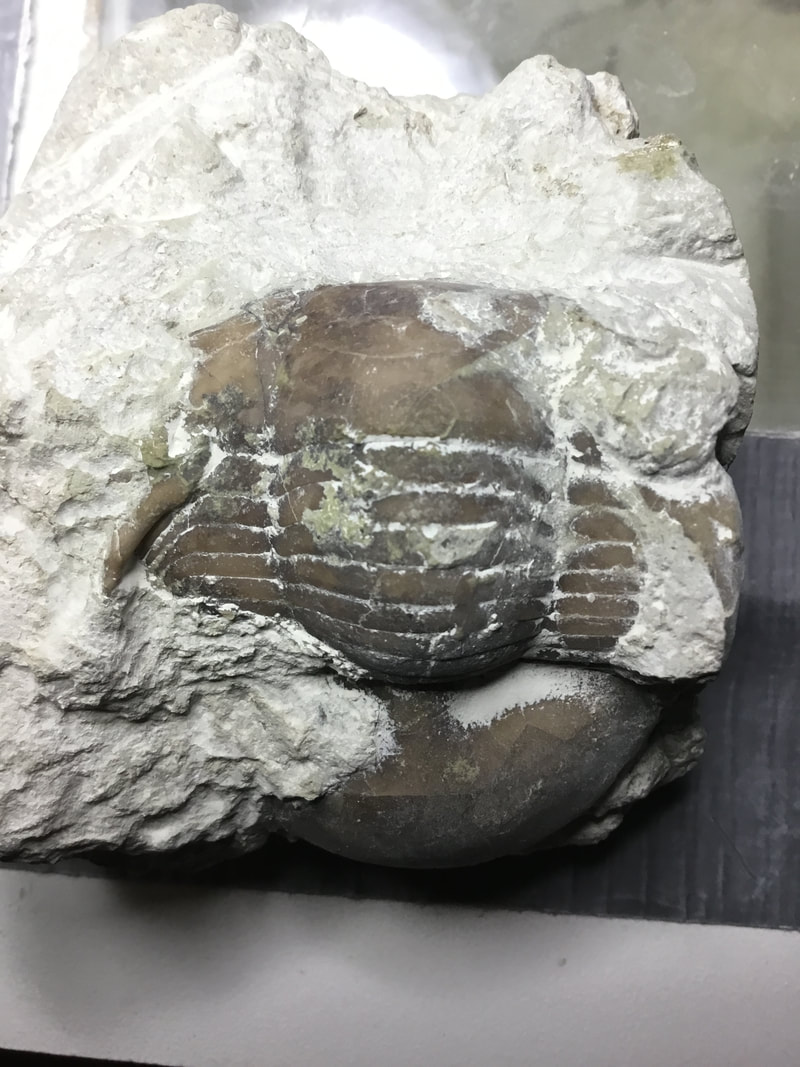
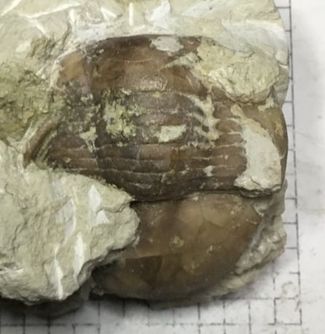
There are collecting locations that I'm not likely to get to in the near future, and as much as I'd love to fancy myself wealthy enough to just buy up every great Russian Ordovician bug, sometimes one has to settle for the discards. Russian preparators who eke out a living collecting and preparing trilobites are not too different than the preparators who do the same thing here: there are those (far too many) finds that are simply not worth the time and effort for whatever reason. It could be a common bug that has too much compaction damage, bad mineralization stains, too many missing parts, or anything else that might result in producing a trilobite that is far less than A-grade for sale. Buyers generally expect perfection, after all, or something close to it. So into the chuck-it bucket it goes. I have my own "graveyard" of partials, botched prep attempts, and stuff far too common yet complicated to be worth preparing unless I had nothing else in the queue. 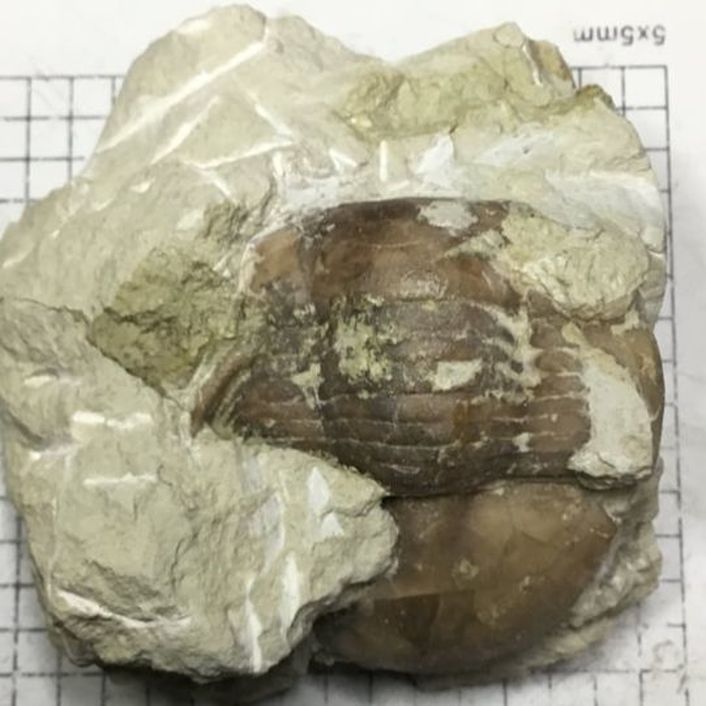 So this is the chuck-pile bug in question. Not quite complete junk, but pretty close. It was likely found busted and glued together in the field, which is a fairly common scenario when collecting from these layers. For every nice, full (sometimes floor polish enhanced) Asaphus sp. one sees for sale, there were likely hundreds of busted up partials (some of which get recycled as grafting material). This trilobite has a lot of problems beyond the fractures tentatively held together with glue: crush damage, missing shell bits, and serious mineralization discolouration that makes it appear mottled and less than pristine sale quality. But I need the practice! I've never prepared an illaenid before, and there are always a few "firsts" I encounter while preparing given that I haven't been doing it for that long. Each prep is a learning experience, and making serious mistakes is part of it... But so is recognizing that each prep is different, even when dealing with the same species and matrix. You try different approaches and techniques, sometimes using a wide range of tools suited just for that particular job.
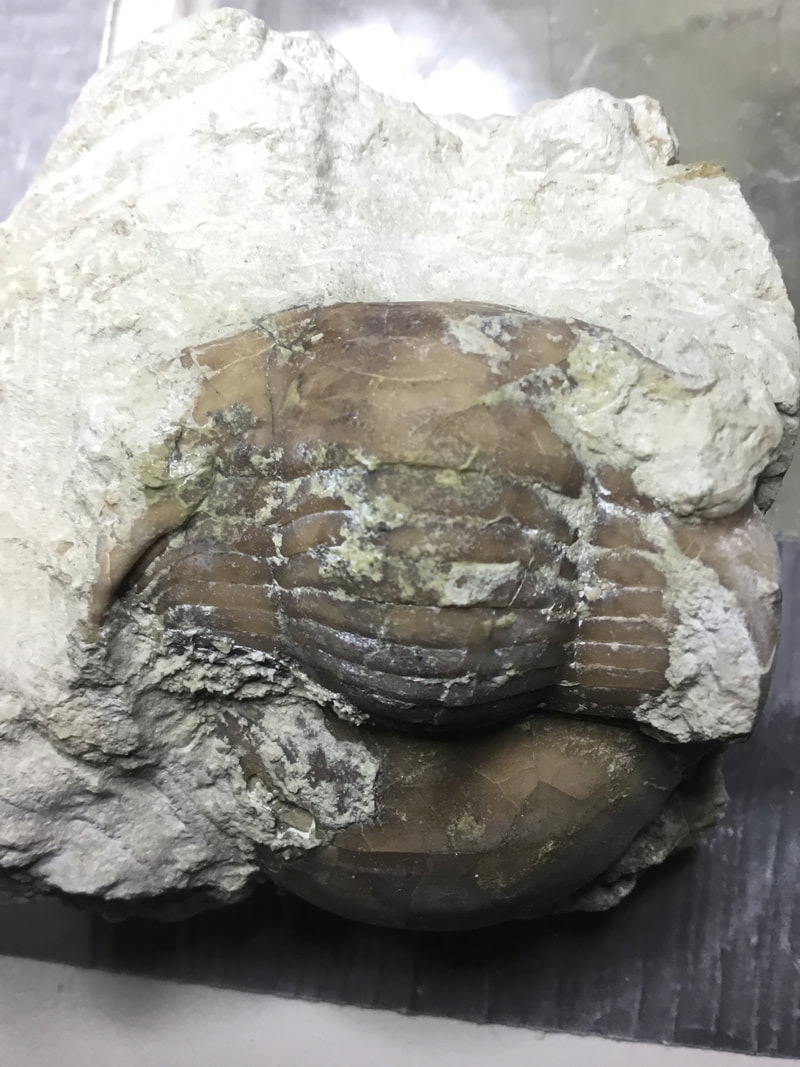
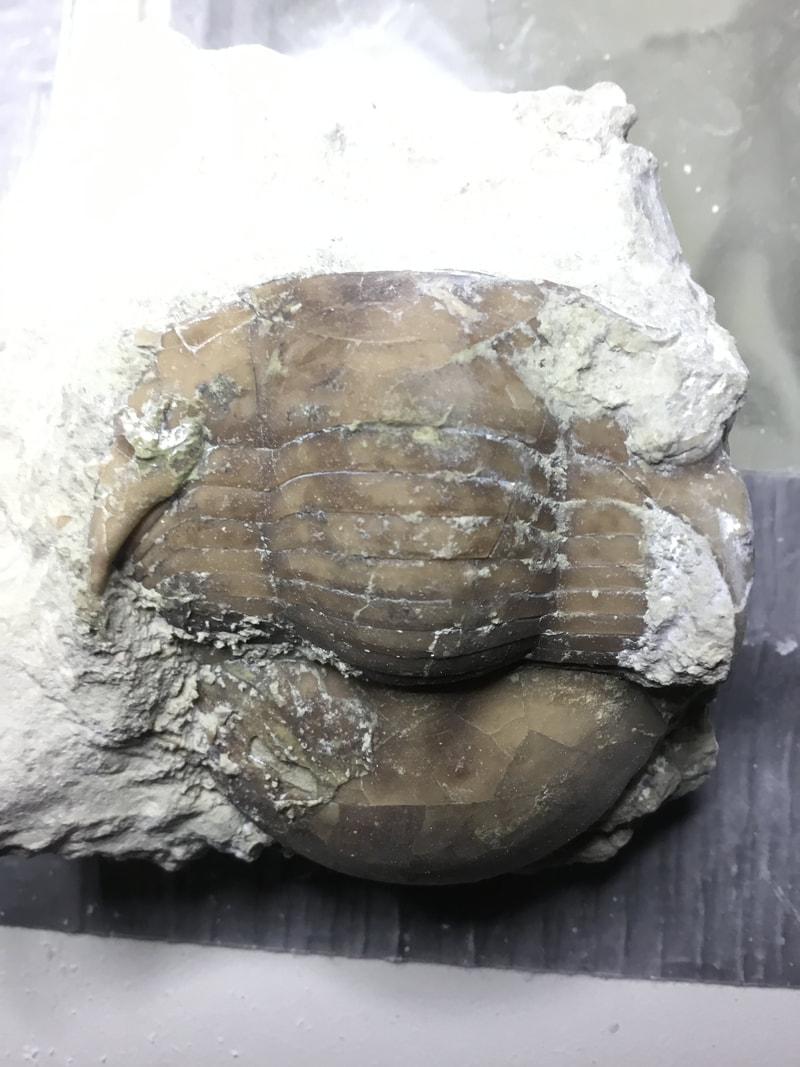
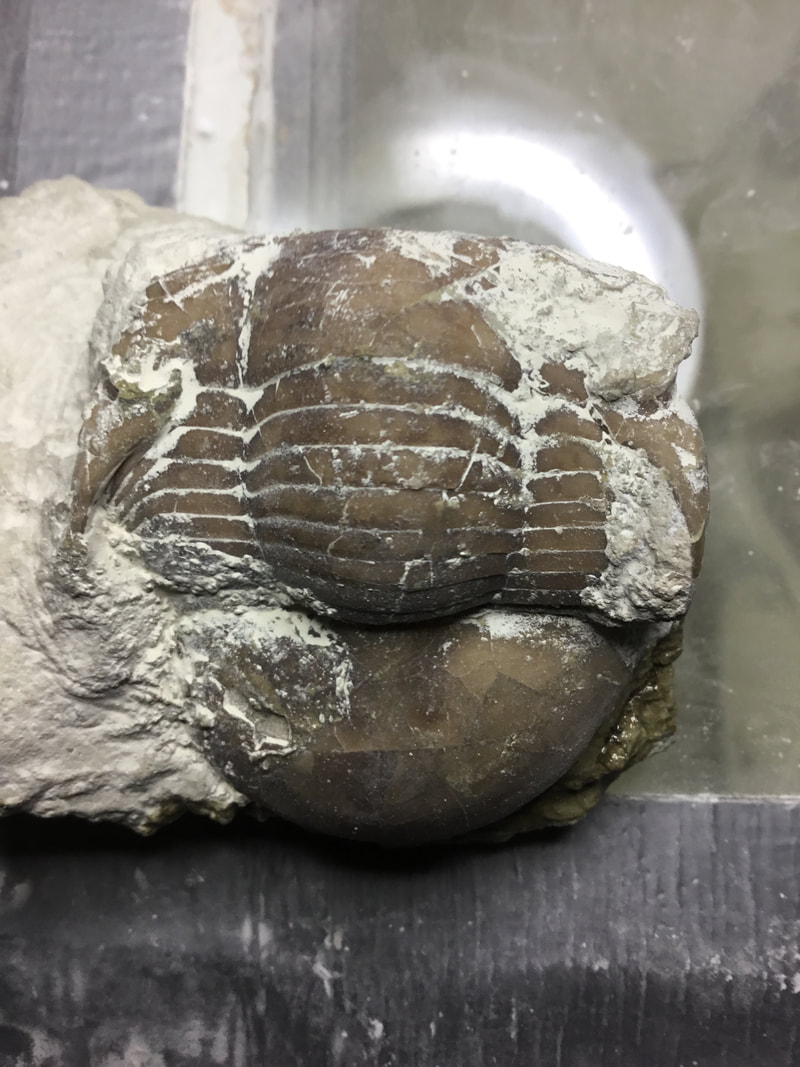
So, let's have at it. The first step was to do the scribe work, but not before consulting numerous images of this species from different angles to give me a reasonable idea of what to expect while my scribe flies blind. My scribe sailed through this matrix! By contrast, the previous prep of an Asaphus lepidurus was a dismal failure as the matrix was a dense, calcitic mess that even 75 PSI dolomite wouldn't touch unless I wanted to eat through several canisters of the stuff. 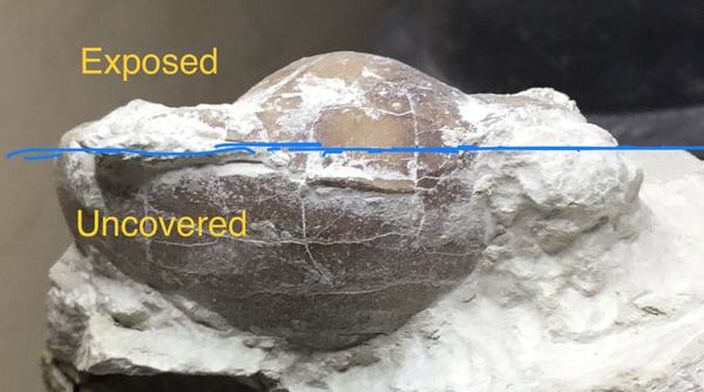 The unique aspect about this genus is that the bulbous cephalon seems to go on forever. This was where I stopped the night before, and there was still a lot more matrix to remove. When they preserve in this kind of almost semi-prone state, it is customary to just blitz off the the anterior side of the matrix, which gives this burrowing bug the appearance of "hanging over" the side. This is all scribe work: I just needed to "kiss" it with the tip and the vibration would knock off the matrix without me risking hitting the shell with the scribe tip. 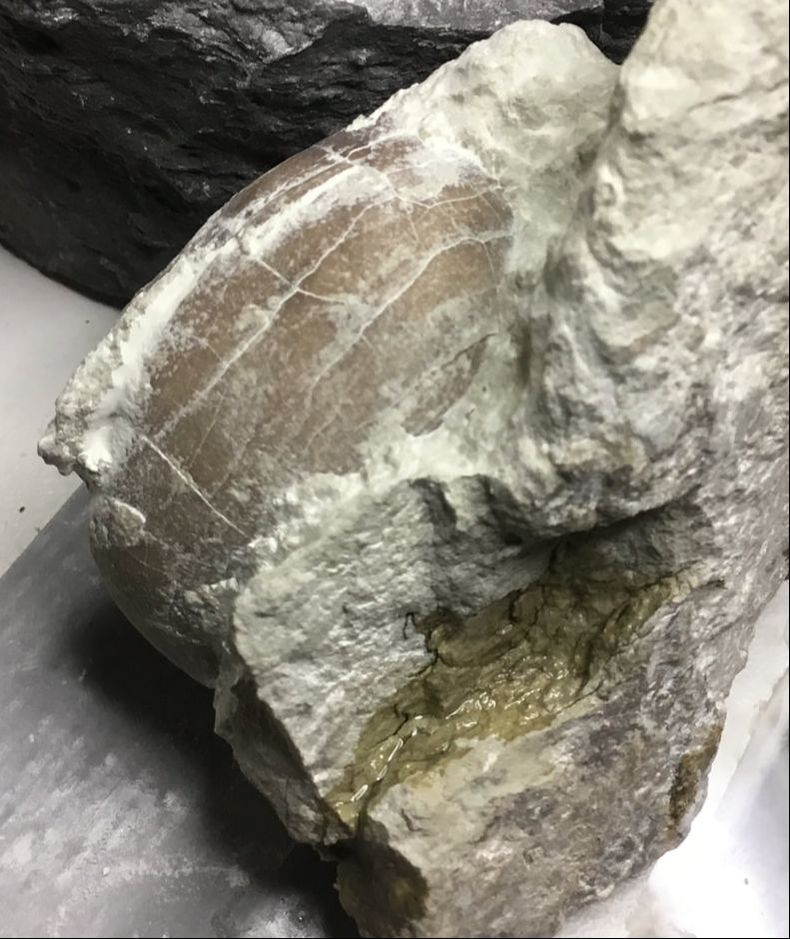 And this was where I had to call it a night... Not just because I didn't want to run the air compressor beyond 10 pm and be a loud nuisance, but on account of the other result of such a soft and yielding matrix is that fractures emerge that run deep and threaten to wreck the trilobite. Pictured here is my stabilizing some vibration-made cracks by wicking some cyanoacrylate. A good ending point for the day to let it cure and get back at it in the morning. 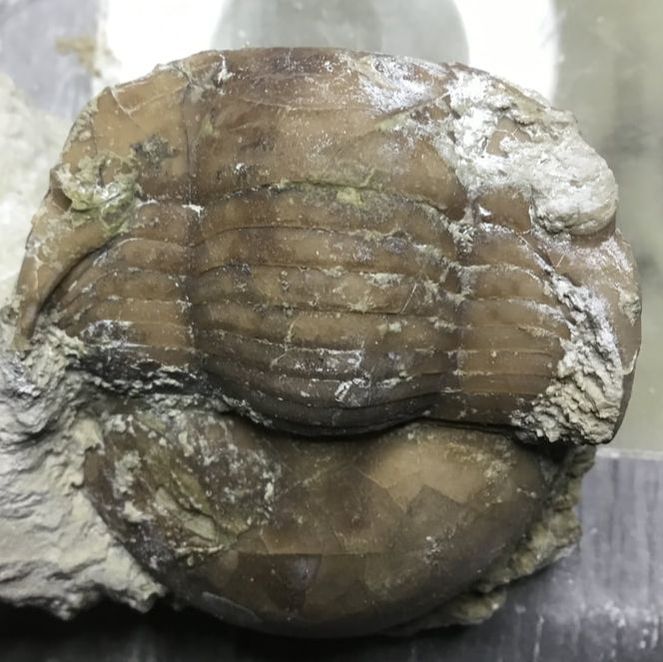 As soon as my missus went to work, I was firing up the compressor for round two. At this point, the scribing work is pretty much done as far as I'm willing to risk it; what remains are some delicate areas that need to be air abraded. I do alternate between scribing and some air dent to test certain spots, but I'm a task-switcher by nature. The tricky spots are going to be the eyes and the genal spines. 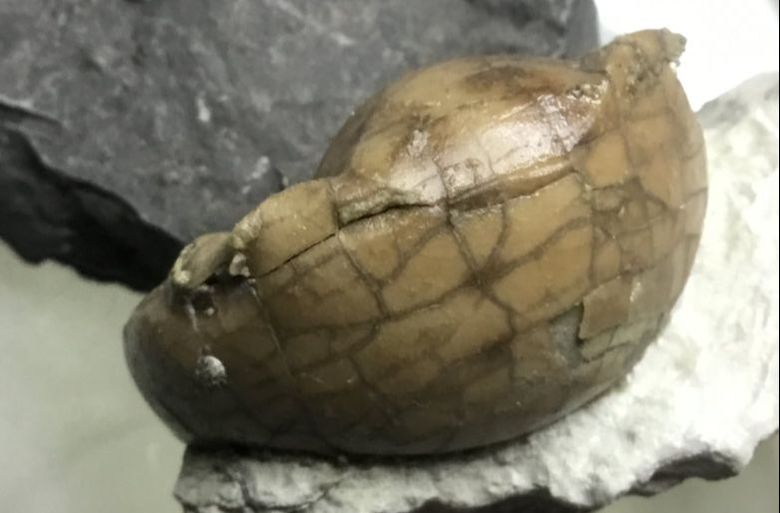 . It isn't a true prep session unless you experience a minor catastrophe (at least that is the norm for my inexperienced self!). The very thin-shelled underside of the cephalon didn't quite dig my air abrasion action, and so some shell bits went flying. I retrieved a few pieces, which is not easy to do in a dust layer in the blast chamber (or in the shop vac bag). And I don't exactly have those tiny fingers adept at threading needles. I reattached a few of the pieces I found, but some of them were lost forever. It could have been much worse, and I managed to fill in the much bigger "bald spot" with the pieces I could glue back on. This is a discarded bug anyway, and not a presentation to the Queen. 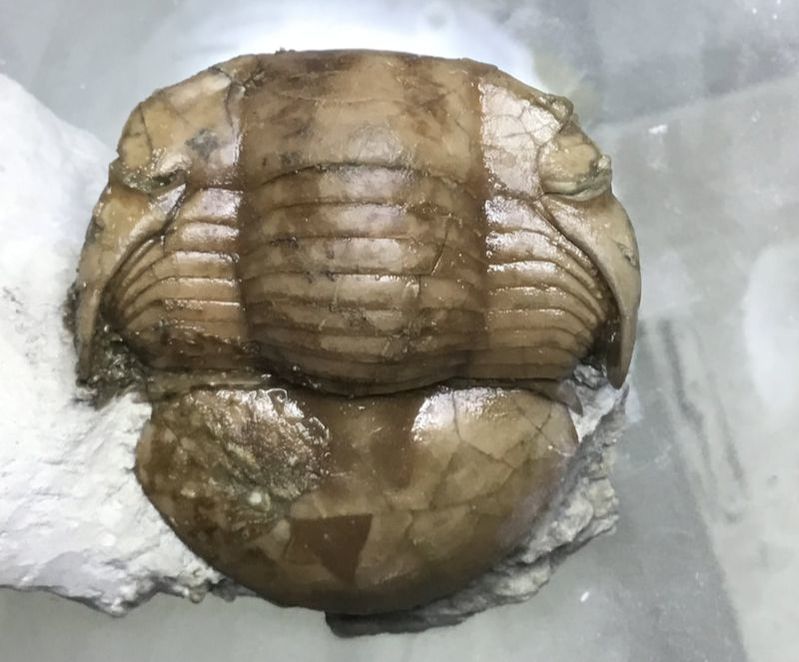 Air abrasion work reveals the eyes and frees out the gunk between the pleurae and the genals. I've moistened it with some oil to better detect other areas I might have missed. 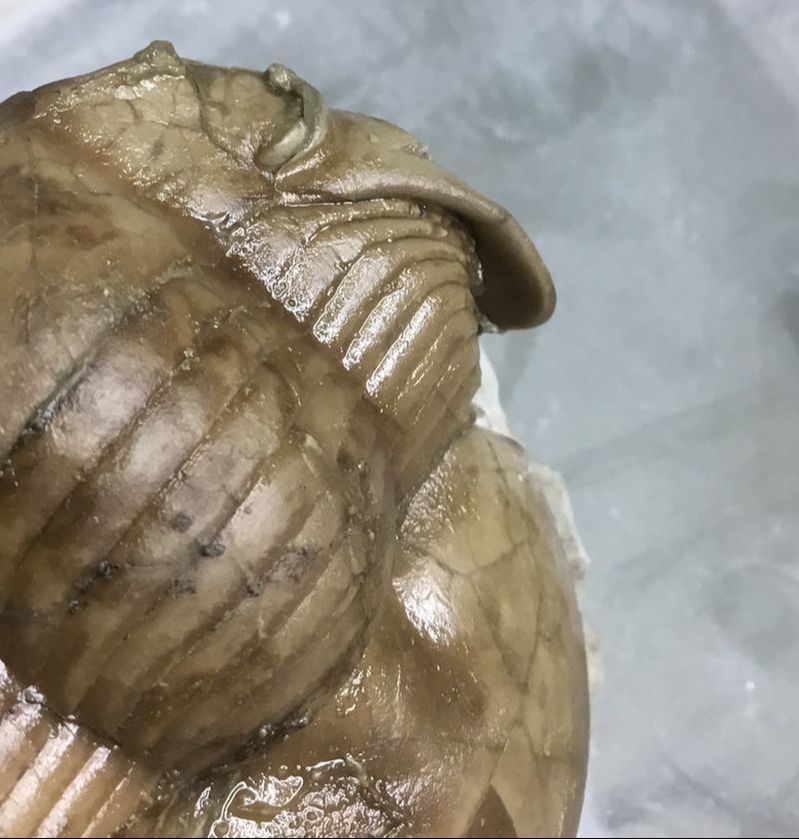 Yes, I am such a prep noob. I will, however, take immense pride in how I managed to free up that genal spine (which had a crack in it, no less) to be my first "flying genal spine." For those who do not prep, this may seem very easy, but it is fraught with a lot of nervousness and care to ensure not blasting the spine off as a sacrifice to the hungry shop vac!
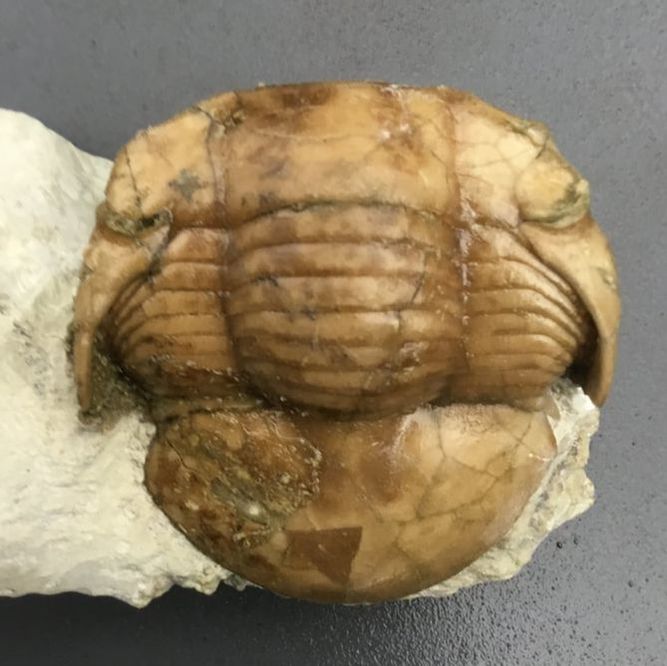
And this is where we are. I also sanded down the matrix (decided to leave a bit for aesthetic reasons). There is some cruddy glue stuff on the left pygidium that needs an acetone bath (abrasion is too risky at that section), but otherwise not bad at all for preparing what had been consigned to being a junk bug. I learned a lot, and ended up cussing a lot less while doing this one. To me this is a prep triumph.
Comments are closed.
|
Kane Faucher
Archives
February 2024
|
 RSS Feed